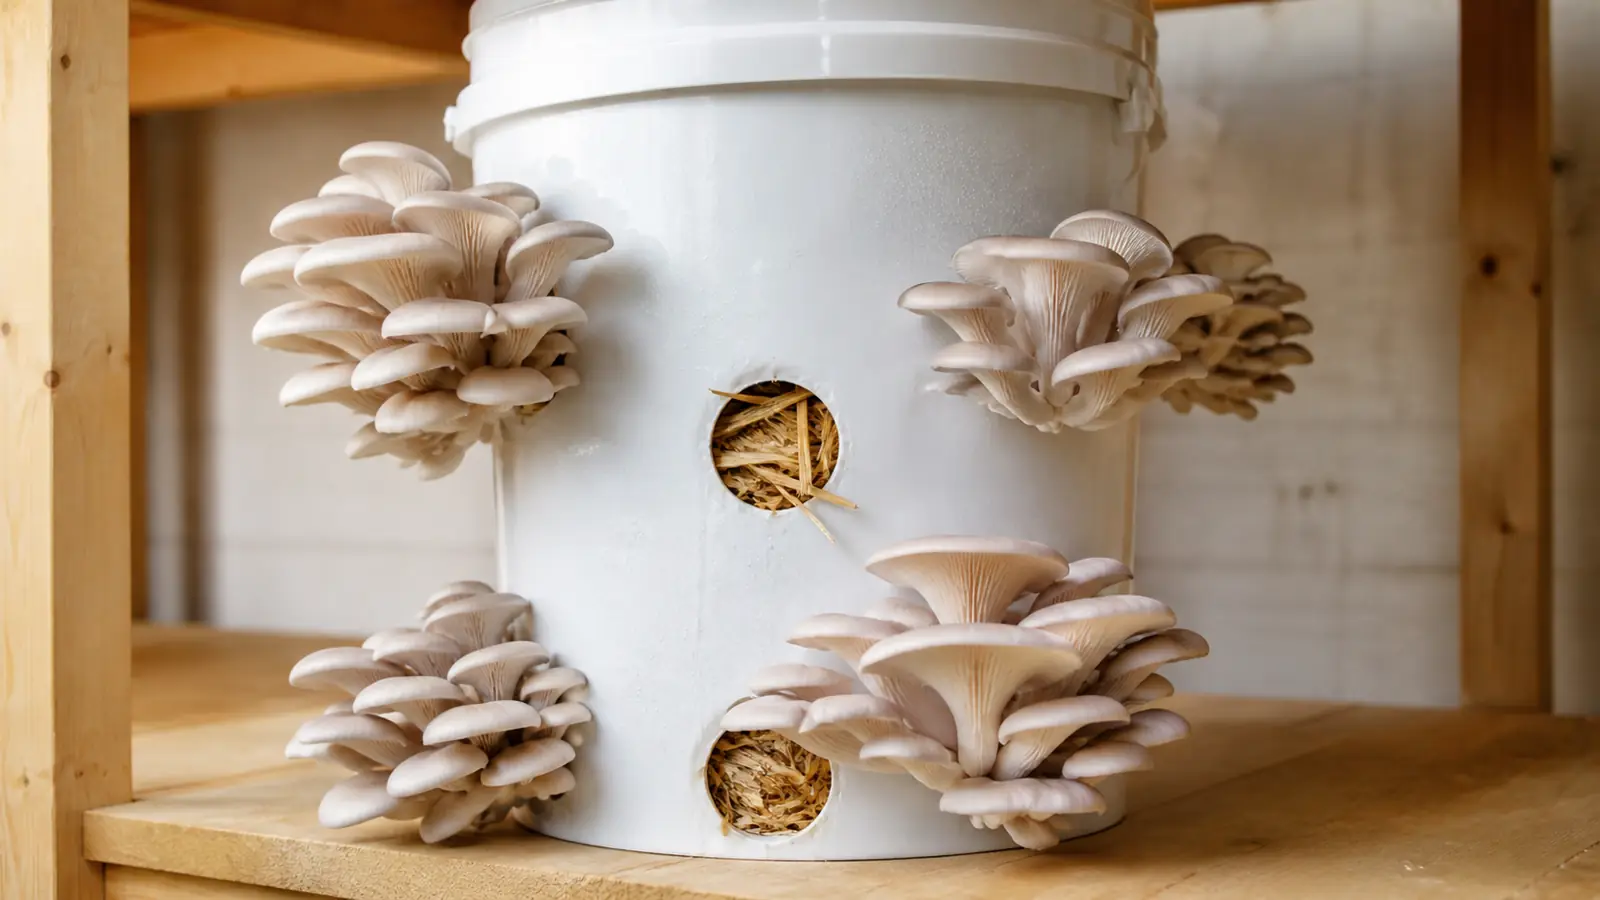
The bucket method turns a washable food-grade container into a side-fruiting chamber for oyster mushrooms. Success depends on prepared substrate, even spawn distribution, drainage, a complete white colonization run, and a fruiting space that supplies humidity without trapping stale air.
The bucket method grows oyster mushrooms by holding prepared substrate in a washable container while small side holes provide controlled fruiting sites. The bucket does not correct weak spawn, untreated substrate, excess water, or the wrong temperature, so build the biological conditions first and use the container to keep them manageable.
A five-gallon bucket is large enough to buffer moisture better than a small bag but still light enough to inspect and move. Start with one bucket, record what happens at each stage, and repeat the method only after the first crop shows that your substrate preparation and fruiting space work together.
Which mushrooms suit the bucket method?
| Choice | Good fit for a bucket | Why it matters |
|---|---|---|
| Oyster mushroom species | Yes, when the strain is sold for straw or hardwood substrate | Oyster mycelium colonizes lignocellulose and fruits readily from side openings |
| Shiitake or lion's mane | Usually better on approved blocks or logs | Their substrate and fruiting habits call for a different container or opening pattern |
| Unknown wild mushroom | No | A bucket is a cultivation tool, not an identification test |
| Clean utility room, shaded porch, or simple fruiting tent | Possible when temperature, humidity, drainage, and fresh air can be controlled | The room determines whether pins dry, stems stretch, or contaminants spread |
Oyster mushrooms are the practical starting point because the genus includes vigorous culinary strains that grow on straw and selected hardwood materials. Buy spawn from a cultivation supplier and follow the exact species and strain range on its label, since a warm-weather oyster and a cool-weather oyster can react differently in the same room.
A bucket makes most sense when you can separate the clean inoculation step from the humid fruiting area.
It becomes a poor choice when water cannot drain safely, flies already breed nearby, or the only available space is a sealed closet with no controlled air exchange.
Use a food-grade bucket that has not held paint, solvents, pesticides, detergents, or unknown industrial material. Scratches and damaged rims retain debris and weaken cleaning, so retire a container that cannot be washed smooth or closed securely.
Scaling from one bucket to several changes the room load.
More colonizing mass releases more heat, and more fruiting clusters release more carbon dioxide and water vapor, so confirm shelf spacing, drainage, and air replacement before multiplying the build.
Run the empty bucket through its final shelf and tray before filling it. Confirm the complete setup before adding substrate.
- Remove and lock the lid without straining the rim.
- Keep every side hole visible from the inspection path.
- Leave enough clearance for clusters to expand.
- Make the full drainage path cleanable without lifting wet substrate over another crop.
How many holes should you drill, and where?
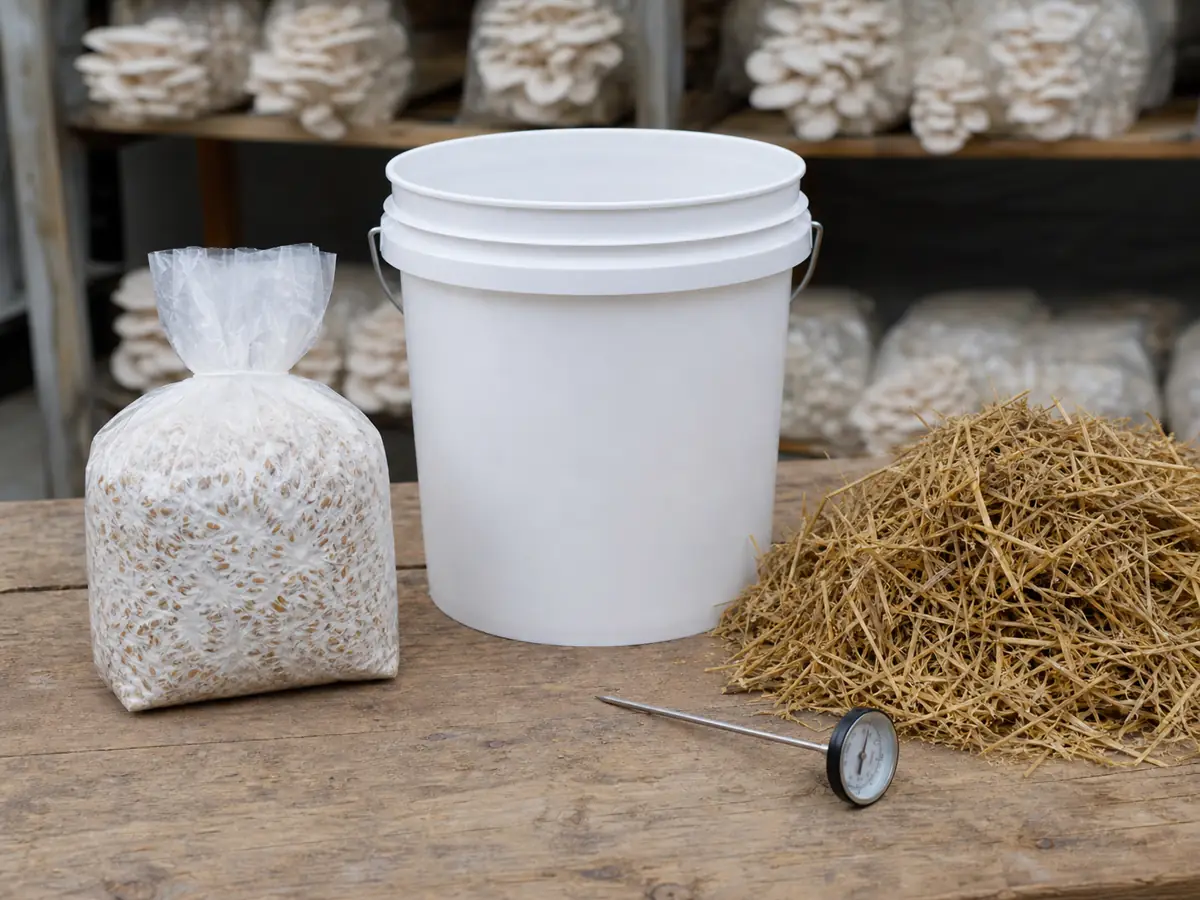
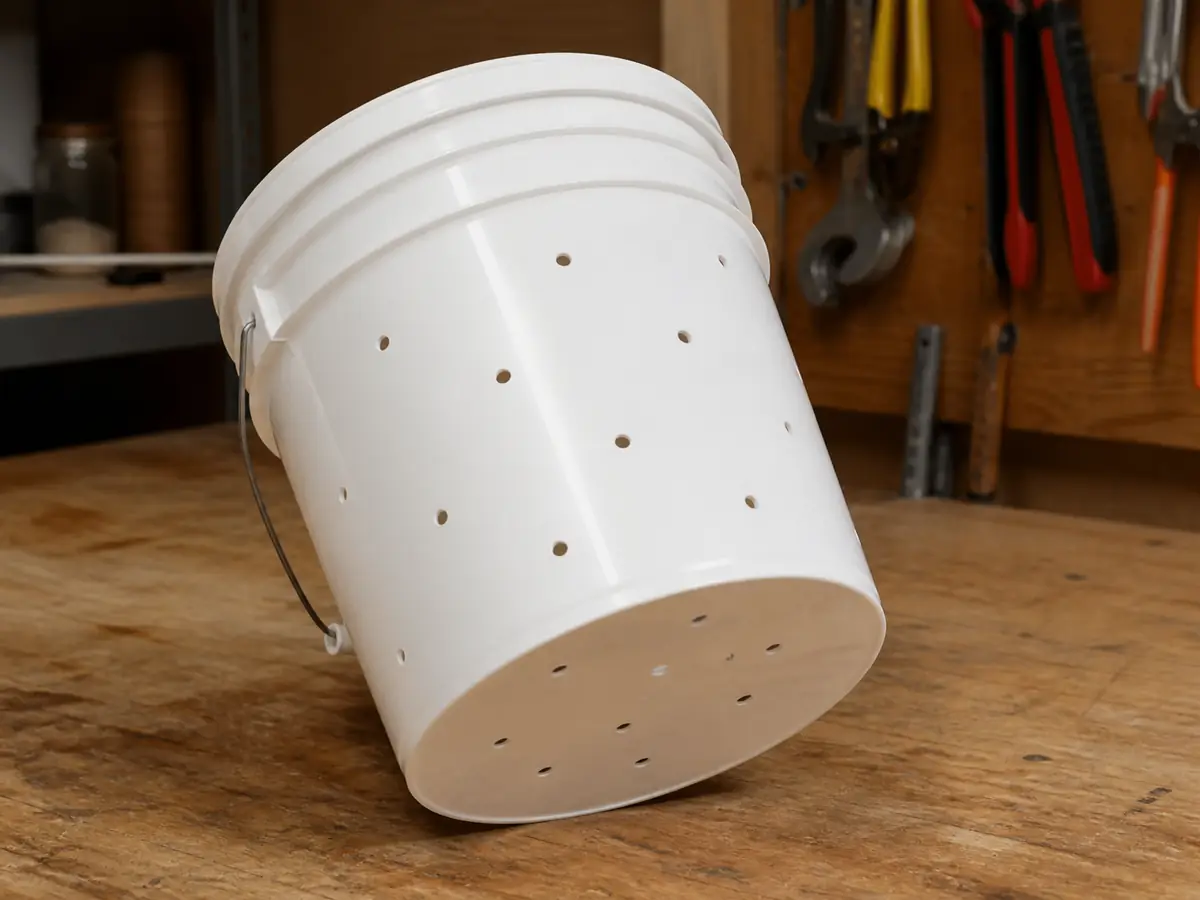
University of Wisconsin Madison Extension describes roughly 30 to 40 quarter-inch holes spaced about three inches apart around a five-gallon bucket, with about 10 smaller eighth-inch drainage holes in the base. This layout creates many modest fruiting points while preserving enough plastic to support the wet substrate.
Mark the side holes in staggered rows rather than stacking them in vertical lines.
Leave solid bands near the rim and bottom so the lid still locks, the base stays strong, and the lowest fruiting clusters do not sit against runoff.
Measure the actual bucket diameter and height if you change container size. Copying the same hole count into a narrow pail crowds openings, while spreading it across a larger drum leaves long internal distances and changes the heat and moisture load.
Note
Side holes admit air and later hold fruiting clusters. Bottom holes release accidental free water, so they must drain into a washable tray rather than onto carpet, wood, or food-storage surfaces.
Drill before cleaning because plastic shavings cling to the inside.
Remove every burr that could trap debris, wash the bucket and lid with soap and water, rinse them, and let them drain without touching the cleaned interior with dirty tools.
What substrate goes in a bucket?
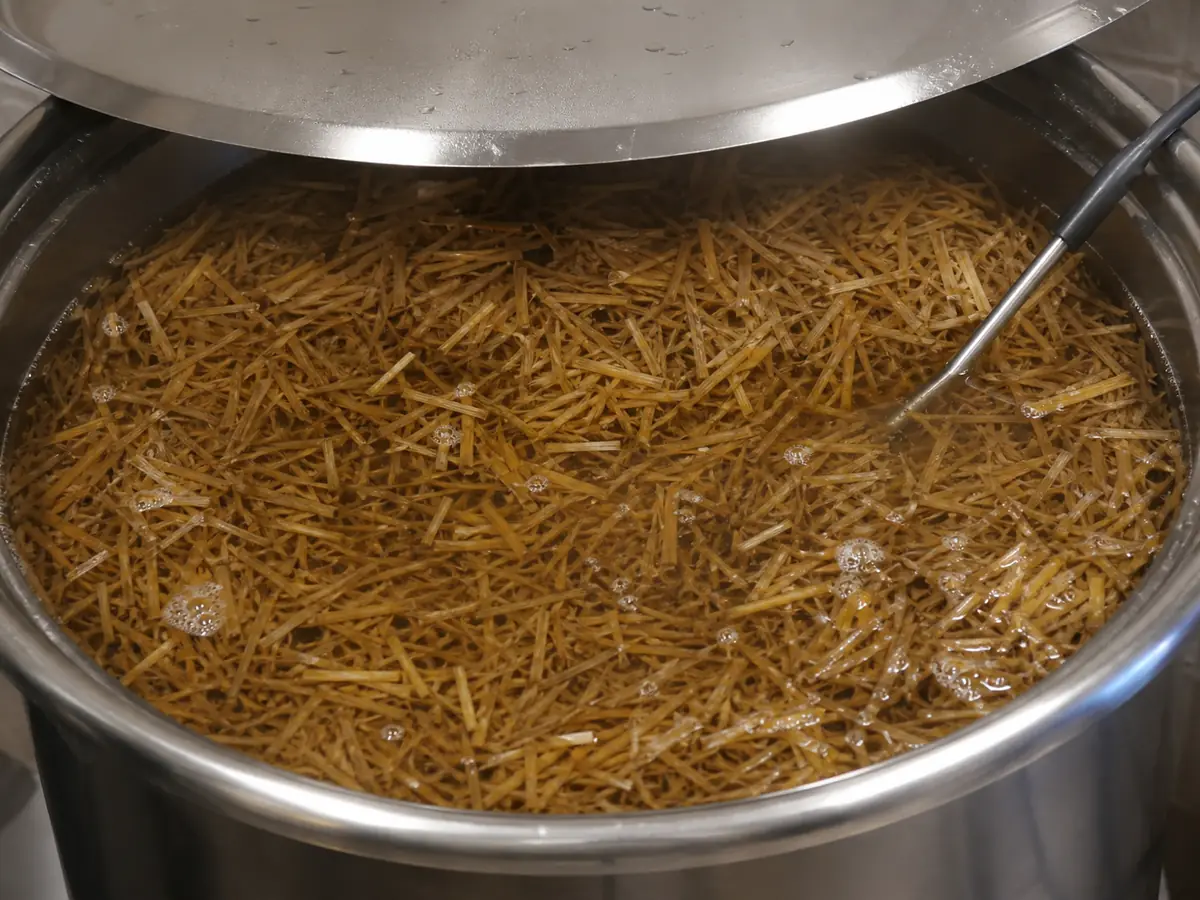
Clean wheat straw is a proven substrate because its hollow stems create air spaces and its cellulose supports oyster growth. Cut long straw into pieces about four to five inches long so it hydrates evenly and packs without leaving large dry tunnels.
UF IFAS Extension describes soaking the cut straw, then holding it at 165 F for one to two hours. Pasteurization reduces competitors without turning a home project into spawn production, but the treated straw can be contaminated again by dirty hands, an unwashed bucket, or a long delay before inoculation.
- Heat
- Keep the water near the documented pasteurization temperature instead of boiling the straw into a dense mat.
- Time
- Start the one-to-two-hour hold after the substrate reaches the working temperature.
- Cooling
- Inoculate only after the center has cooled to the spawn supplier's safe range.
- Clean transfer
- Drain and cool in a cleaned container or on a sanitized surface protected from soil and splash.
Hardwood chips can work in the Wisconsin bucket method, but species compatibility and chip condition matter.
Do not assume aromatic softwood, painted wood, construction waste, moldy mulch, or an unknown mixed load is interchangeable with clean hardwood material.
How long should the straw drain?
Hot substrate needs time to release free water and cool through the center. A pile may feel cool at the edge while holding heat inside, and a wet mass can continue dripping after the surface looks dry.
Lift a representative handful with clean hands and squeeze firmly over the drain vessel.
The fibers should feel evenly wet and may release a few drops, but a stream means the substrate still holds water that will collect at the bucket base and replace useful air space.
Evenly damp fibers that spring apart after the squeeze.
A center temperature inside the spawn supplier's inoculation range.
Water running from a compressed handful.
Hot pockets, sour odor, greasy texture, or substrate that has touched an unclean floor.
Do not correct overly wet straw by adding dry, untreated material at the last minute. Drain it longer and spread it in a clean shallow layer if needed, because untreated additions reintroduce the organisms the heat step was meant to reduce.
Growing MushroomsHow Do Mushroom Sawdust Blocks Work from Mix to Fruit?How much spawn does a bucket need?
UF IFAS gives a home-cultivation spawn range of about 5 to 10 percent by weight or volume. Use the supplier's rate when it is more specific, and measure the substrate and spawn with one consistent basis instead of comparing wet substrate weight with a vague scoop of grain.
Break purchased spawn into small intact grains or sawdust pieces without crushing it into paste.
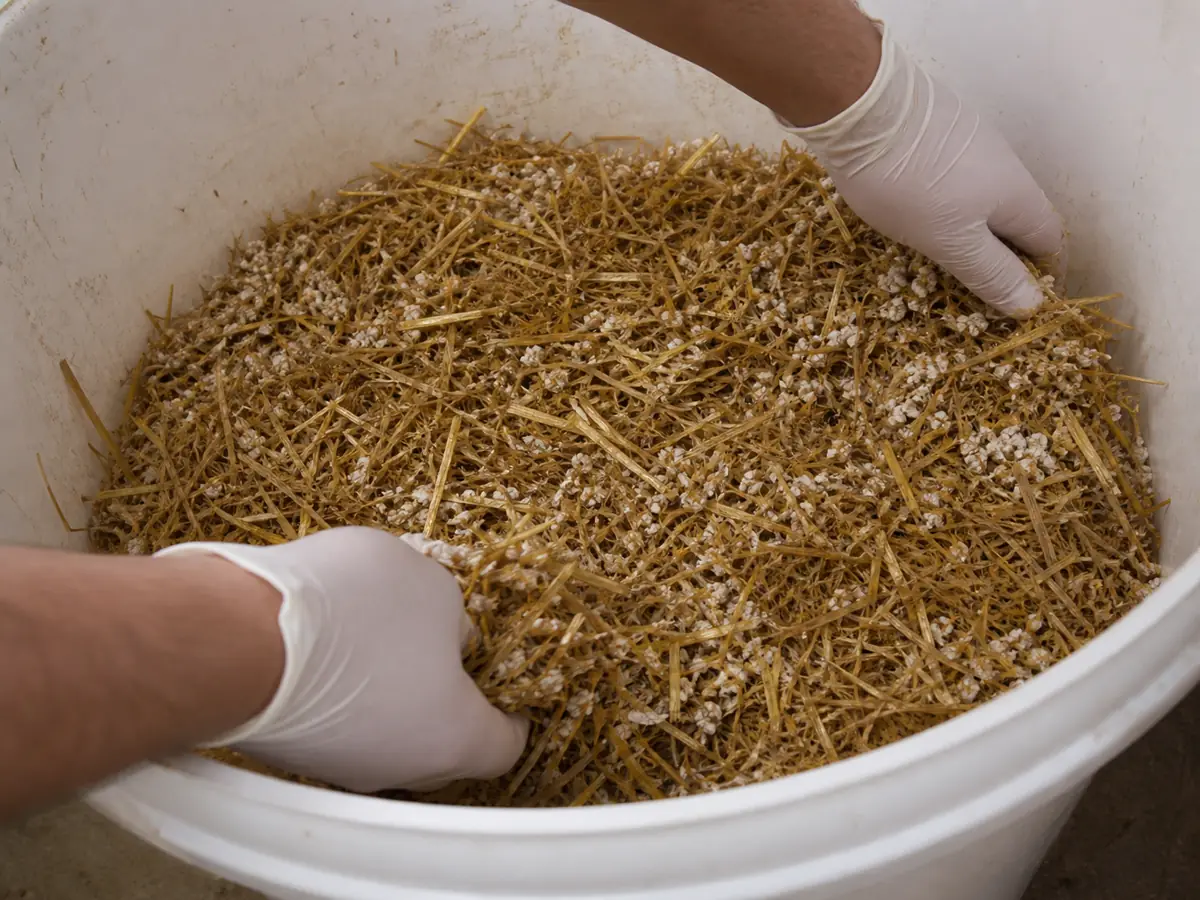
Mix it through the cooled substrate or build thin alternating layers, paying special attention to the bucket wall where the fruiting holes will later expose colonized material.
- Place a loose substrate layer in the cleaned bucket.
- Distribute spawn across the full surface, including the perimeter.
- Repeat thin layers until the bucket is filled without forceful compression.
- Wipe the rim clean and lock the lid before moving the bucket.
The substrate should settle into contact without becoming a solid plug. Large cavities dry unevenly, but hard packing slows gas movement and can turn wet pockets into low-oxygen zones.
How do you tell the bucket is colonized?
Place the closed bucket where room temperature matches the strain guidance and direct sun cannot heat one wall. Cornell notes that active mycelium produces heat, so leave space around the bucket and measure the substrate through a clean central probe point when the room is already near the upper limit.
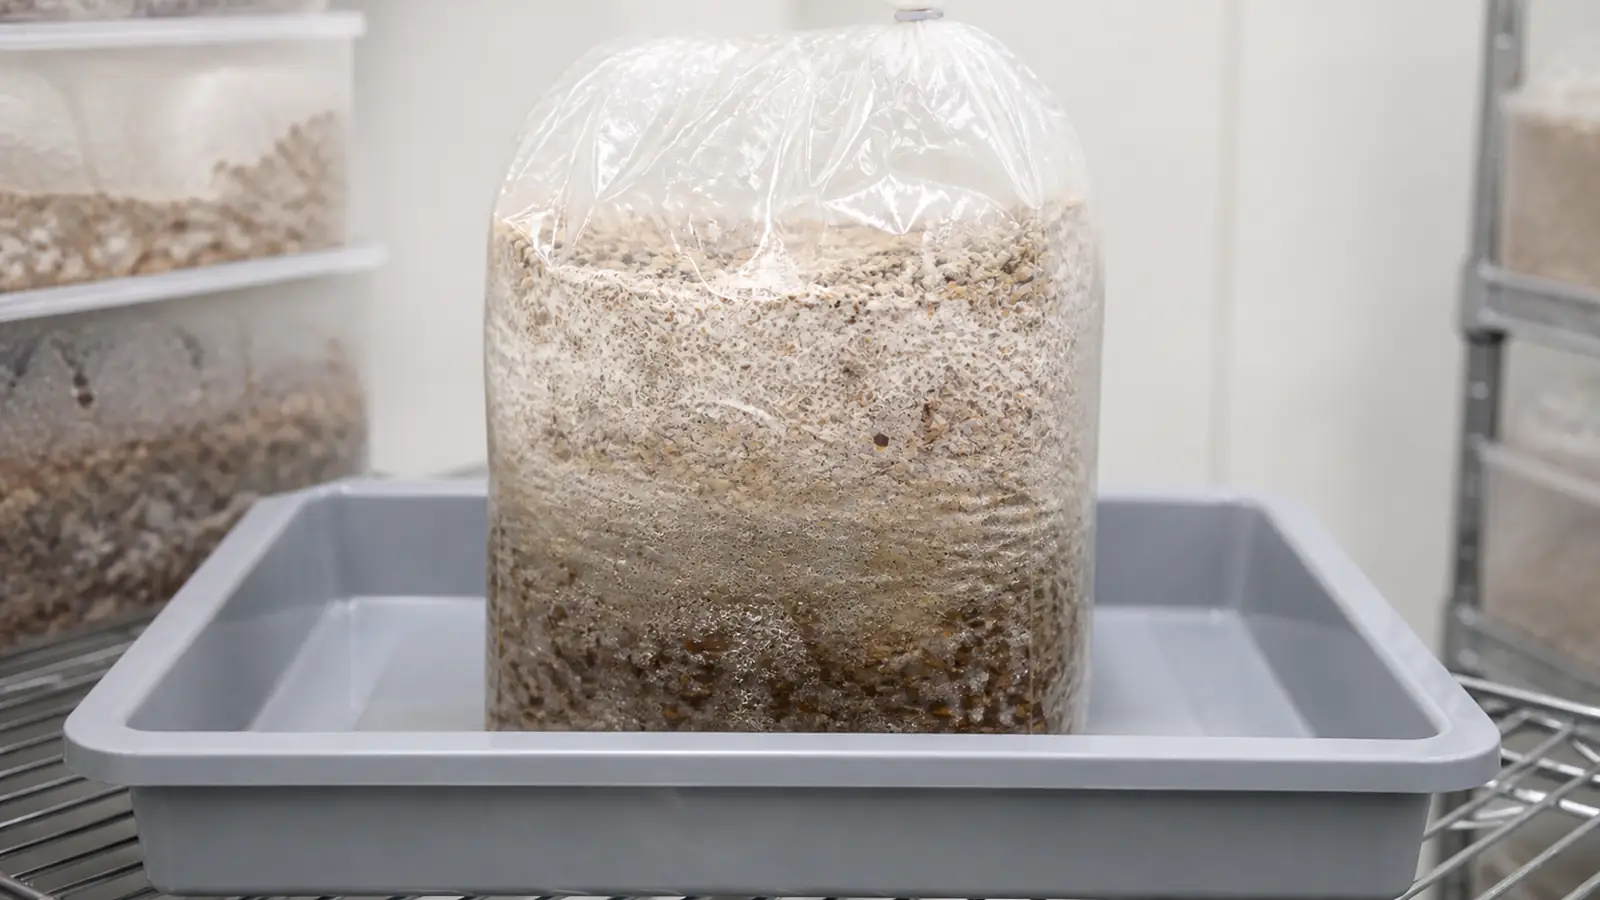
White growth should expand from many spawn points and gradually connect through the straw. One white patch at a single hole proves only that one local area is active, while even progress around the bucket indicates that moisture, temperature and spawn distribution are working across the whole mass.
Do not keep opening the lid to look inside.
Each opening moves room air, dust and insects across a nutrient-rich surface, while the side holes already provide repeated observation points.
For straw, UF IFAS describes complete whitening in roughly two to three weeks under suitable conditions. Treat that as a comparison point rather than a deadline because strain vigor, spawn rate, substrate density and actual core temperature can change the pace.
When do you move the bucket to fruiting?
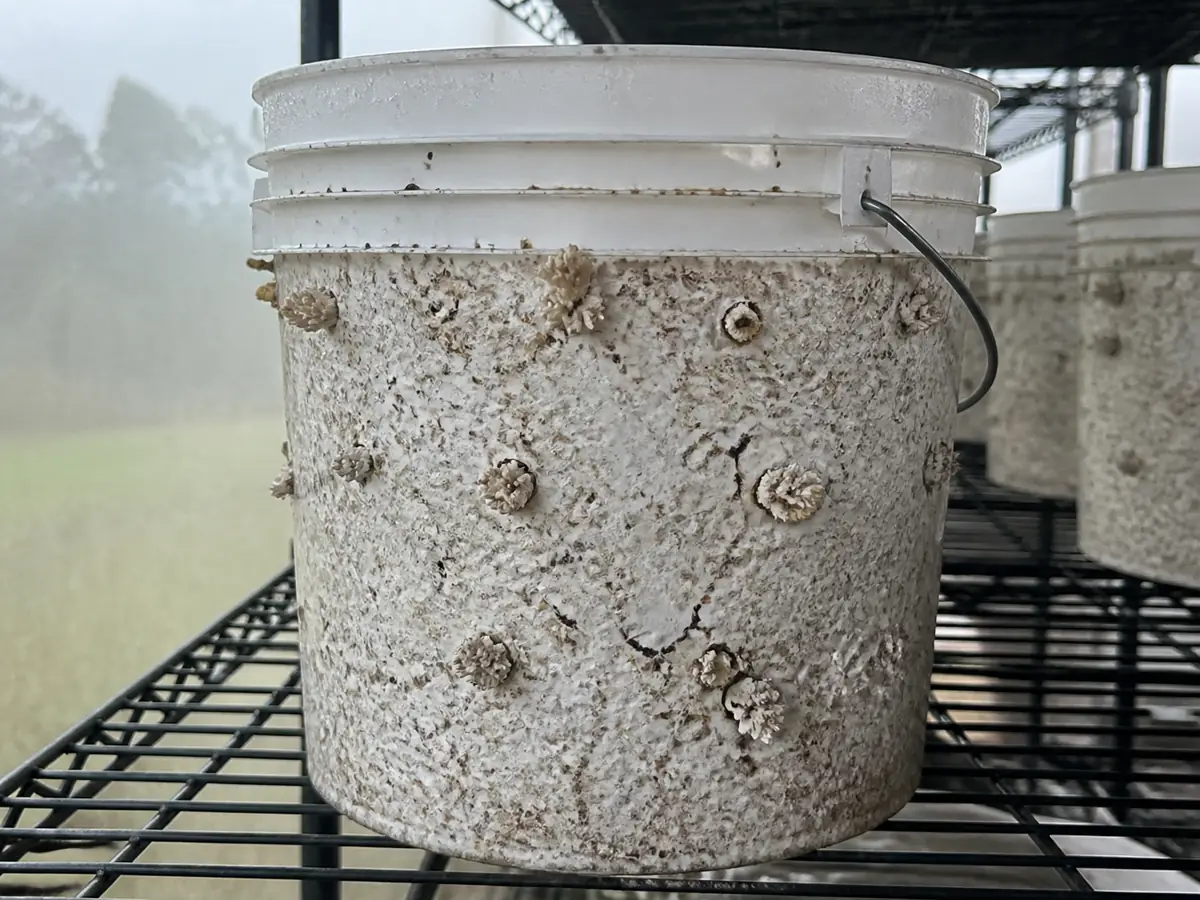
A white bucket is ready for fruiting when growth connects throughout the substrate, no uncolonized wet pocket remains, and the temperature surge has settled. Fruiting then requires the strain's suitable temperature plus humidity, light and fresh-air exchange.
Remove any loose incubation cover when pins form, but do not aim a fan directly at the openings. Fresh air must replace carbon dioxide around the bucket while the air at the holes stays humid enough that tiny primordia do not crust or shrink.
These figures describe the cited protocols, not every oyster strain.
Read the supplier's range first, then use cap and stem form, surface moisture and recovery after misting to tune the room without soaking the bucket.
Why are the stems long and the caps small?
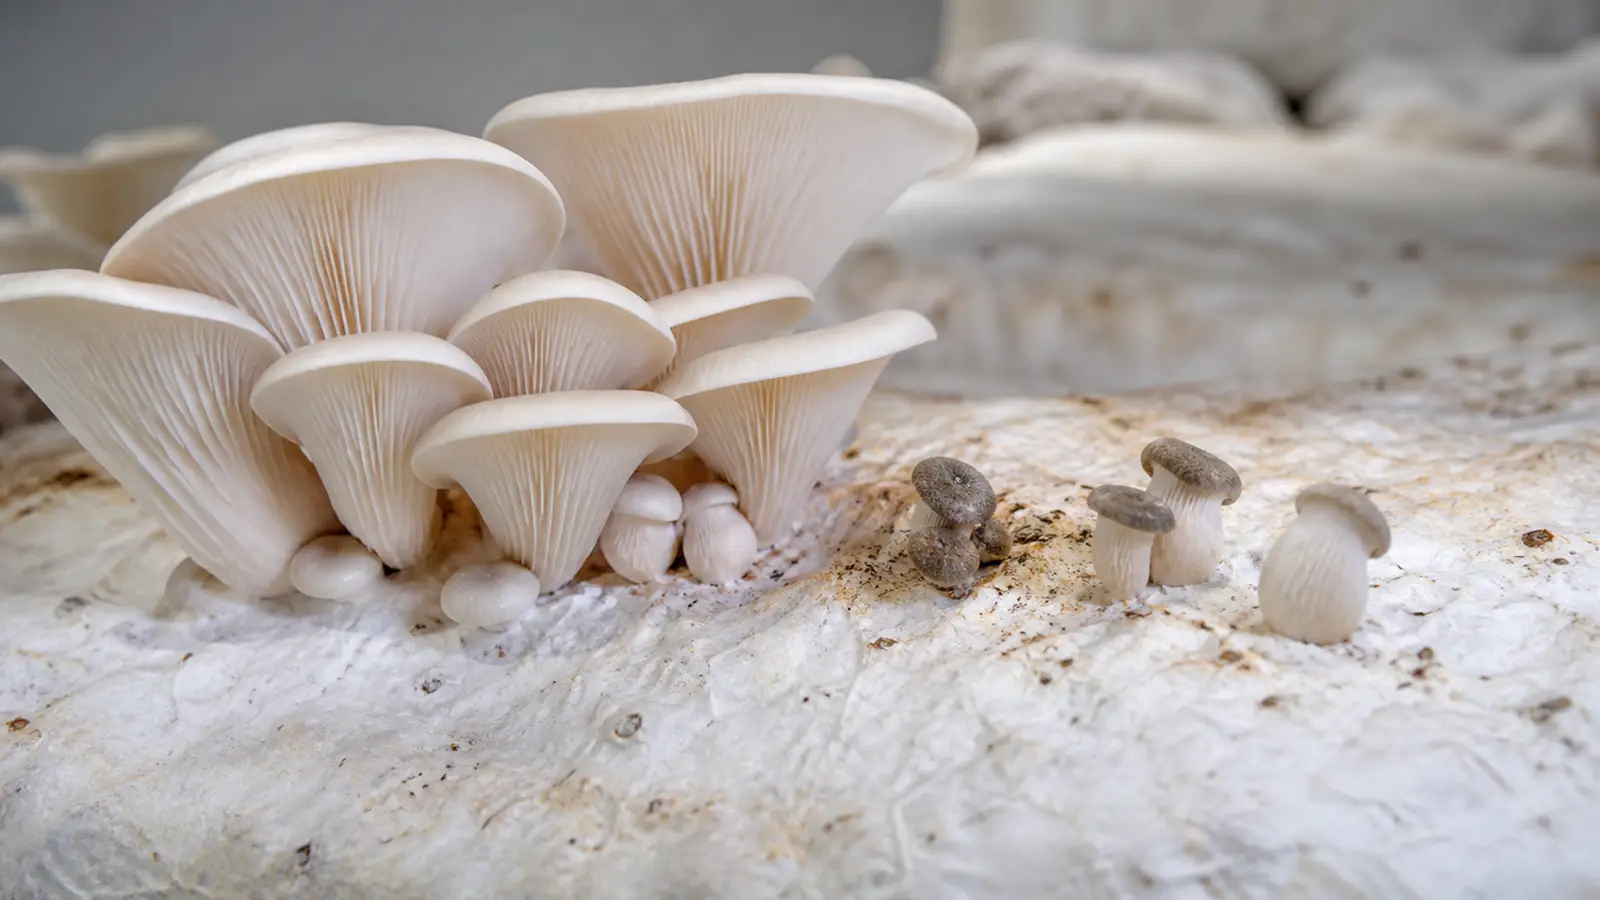
Long stems with small caps point toward insufficient fresh-air exchange more strongly than toward low humidity. Dry, cracked or stalled pin edges point toward excessive evaporation, while dripping surfaces and water at the base show that adding more mist would worsen the imbalance.
Change one control, record the time, and watch the next several hours or the next developing cluster. Simultaneously increasing fan speed, misting frequency and room temperature destroys the evidence needed to learn which condition was wrong.
| Observation | Likely direction | First measured response |
|---|---|---|
| Long stems and undersized caps | Carbon dioxide remains high near the bucket | Increase room air replacement without blowing directly on clusters |
| Pins become dull, wrinkled, or crisp | Evaporation exceeds moisture supply | Raise ambient humidity and shield the bucket from direct drafts |
| Water runs from holes or pools below | Substrate or misting is excessive | Stop adding water, confirm drainage, and inspect for odor or slime |
| Only one side fruits | Light, air movement, temperature, or colonization differs by side | Rotate only after documenting the room difference and checking colonization |
| Colored growth or sour odor spreads | Competing mold or bacteria may be active | Isolate the closed bucket and prepare to discard it safely |
These patterns separate a room adjustment from a failed substrate.
Change the room only when the bucket remains clean and the fruit bodies provide consistent evidence.
Warning
Do not smell a questionable bucket by placing your face over an opening, and do not open a heavily moldy bucket in the fruiting room. Move it away from food and healthy cultures while closed, then discard the contents according to local waste rules.
The comparison below applies only to a bucket that remains clean enough to observe. Colored growth, slime, or an abnormal odor overrides fruit-body shape and calls for isolation.
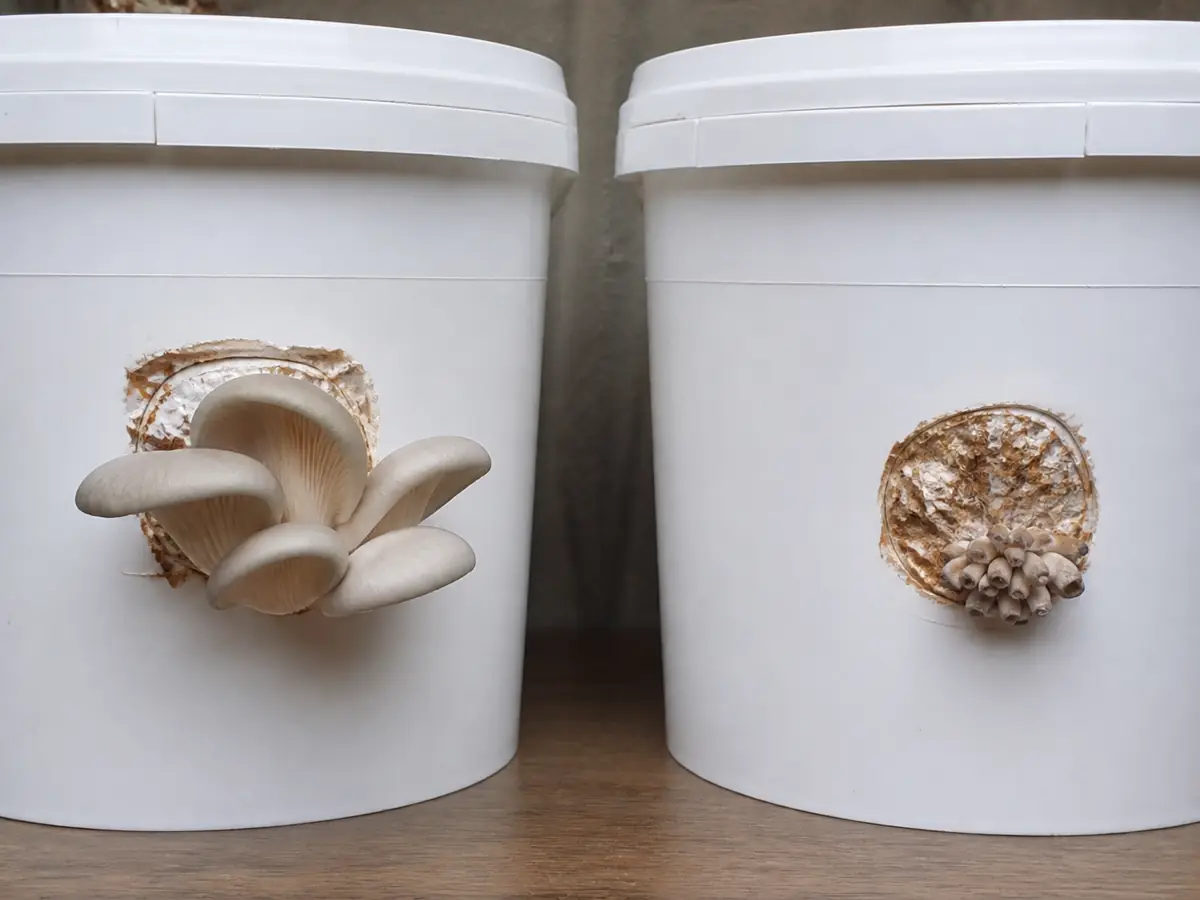
Will the bucket give a second flush?
Harvest an oyster cluster while caps remain firm and before the edges flatten completely and release a heavy spore load. Support the cluster and twist it away as one unit, or cut cleanly at the opening without gouging deep into the colonized substrate.
- Remove loose stem tissue from the hole because decaying scraps attract flies and bacteria.
- Keep harvest containers away from the floor and refrigerate clean mushrooms promptly in a breathable container.
After harvest, the substrate needs a recovery interval, suitable moisture and the same clean fruiting conditions.
Do not pour water through the lid as a routine reset because the bucket may already contain adequate water and the resulting pool can damage the remaining crop.
Weighing the filled bucket at inoculation and again after a flush provides a rough water-and-mass record when the scale can handle it safely. Weight does not replace inspection, but it helps distinguish a light depleted bucket from a heavy bucket whose poor performance should not be answered with more water.
A later flush is worth waiting for while the bucket smells clean, remains substantially colonized and shows no spreading colored growth or insects. Retire it when biological contamination, structural cracking or depleted collapsed substrate makes another crop less valuable than a clean restart.