Grow king oyster mushrooms from the top of a fully colonized hardwood block. A reliable crop depends on sterile substrate preparation, complete colonization, cool humid fruiting conditions, deliberate pin selection, and fresh air adjusted from visible fruit shape.
King oyster mushrooms reward precision more than elaborate equipment. The easiest first crop starts with a colonized ready-to-fruit block, while the full-cycle method adds substrate mixing, pressure sterilization, and sterile inoculation before fruiting can begin.
Both routes converge on the same practical goal. You need a dense white hardwood block, a cool and humid top-fruiting environment, enough fresh air to shape the caps, and a harvest decision based on the fruit bodies rather than the calendar.
Should you buy a block or build one?
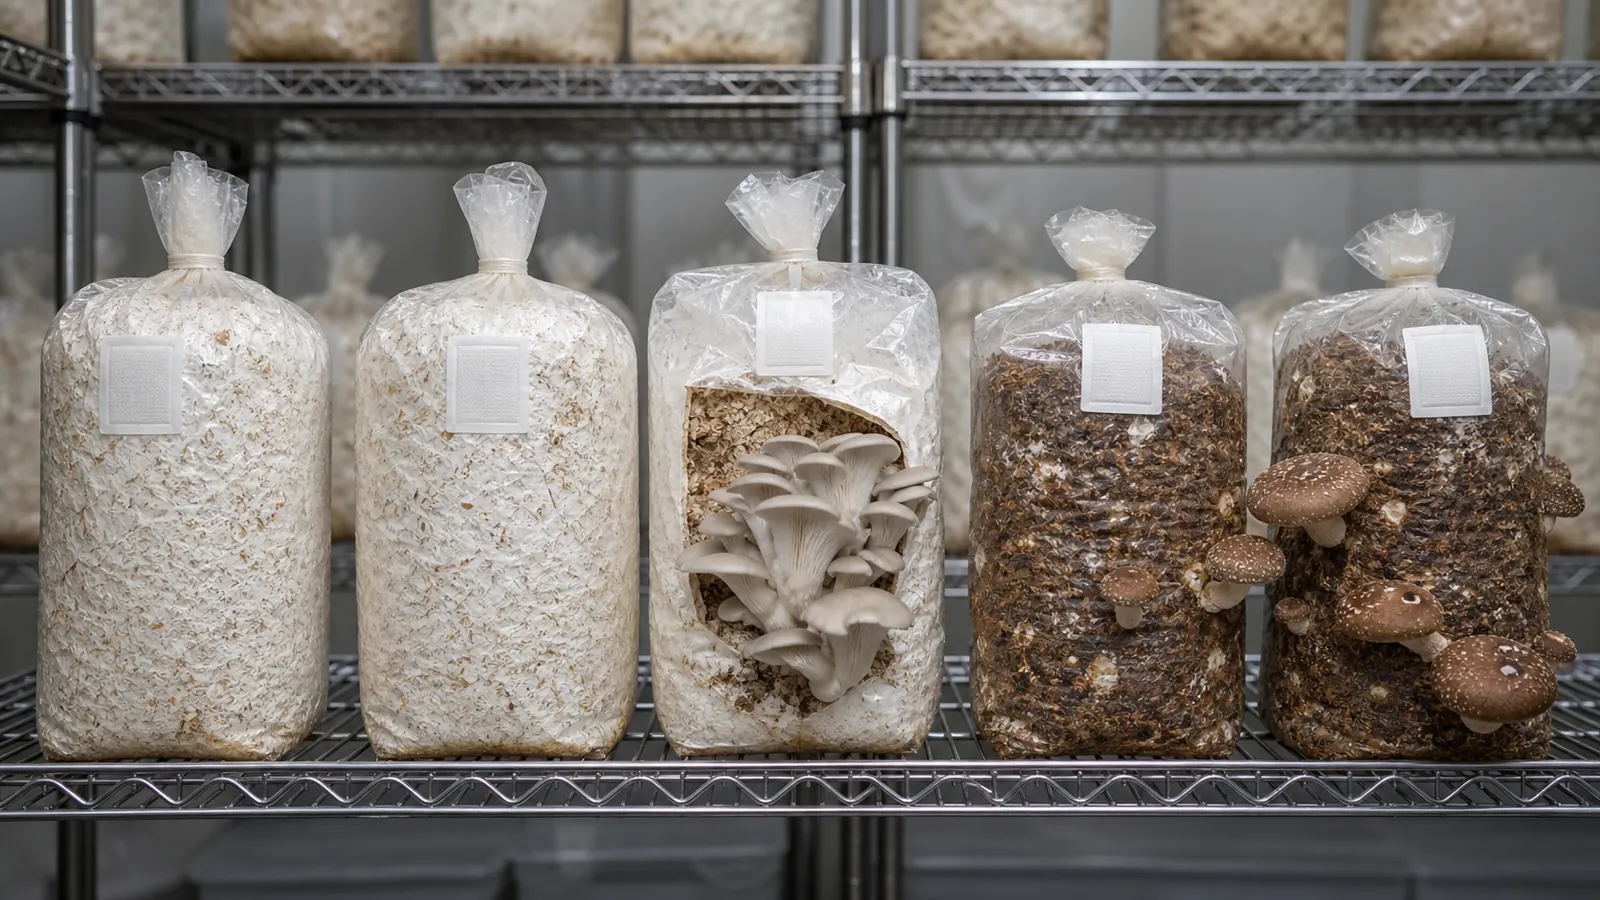
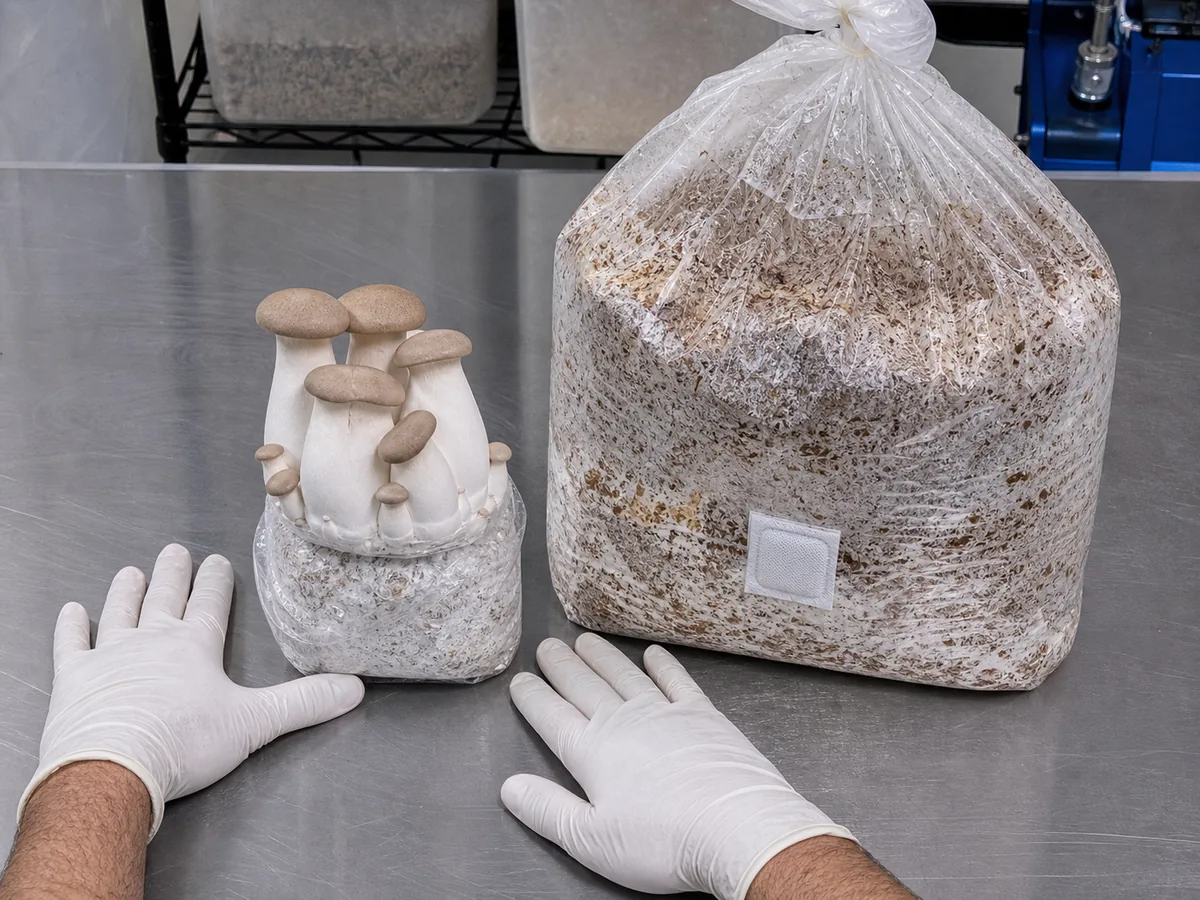
A ready block moves the first difficult decision upstream to a commercial grower. It arrives fully colonized, so you inspect the bag, follow the strain-specific opening instructions, and concentrate on the fruiting environment.
The full-cycle route gives you control over substrate, bag size, spawn rate, and repeatability.
It also creates a much larger contamination window because nutrient-rich hardwood supports molds and bacteria as readily as it supports king oyster mycelium.
| Route | What you receive | Equipment you still need | Main failure risk |
|---|---|---|---|
| Ready-to-fruit block | Sealed, mature substrate block | Fruiting space, humidity control, light, and clean harvest knife | Dry surface, stale air, or fruiting too warm |
| Full-cycle bag | Spawn plus separate raw materials | Scale, mixer, filter bags, pressure canner, clean inoculation space, sealer, and fruiting space | Incomplete sterilization or contamination during inoculation |
The ready-block route is the better first experiment because it tells you whether your room can support fruiting before you invest in sterile production. If you want a more forgiving side-fruiting crop first, the general oyster growing method uses a different container and substrate path.
A successful crop also gives you a living reference for how healthy mycelium, pins, and mature fruits should look.
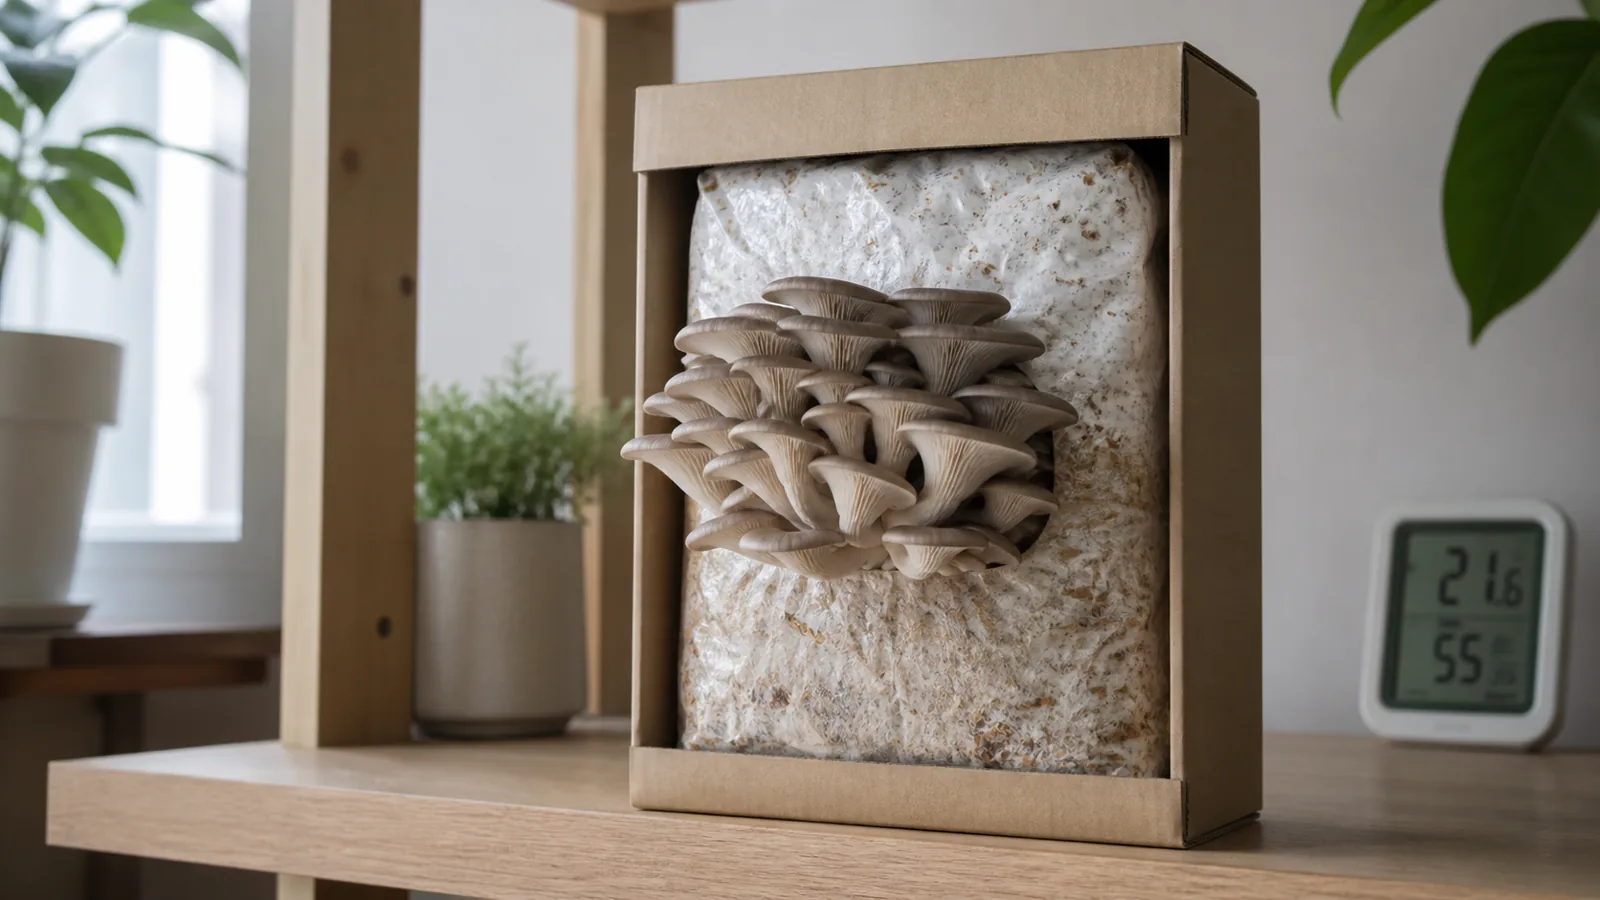
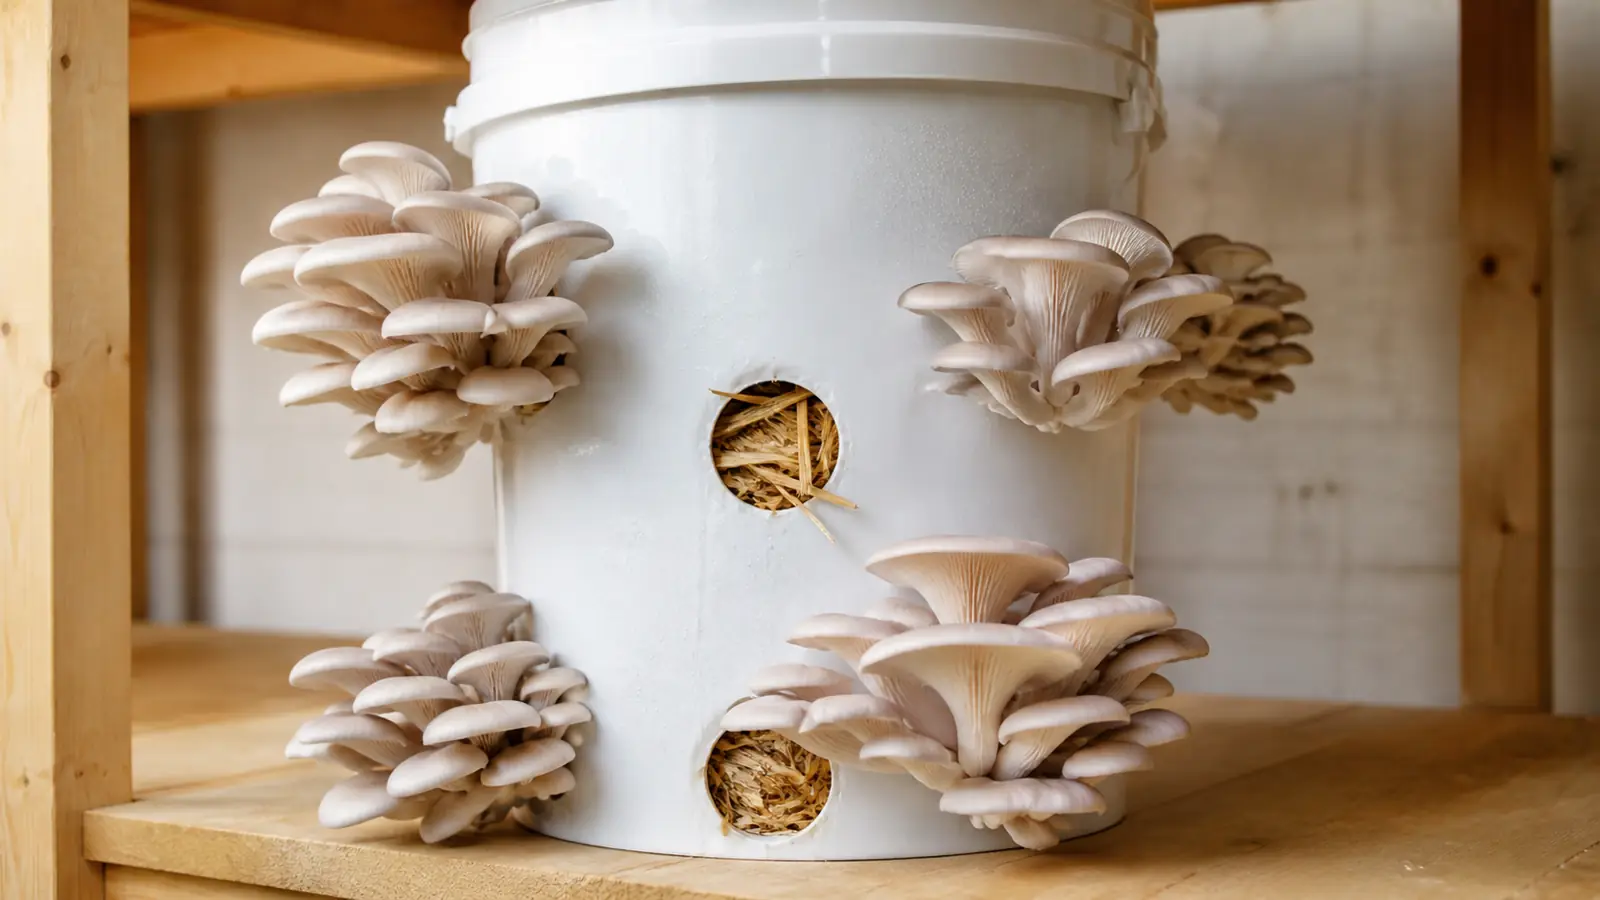
Do not cut random holes around a king oyster block just because pearl oysters often fruit from bucket openings. Most home king oyster strains are managed from an exposed top surface so their upright stems have space to thicken.
Why do king oysters fruit differently?
- Species
- Pleurotus eryngii, commonly called king oyster or king trumpet
- Typical cultivated form
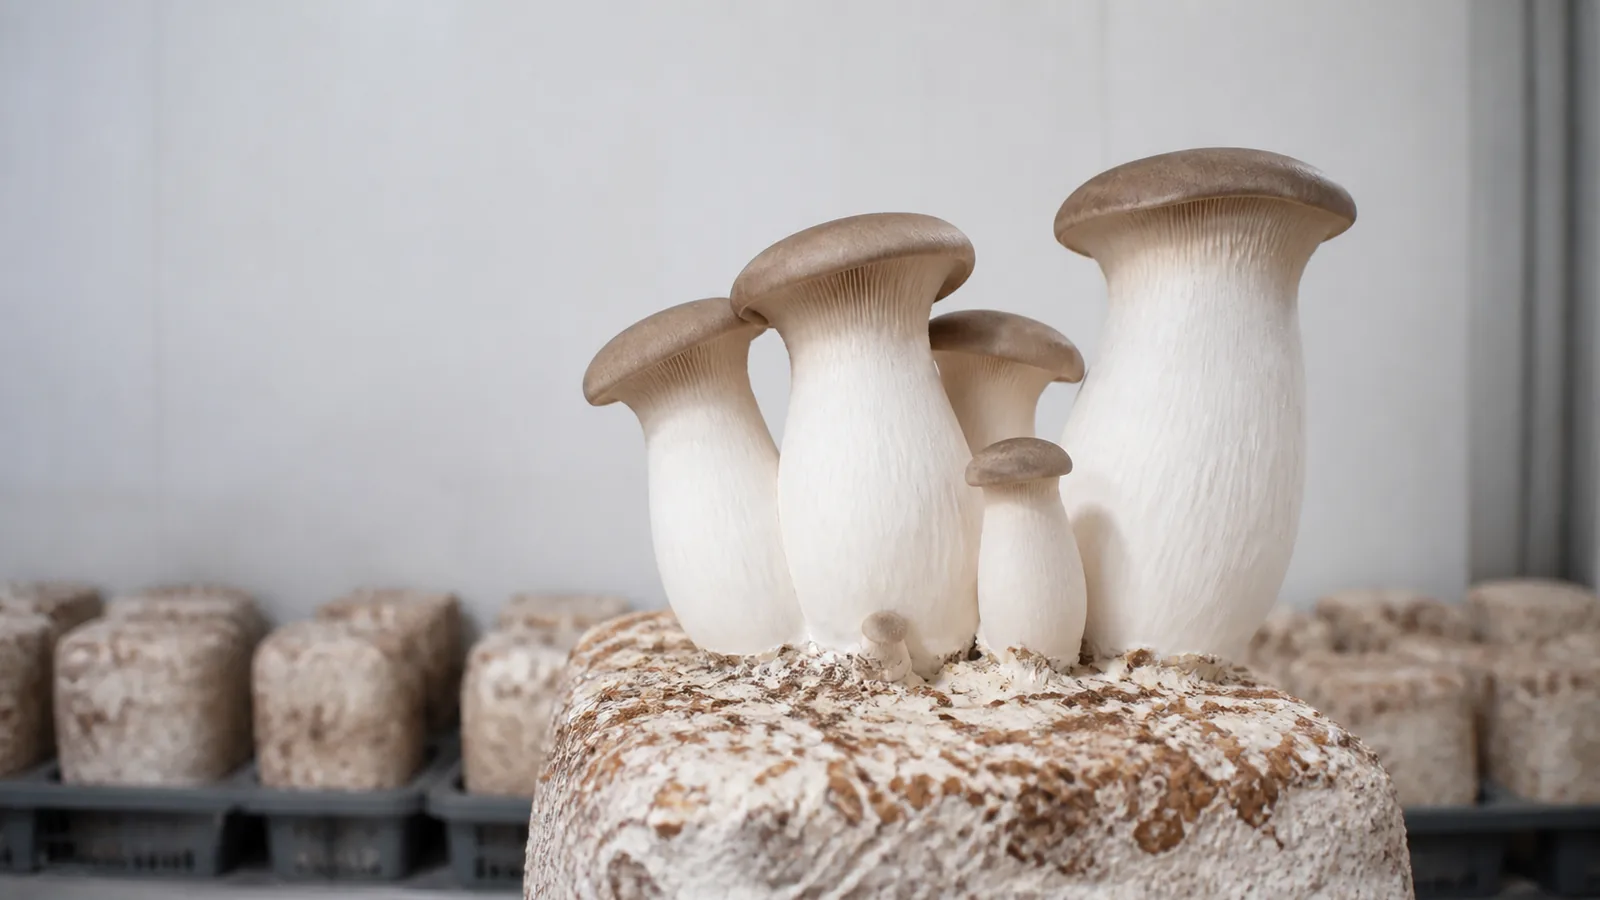
- One or several upright fruit bodies with a thick pale stem and a tan to brown cap
- Usual orientation
- Top-fruited from a compact bottle or filter-bag block
- Main shape controls
- Strain, pin number, temperature, humidity, light, and carbon dioxide removal
King oysters belong to the oyster mushroom group, but the crop you are trying to produce is not a shelf-like cluster.
The valued cultivated form has a substantial stem, a cap that expands without becoming thin and floppy, and enough space between fruit bodies for air to move.
That difference changes the container and the harvest cues. A side-fruiting straw bucket favors clusters emerging through small holes, while a compact hardwood block lets selected king oyster pins grow upward from one controlled surface.
Fresh air still matters even though a long stem is desirable. Excess carbon dioxide can suppress cap development and produce weak or distorted growth, so stem length alone does not prove that the chamber is correctly adjusted.
Strains do not respond identically to one recipe or one set point. Treat the supplier's range as the first setting, then record how that strain behaves in your bag size and room instead of forcing a commercial number onto a small home chamber.
Growing MushroomsWhat Does a Mushroom Farm Actually Cost to Start?What substrate do king oysters need?
The base needs lignocellulosic material that king oyster mycelium can digest.
Hardwood fuel pellets, hardwood sawdust, corncob material, and cottonseed hulls all appear in cultivation research, but availability and particle structure make hydrated hardwood pellets a practical home starting point.
Bran or another nitrogen-rich supplement can increase productive potential. The same nutrition also increases contamination pressure, which is why a supplemented sawdust bag belongs in a pressure sterilizer rather than in a simple hot-water pasteurization workflow.
- Use clean hardwood pellets or sawdust without paint, glue, treated timber, aromatic cedar, or unknown workshop waste.
- Add a measured supplement only when you can sterilize the entire hydrated bag and keep it sealed through cooling.
- Use gypsum only as a modest structural and mineral addition, not as a substitute for correct hydration or sterile work.
- Weigh water and dry ingredients so a successful batch can be repeated instead of reconstructed from memory.
Hydration should distribute water through every particle without leaving a reservoir at the bottom. A squeezed handful should bind briefly and may release a few drops, but a stream of water means the mix is too wet for a densely packed filter bag.
The exact water ratio changes with pellet brand, supplement, and storage conditions. Add the last portion slowly, mix to the bottom of the container, and judge the whole batch because a dry center and wet corner can exist in the same bag.
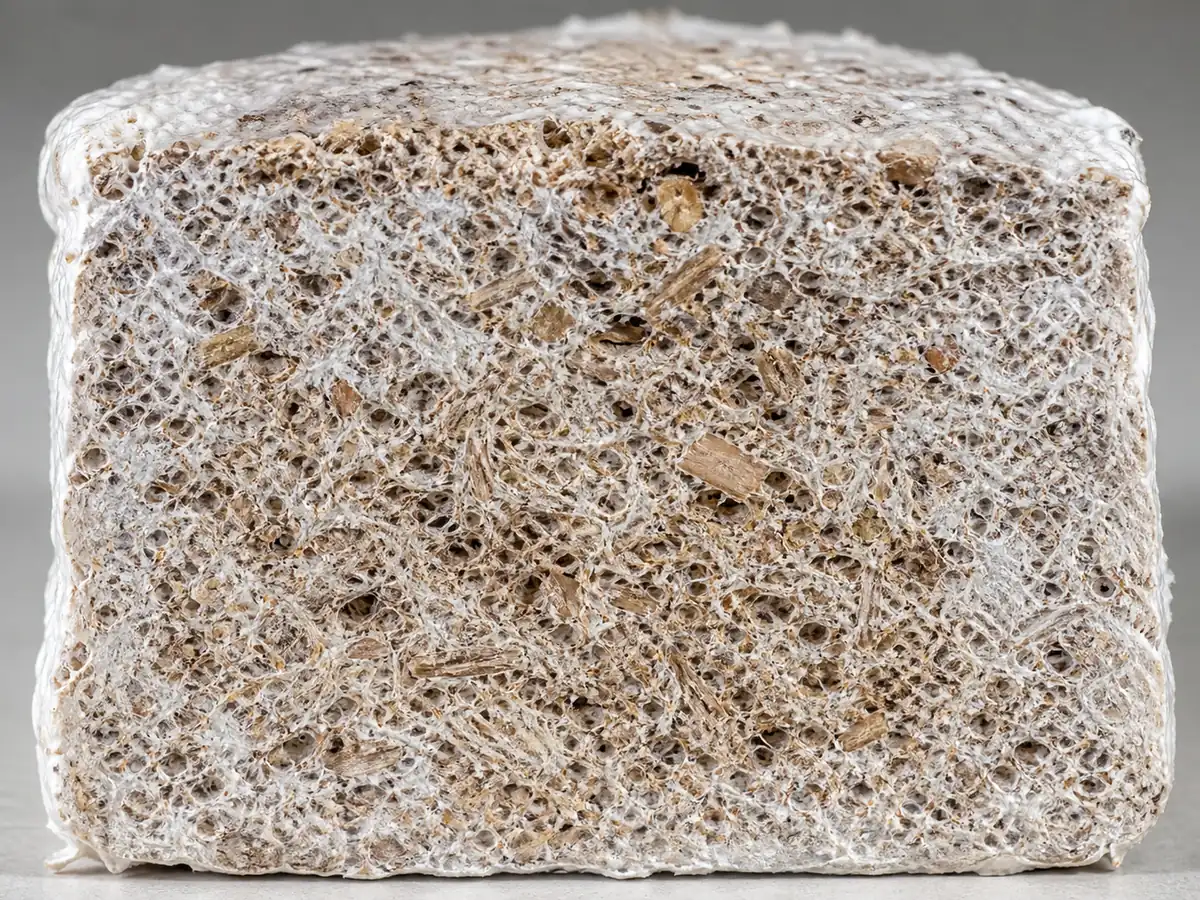
Pack the bag firmly enough to remove large voids but not so hard that the hydrated particles become a solid airless mass.
Fold the filter patch away from wet substrate, clean the sealing zone, and keep the final bag within the safe load and volume limits of your pressure canner.
How do you sterilize a supplemented block?
Supplemented blocks need heat to reach the center and remain there long enough to reduce competing organisms. Home growers commonly use saturated steam under pressure at about 121 degrees Celsius, but cycle length depends on bag mass, density, canner design, elevation, and load arrangement.
Follow the pressure canner manufacturer rather than copying a time from a smaller jar. A large cold spot can survive in the middle of an overloaded bag even when the gauge reached the expected pressure.
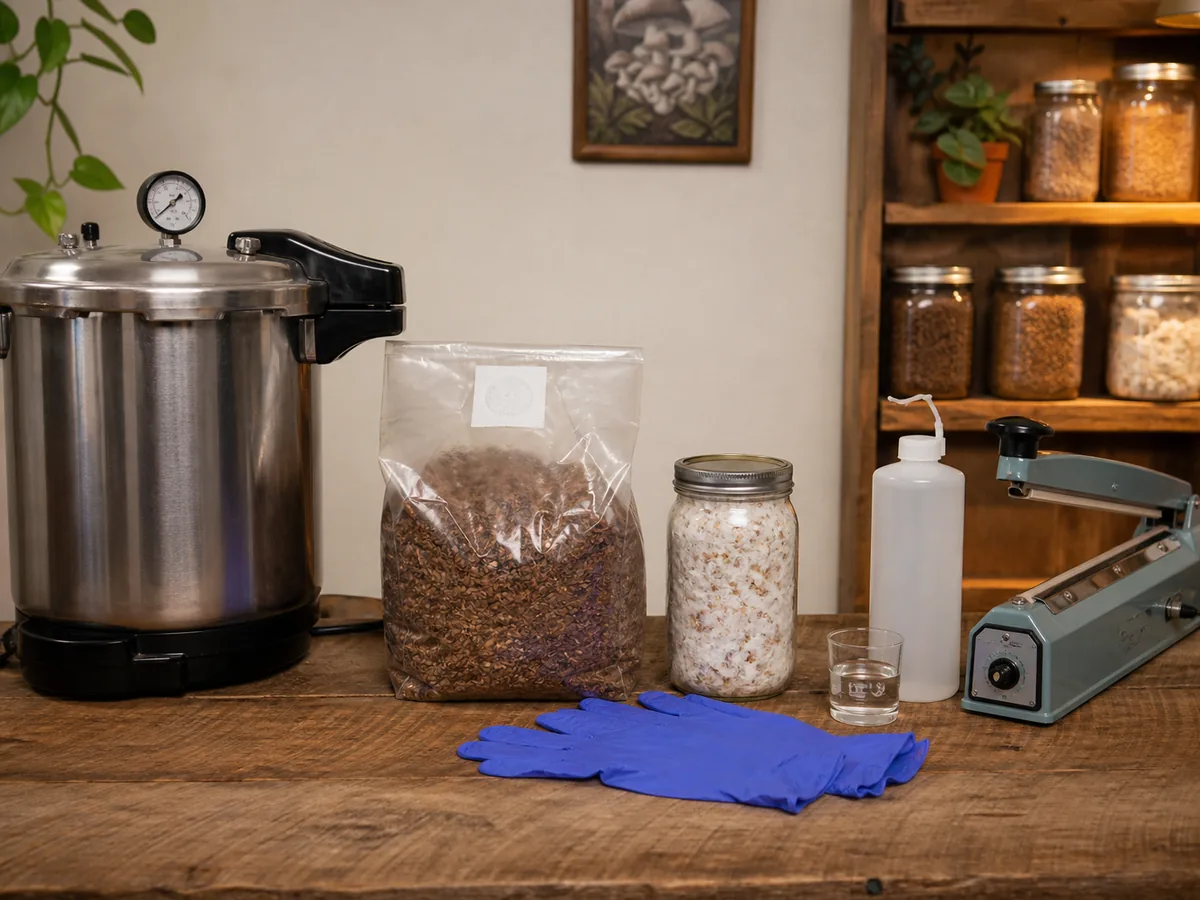
Let the sealed bags cool fully to room temperature before inoculation. Warm substrate can damage spawn, create condensation, and pull unfiltered room air into a bag as its internal air contracts.
Prepare the clean zone
Stop fans, remove clutter, wash your hands, wear clean gloves, and disinfect the work surface and the outside of the spawn container
Inspect before opening
Reject a torn filter, failed seal, burst bag, sour odor, or substrate that leaked into the filter patch
Add verified grain spawn
Open the cooled bag only as far as needed, add clean vigorous spawn, and avoid touching the bag interior or filter
Distribute the inoculum
Seal the bag, then mix gently so grain is spread through the block instead of remaining in one vulnerable pocket
Label the batch
Record species, strain, substrate formula, wet bag weight, spawn lot, inoculation date, and any unusual observation
Work smoothly rather than rushing.
A clean sequence reduces exposure, but no amount of alcohol can rescue a dirty spawn jar, an unsterilized core, or a filter damaged during pressure processing.
Tip
Keep one unopened sterilized control bag from a new process. If the control contaminates, the fault occurred before inoculation; if only inoculated bags fail, investigate spawn quality and the transfer step.
When is a king oyster block ready?
Incubate the sealed bag where temperature is stable, direct sun cannot heat it, and the filter patch can breathe. The growing mycelium releases heat, so the center of a large block can run warmer than the surrounding room.
These numbers describe particular strains, formulas, bag sizes, and rooms. Use them to plan weeks rather than to force a block into fruiting on a particular morning.
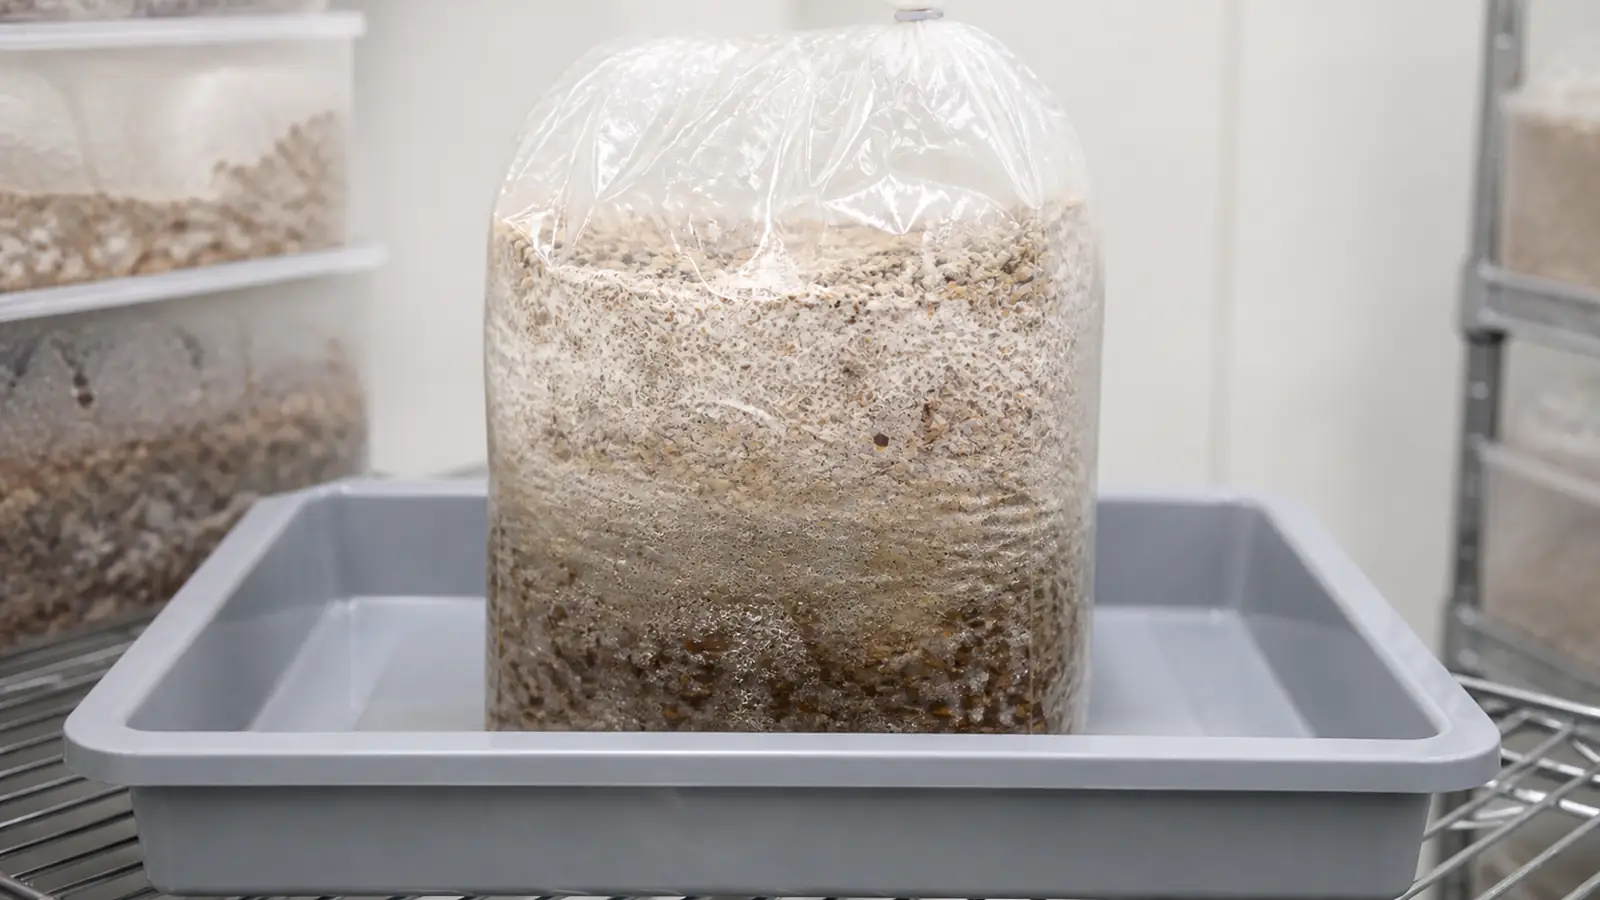
Healthy colonization spreads as coherent white growth from many grain points. The block becomes increasingly bound and uniform, while an unfinished brown pocket should continue shrinking rather than remaining wet, sharply bordered, or unchanged.
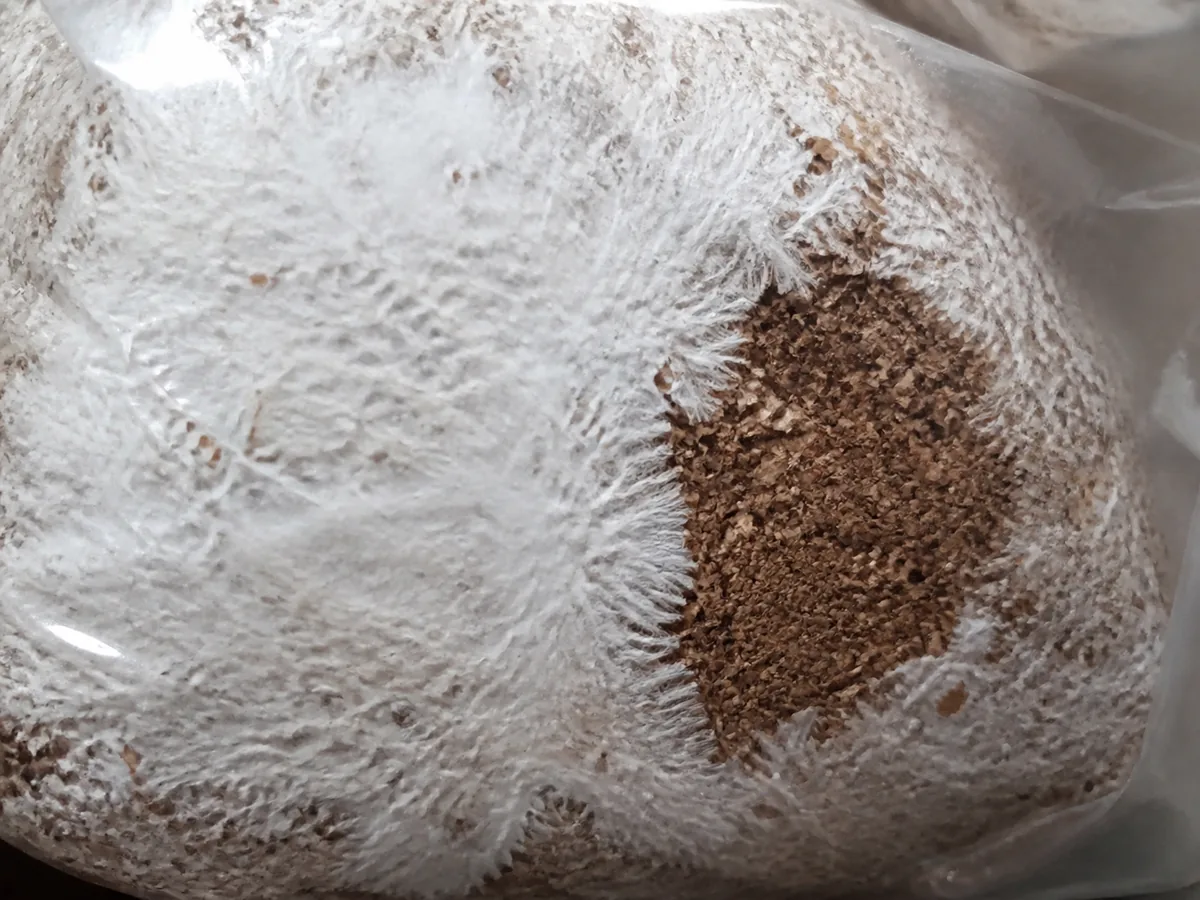
Condensation alone is not contamination, and amber droplets can be fungal metabolites.
Pair color with direction of change, texture, and odor because expanding green powder, milky wet substrate, or a sour smell through the filter tells a different story.
Wait until the block appears fully colonized and consolidated rather than merely dusted white on the outside. A mature block holds together when handled gently and has no active uncolonized pocket that could become a foothold after the top is opened.
How do you start a king oyster fruiting?
Move a mature block into its fruiting environment before opening it. This prevents the exposed surface from drying while you assemble a chamber or discover that the only available room is too warm.
The temperature range is a starting point, not a promise for every strain. If the supplier gives a narrower fruiting range, use that strain-specific guidance and record both room temperature and visible growth.
For a typical top-fruiting bag, keep the plastic collar around the block and expose only the upper surface.
The collar protects the sides from uncontrolled pins and helps maintain a moist boundary around the developing cluster.
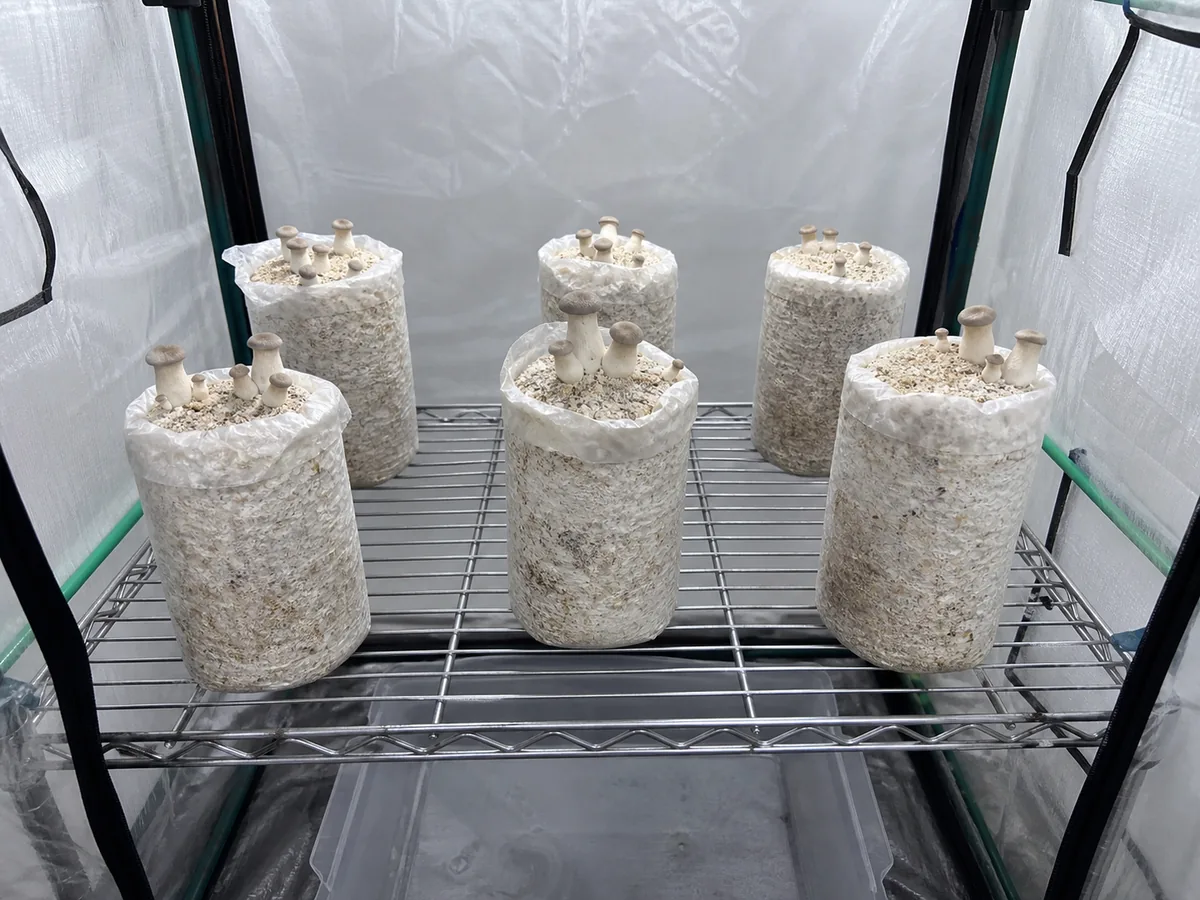
Maintain humidity in the air rather than spraying pins until water collects between them. Fine surface moisture may evaporate between checks, but a glossy puddle that remains on the block encourages bacterial damage and does not prove that the surrounding air is humid enough.
Air exchange must begin with fruiting, not after malformed mushrooms appear. Bring in clean room air and exhaust damp air without aiming a harsh fan directly at the exposed block.
Should you thin the pins?
A mature block may form more pins than it can carry to the thick-stemmed size shown in markets. Commercial growers often thin clusters, but a home grower can leave more pins for a cluster of smaller fruits when total size and appearance matter less.
Wait until the strongest pins are clearly distinguishable.
Removing the surface too early can erase the entire pin set, while waiting until stems overlap makes every cut or twist more likely to bruise a fruit you intended to keep.
- Keep pins that are upright, evenly colored, firmly attached, and spaced so their caps can expand.
- Remove obvious runts, damaged pins, and crowded inward-facing growth with cleaned fingers or a sanitized tool.
- Touch the retained pins as little as possible because bruised tissue and trapped water create weak points.
- Photograph the selected cluster so the final size can be compared with the number left on the block.
Tip
Thin one block and leave a matched block untouched when you have two from the same batch. The comparison teaches more about your strain and room than adopting a fixed number of stems from a commercial bottle farm.
Pin selection cannot compensate for an immature substrate or poor air. If every pin is gray, stalled, soft, or drying at the tip, diagnose the environment and block condition before choosing winners.
Growing MushroomsHow Do You Build an Outdoor Mushroom Bed That Lasts?How does fresh air change the stems?
Fruit shape is a report from the chamber. Cap expansion, stem proportion, surface texture, and daily growth together show whether the block is receiving balanced air, moisture, and temperature.
One ventilation study compared systems near 800 and 1,400 parts per million of carbon dioxide. The lower-carbon-dioxide system produced better stipe, cap, yield, and general quality outcomes, but that result does not turn one sensor value into a universal home target.
| What you see | Likely pressure | First adjustment |
|---|---|---|
| Tiny caps with excessive stretch and weak growth | Carbon dioxide is accumulating or air circulation is uneven | Increase gentle exhaust and verify that intake air reaches the shelf |
| Cracked caps or dry, leathery pin tips | Air is dry, direct airflow is too strong, or the surface is losing water too fast | Raise ambient humidity or redirect the fan without sealing the chamber |
| Soft wet tissue or amber puddles between pins | Water is remaining on the crop and air may be stagnant | Stop direct spraying, drain standing water, and improve gentle exchange |
| Growth stalls after a warm period | Fruiting temperature may be above the strain's useful range | Move heat sources, measure at block height, and return gradually to the supplier range |
Change one variable, record the time, and watch the next growth interval.
Raising humidity, increasing the fan, lowering temperature, and cutting more plastic at once can produce a response without revealing which change caused it.
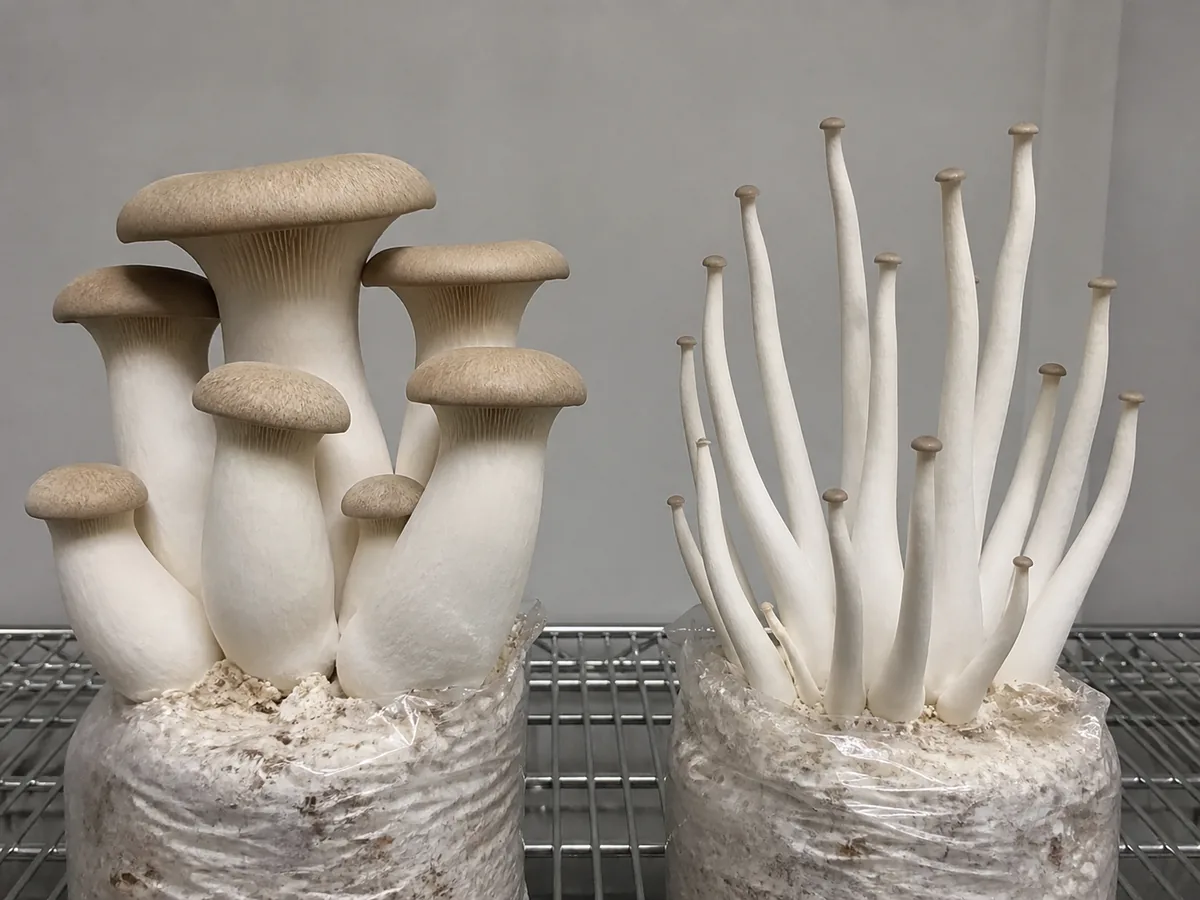
Humidity and fresh air must work together because either extreme can damage the crop. A sealed wet chamber holds carbon dioxide and surface water, while unrestricted dry airflow can stop pins before their caps expand.
What do you do with a contaminated block?
Contamination after full colonization is less common than an early failure, but opening the top removes part of the bag's protection. Inspect the substrate surface and stem bases daily without digging into the block.
Green powder that expands, a black or pink colony, milky wet substrate, a rotten or sour odor, and soft collapse are stop signs. Isolate the sealed or reclosed bag from the fruiting area rather than opening it indoors to identify the smell more closely.
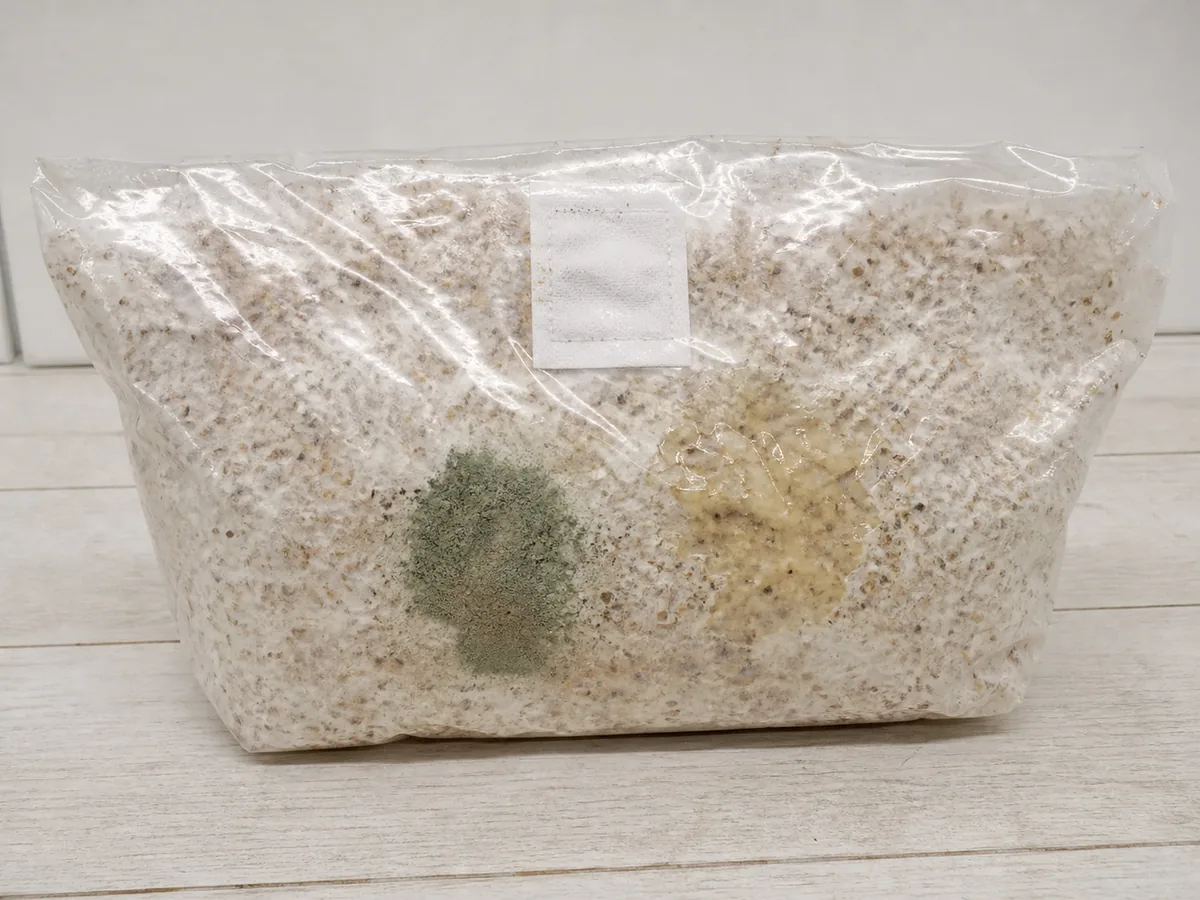
Yellow or amber droplets on otherwise dense white mycelium can be metabolites rather than a competing organism.
They still deserve observation, but a stable droplet without spreading color, wet decay, or bad odor is different from a colony that enlarges between checks.
Warning
Do not fruit through active contamination | Close the bag, move it out of the living and growing space, and follow local waste rules. Do not scrape off a colored colony, spray it with disinfectant, or harvest mushrooms growing through a suspect zone.
Clean the shelf, catch tray, humidifier reservoir, and nearby washable surfaces after removing a failed bag. Use the wider growing contamination checklist to compare recurring colors, textures, and introduction points across later batches.
Then trace the first visible defect back to the sterile cycle, filter integrity, spawn lot, transfer step, or standing water instead of blaming the final fruiting day.
When should you harvest king oyster?
King oysters are ready when the stems feel firm and the caps have expanded but retain a gently curved margin. A cap that has spread broad and flat is moving beyond the dense young stage, although the exact preferred size depends on the strain and how you plan to cook it.

Support the cluster and cut it cleanly at the substrate surface with a sanitized knife.
Avoid tearing a deep crater from the block because exposed loose substrate dries quickly and creates an irregular wet pocket when the block is rehydrated.
Brush off substrate, refrigerate the harvest promptly in a breathable paper bag, and cook it before quality declines. Do not wash the entire harvest before storage because retained water speeds surface deterioration.
Some commercial king oyster systems take one carefully managed flush, while a clean home block may produce another after a rest. Remove loose stem bases, let the surface recover, then follow the supplier's second-flush instructions or rehydrate only when the block has become light and dry.
Expect the next flush to differ in number and size.
Record the rest period, any added water, pin date, harvest weight, and contamination signs so the second crop becomes evidence for the next block rather than a yield promise.
Key takeaway
Retire the block when contamination appears, the substrate becomes soft or sour, or repeated rehydration produces no healthy pins. A clean spent block can enter an appropriate compost or waste stream, but a contaminated block should remain contained according to local disposal guidance.