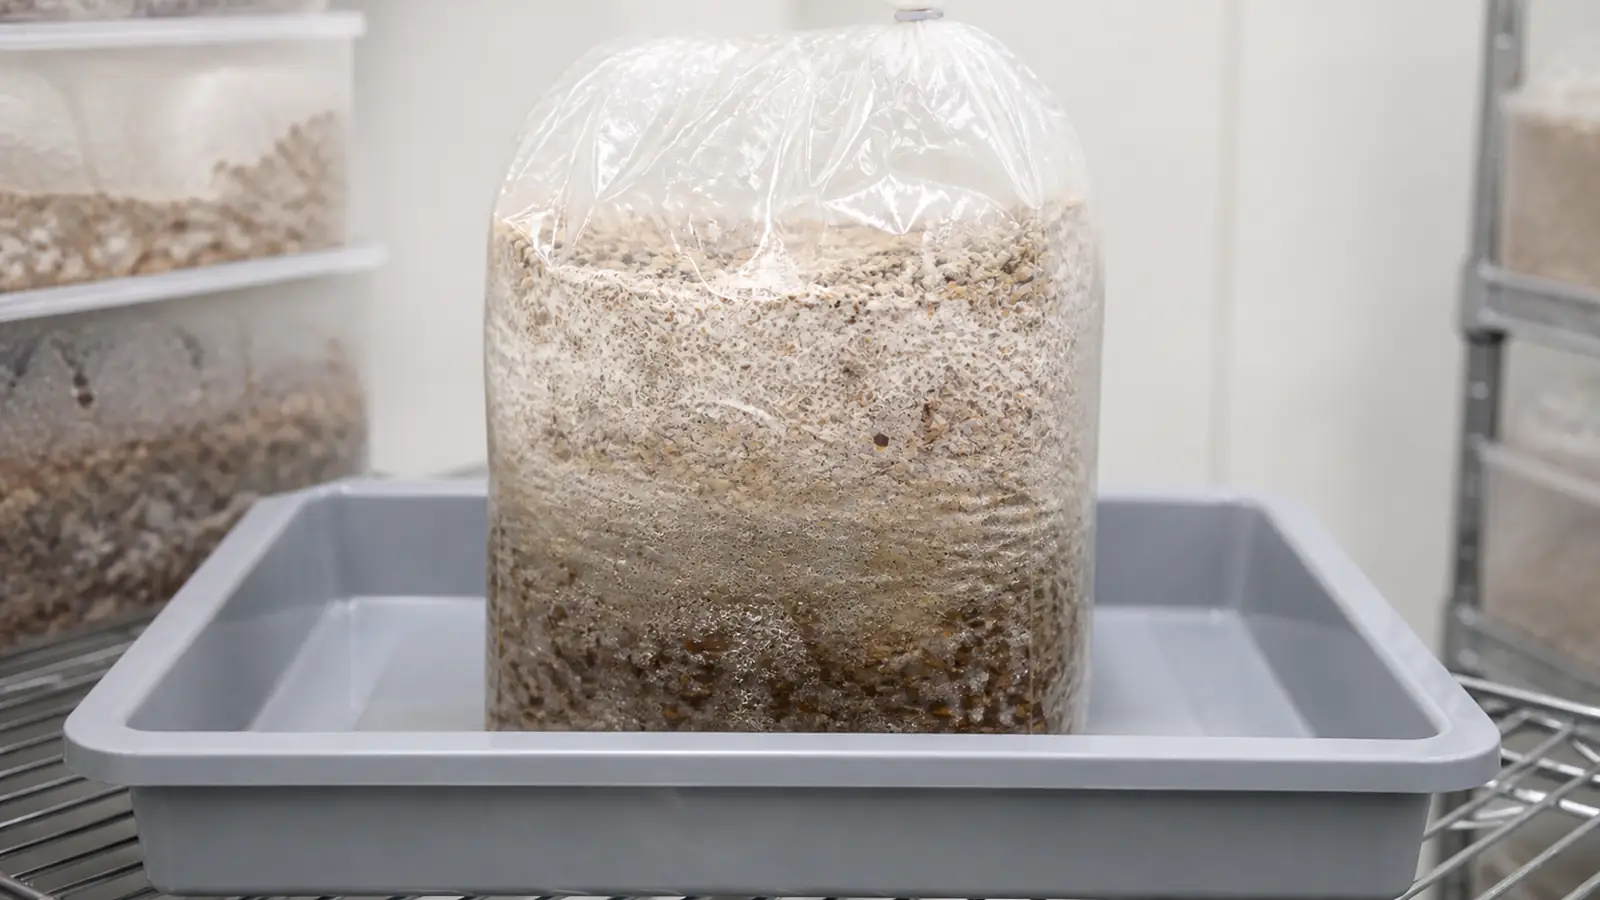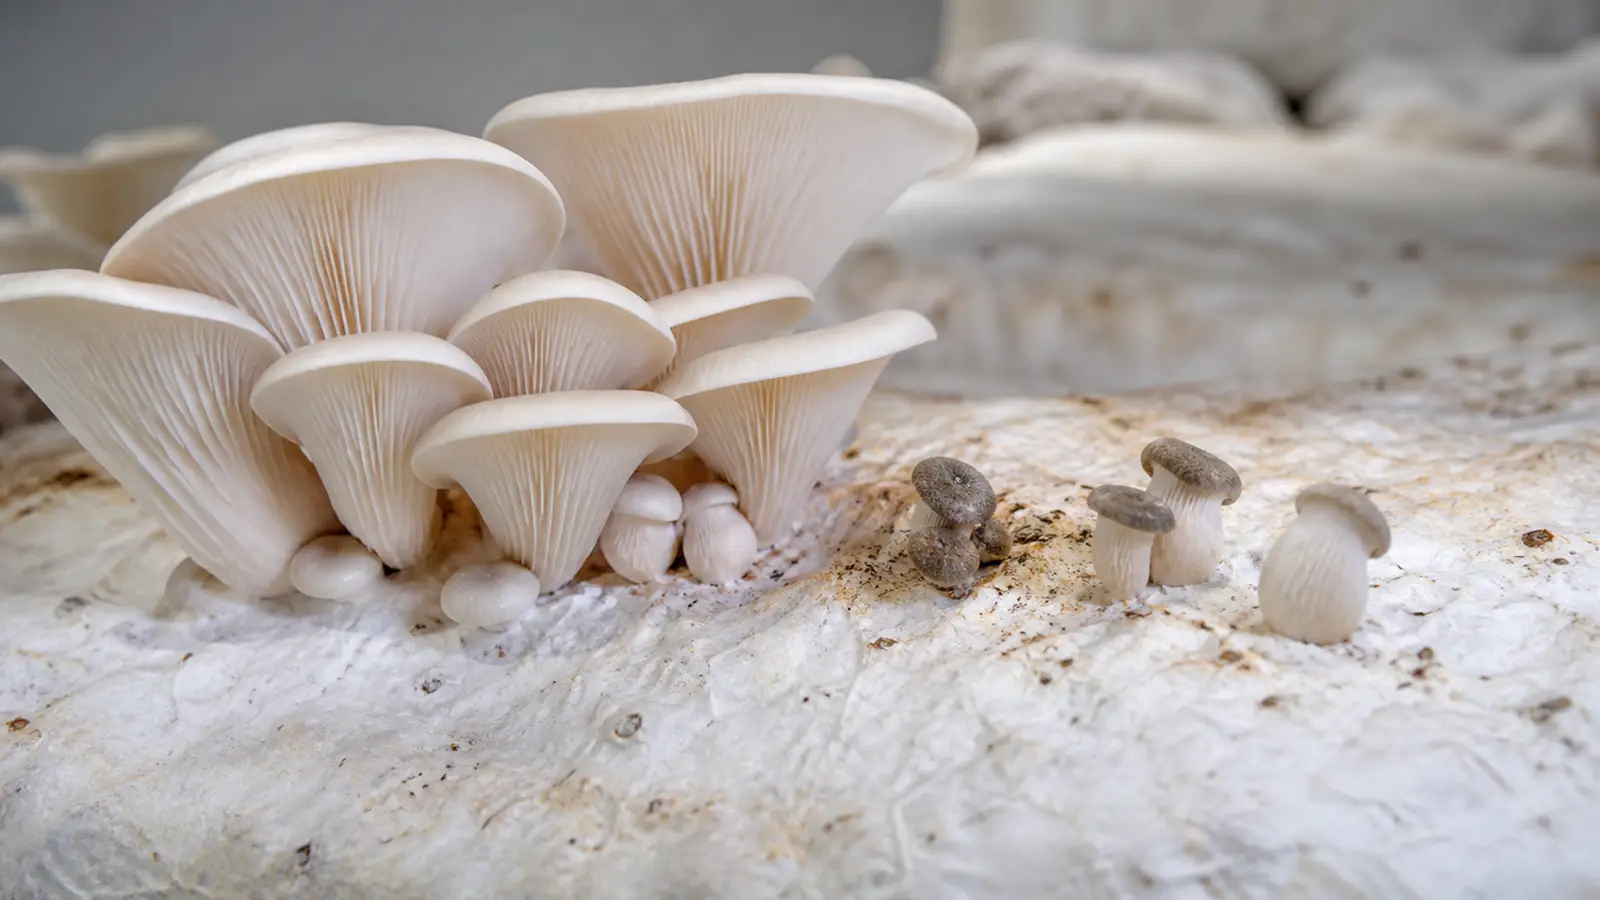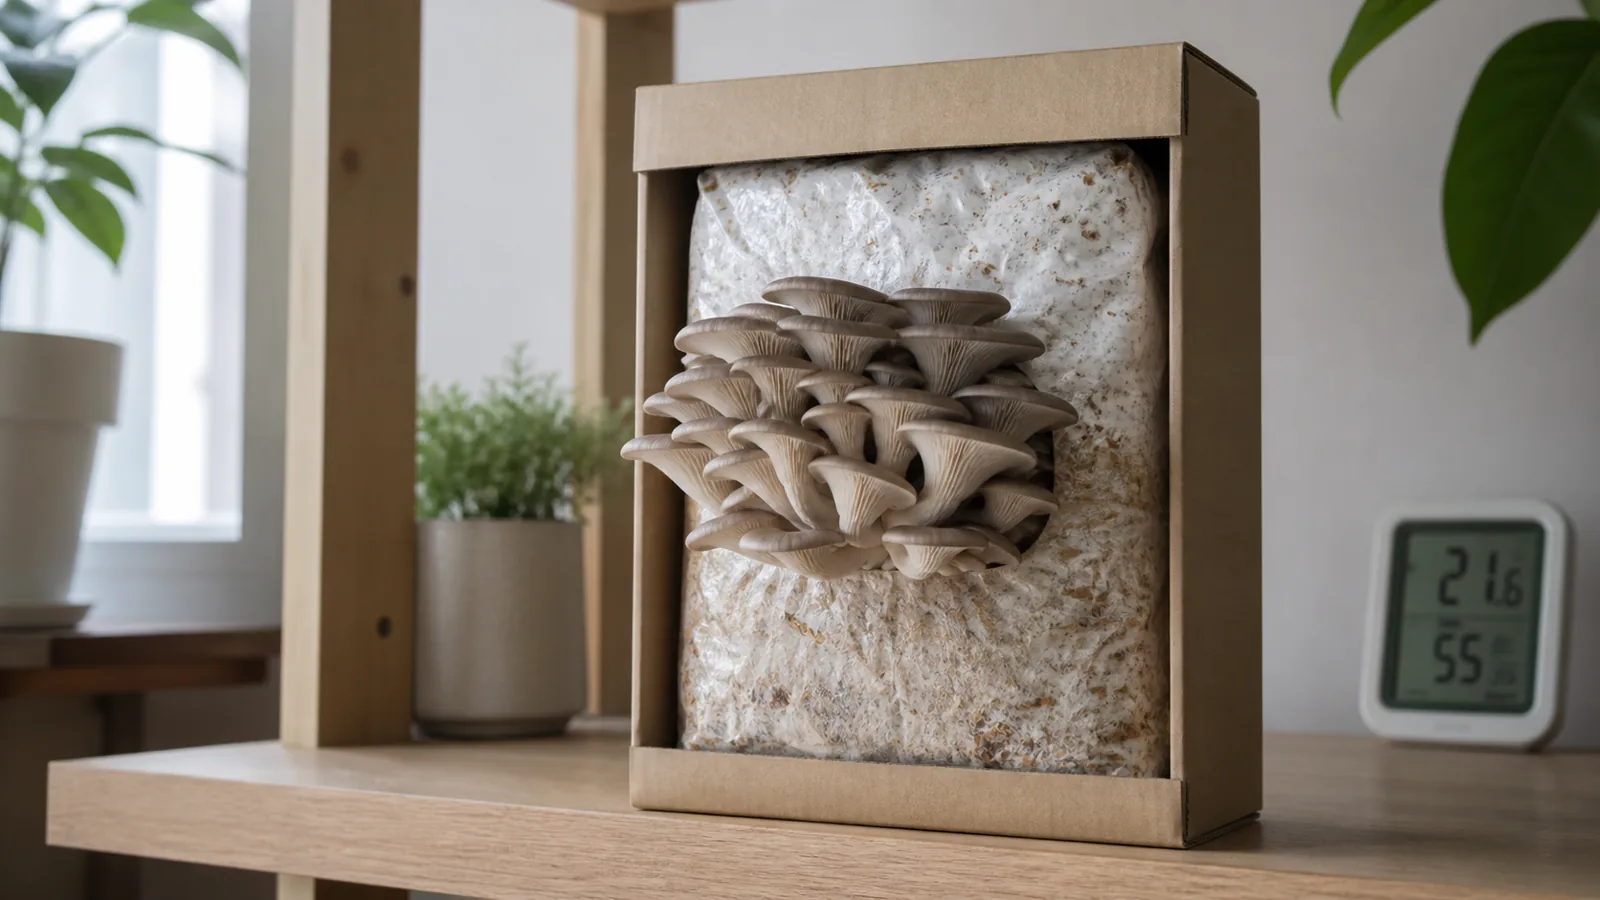
A ready-to-fruit kit is a formulated block the supplier has already inoculated and colonized. Your job begins with verifying the species and readiness, making only the instructed opening, then balancing surface moisture, replacement air, light and temperature from the block's response.
A ready-to-fruit mushroom kit is the last stage of a production process, not a box of inert soil waiting for water. The supplier should have selected a culture, prepared and treated the substrate, inoculated it, and allowed the mycelium to occupy the block before it reaches you.
Your decisions begin at that handoff.
Verify what arrived, expose only the fruiting area the labeled species needs, then adjust the local environment from visible evidence instead of following a universal misting routine.
What work has already happened inside the kit?
- Product stage
- Substantially colonized substrate ready for a species-specific fruiting step
- Protected barrier
- Intact filter bag, seal, and unexposed substrate mass
- Reader handoff
- Verify readiness, make the correct opening, balance the local climate, and harvest by species cue
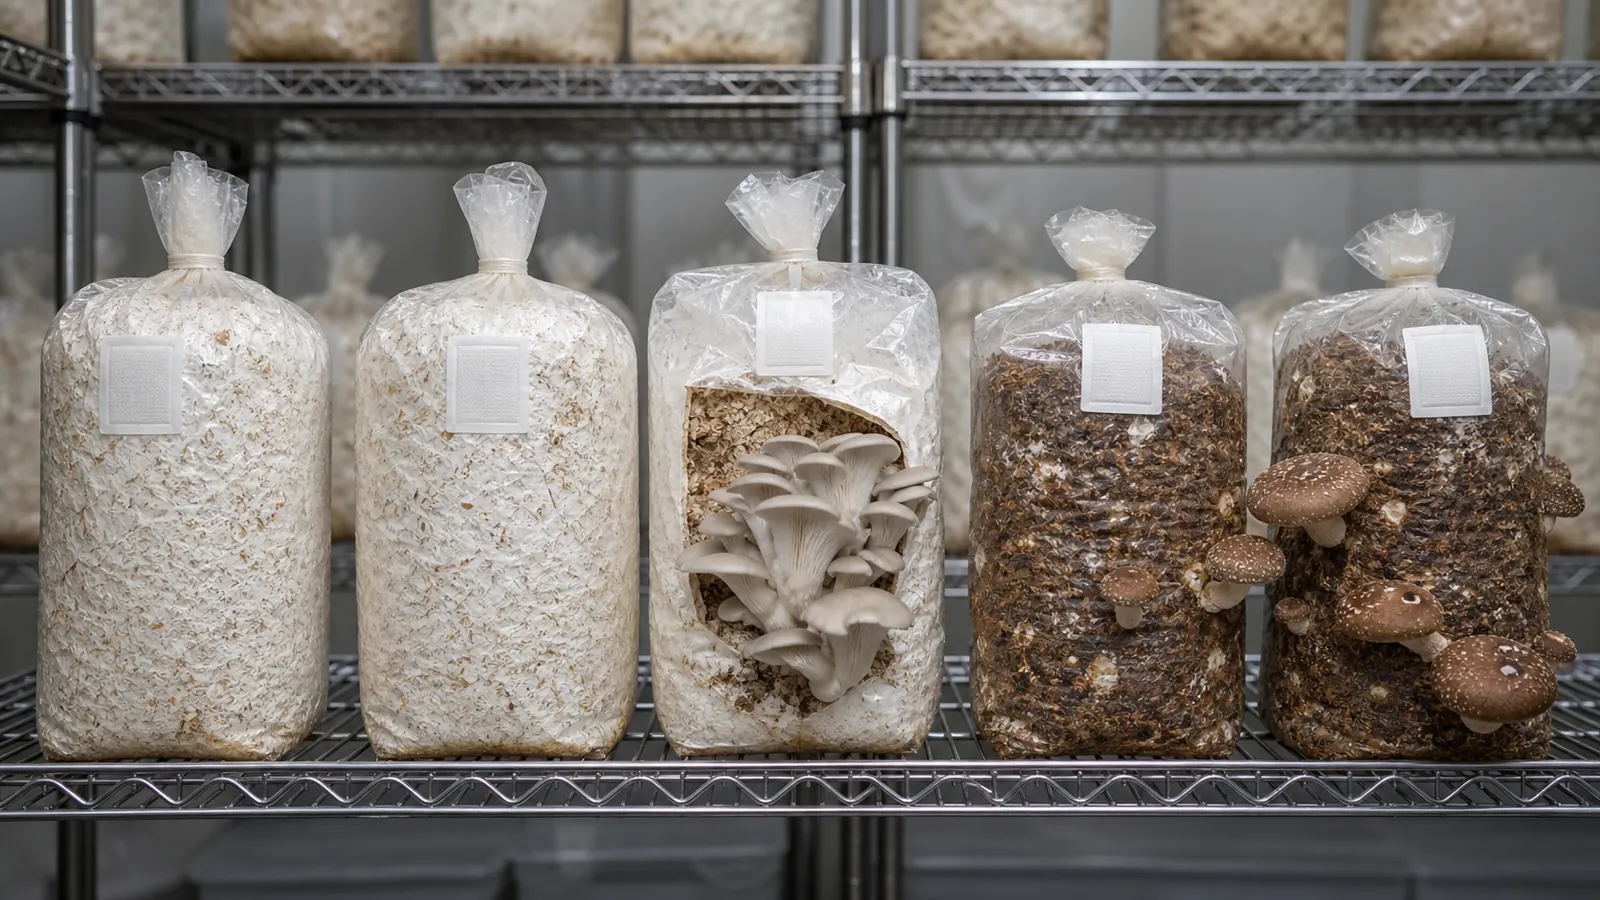
Most kits contain hydrated plant material inside a gas-permeable filter bag. Hardwood sawdust, straw, or another crop-compatible base supplies structure and carbon, while a measured supplement may provide additional nutrients.
The grower who made the block also chose the water content, heat treatment, culture, inoculation rate, bag size, and incubation conditions.
Those hidden decisions explain why two similar boxes can react differently in the same room.
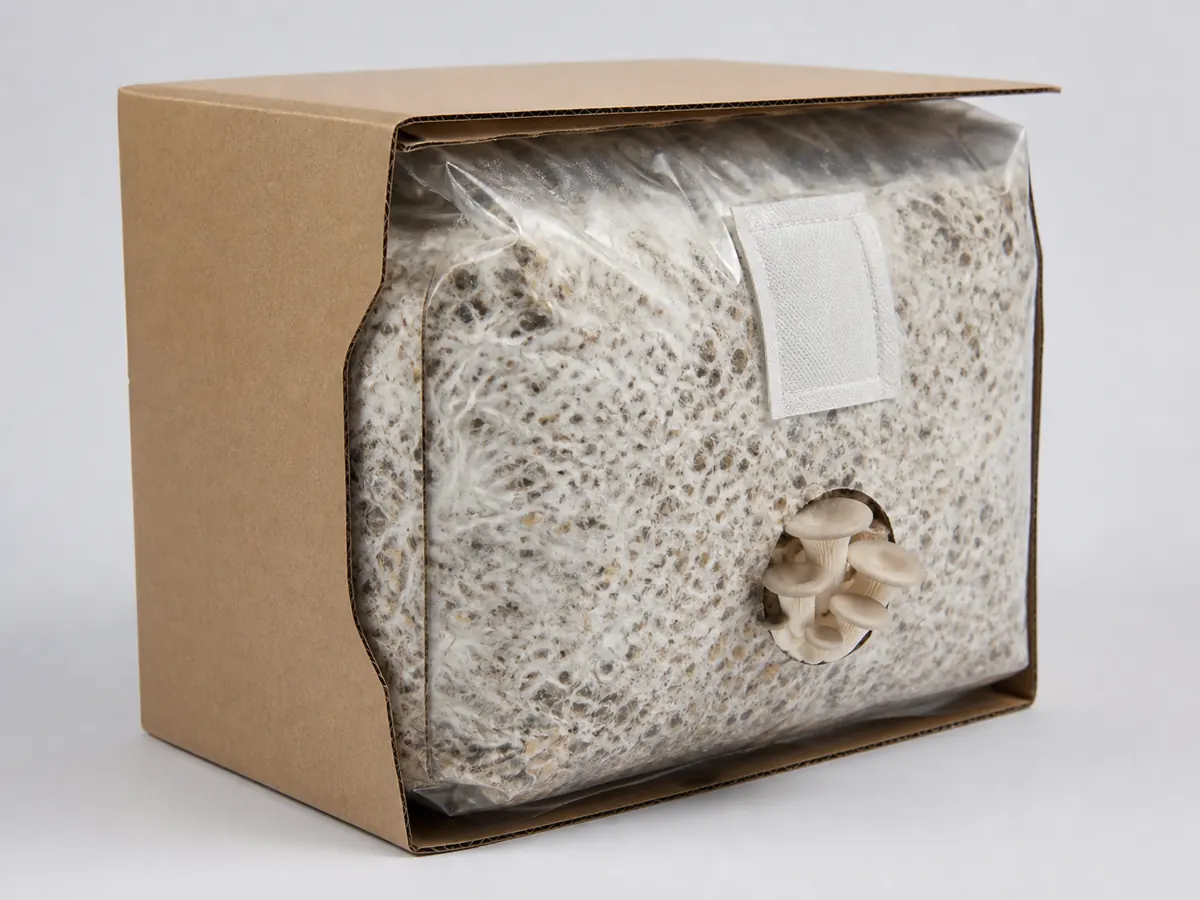
The filter supports limited gas exchange during colonization while keeping most airborne material away from the substrate. It is not a fruiting window, so do not cut it, wet it, cover it, or treat it as a handle.
Your remaining job is to create fruiting conditions without undoing that protected production history.
That means choosing the right opening, maintaining a moist surface without standing water, providing replacement air, and harvesting at the maturity cue for the named species.
| Part of the kit | Work already completed | What you still control |
|---|---|---|
| Colonized block | Formula, hydration, treatment, inoculation, spawn run | Readiness check and stable placement |
| Filter bag | Protected exchange during incubation | Keep the filter dry and undamaged |
| Fruiting face | Usually still sealed for transport | Make only the instructed exposure |
| Printed label | Species, lot, dates, storage, and method | Confirm that the instructions match the block |
Some products are incubation kits rather than ready blocks. If the instructions say the culture still needs weeks to finish colonizing, keep it sealed under the stated conditions and do not force fruiting because white growth has appeared on one face.
The handoff date matters because an older block may have used water and nutrients during storage even when the bag remains white.
Record arrival mass when the supplier provides a reference, then use that evidence during later rehydration decisions.
Growing MushroomsWhat Does a Mushroom Farm Actually Cost to Start?Which kit should you buy?
The species name is the first buying criterion because it controls temperature, opening geometry, fruit shape, and harvest timing. A package that promises only a generic mushroom crop does not give you enough information to manage it safely.
Read the package as a production record before treating it as a gift or countertop object.
- Confirm the common name plus a scientific name or clearly documented strain.
- Find a production or best-start date, storage conditions, and a traceable lot number.
- Check whether the block fruits from a small side opening, a top surface, or a bag that is removed after a named maturity stage.
- Require a support contact and instructions that describe normal arrival changes, stop conditions, and the seller's replacement process.
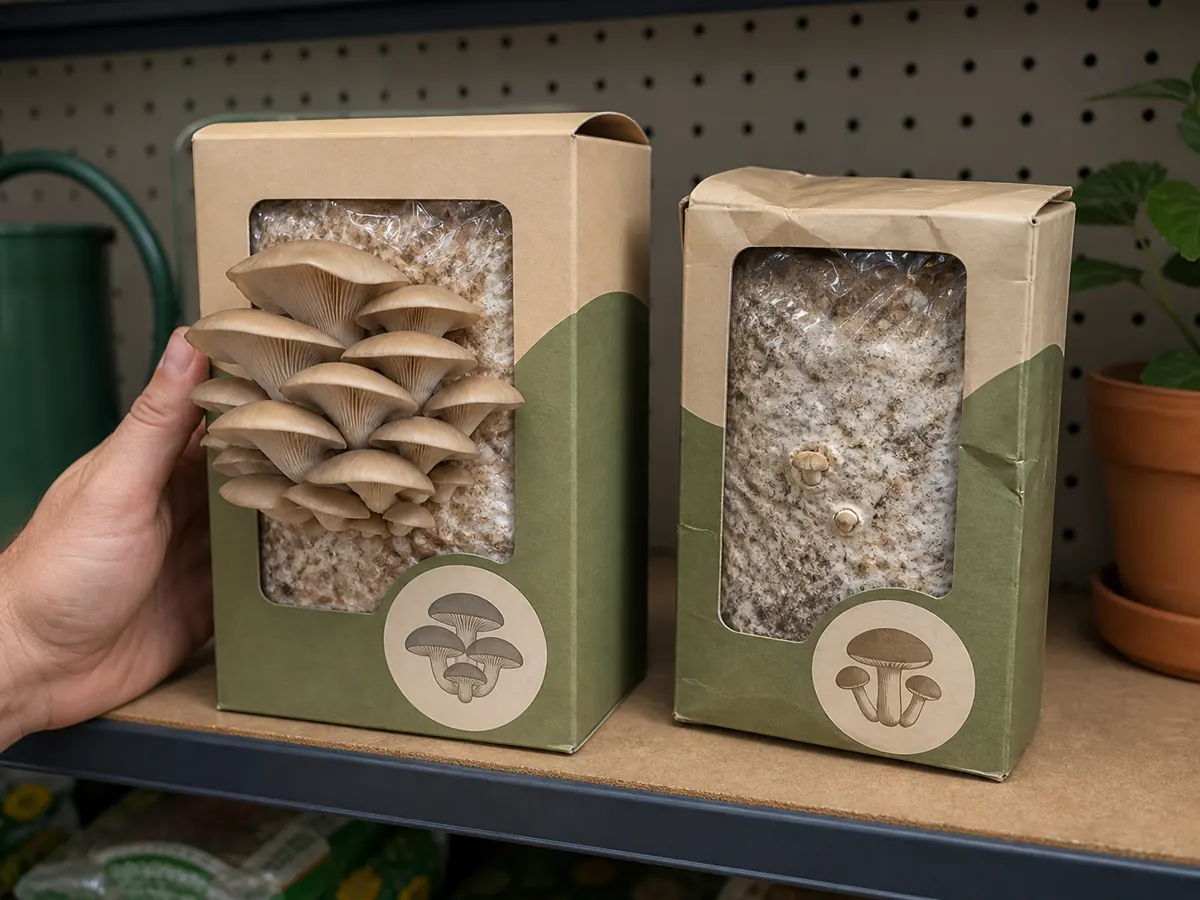
A heavy block is not automatically fresher. Weight only helps when the supplier states an expected range, because bag volume, substrate formula, and moisture content differ among products.
Reject a bag with a torn seal, punctured filter, sour leak, broad uncolonized wet zone, or expanding green, black, pink, or orange growth. A small amount of amber metabolite can occur in stressed mycelium, but the seller should evaluate it from clear sealed-bag photographs before you open anything.
Price should be compared against the amount of viable colonized substrate and the support provided, not a promised number of flushes.
Yield depends on culture, block condition, species, fruiting environment, and how much biological capacity remains after shipping.
Read the instructions before checkout and look for measurable maturity cues rather than slogans. A seller who explains normal metabolites, shipping delay, opening geometry, and replacement policy gives you a usable decision path when the block arrives imperfectly.
What should a healthy block look like on arrival?
Inspect the unopened bag in bright indirect light and photograph every face, the base, the filter, and the label. This preserves evidence for a supplier claim and gives you a baseline for later changes.
Healthy colonization can look dense and white, thin and web-like, or partly brown after a species-specific maturation stage.
Compare the block with the producer's own reference images rather than expecting every culture to resemble white paint.
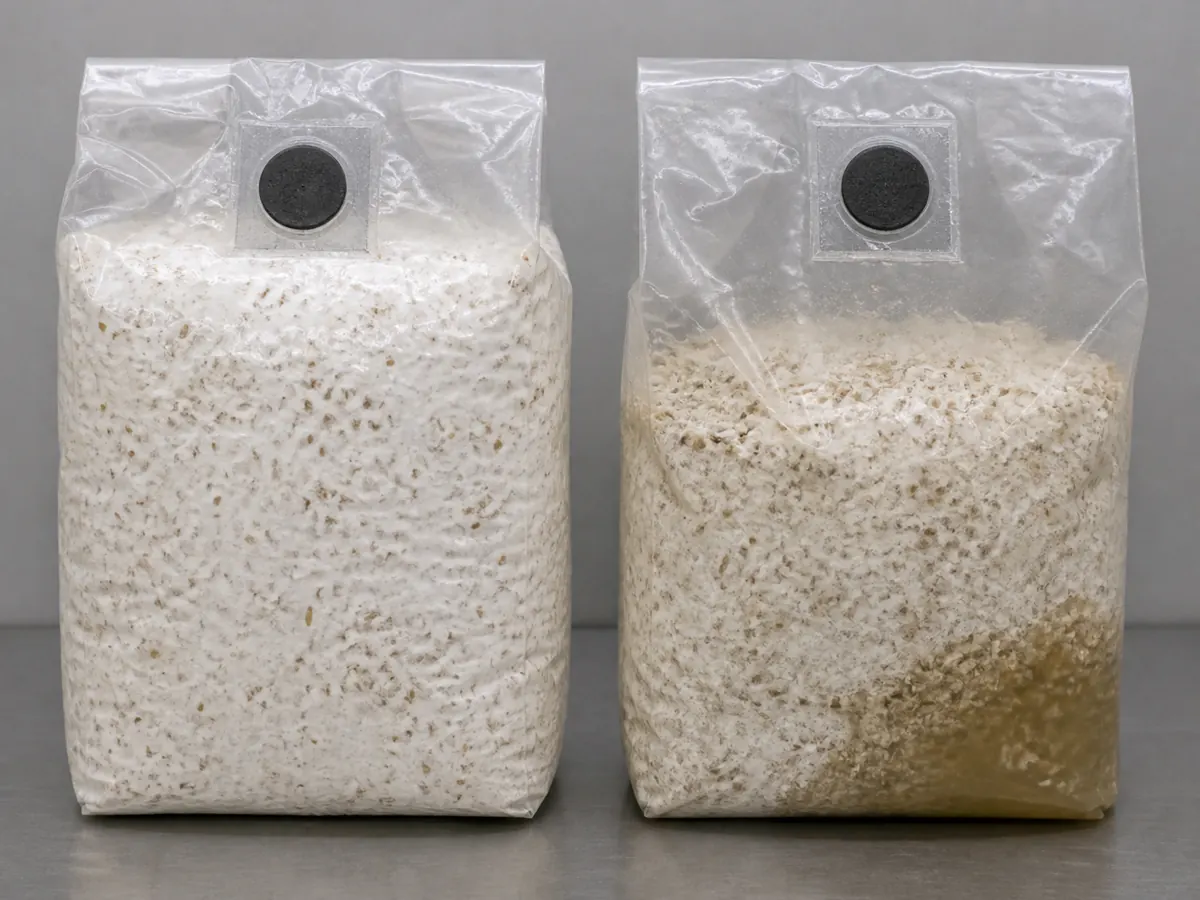
Pressing the bag repeatedly is a poor readiness test. Firmness comes from both substrate packing and fungal binding, and squeezing can fracture new growth or pull room air through a damp filter.
Condensation on the plastic can reflect a temperature change during shipping.
Free liquid inside the substrate, soft collapse, or a stable bare pocket is more concerning because it points to hydration, treatment, or colonization trouble.
| Arrival observation | Likely meaning | Next action |
|---|---|---|
| Intact bag, bound block, species-normal color | Ready or close to ready | Follow the stated acclimation period |
| Cold block with surface condensation | Recent temperature change | Let it equalize while sealed |
| Loose clean edge but no foreign boundary | Colonization may be incomplete | Send photographs and ask whether to wait |
| Wet soft pocket or growing colored patch | Production or contamination concern | Isolate sealed and contact the seller |
| Split seam or damaged filter | Protection has been lost | Keep sealed inside a second bag and request replacement guidance |
Do not open a suspect block to smell it. Opening releases spores and aerosols, destroys the supplier's sealed evidence, and exposes other cultures in the room.
If the block arrived very cold or hot, follow the supplier's acclimation instructions before cutting. A rapid temperature change can create more condensation and make a simple shipping effect harder to distinguish from a wet substrate defect.
Mark any questionable area on a photograph and compare it after the acclimation period. A wet pocket that expands or loses structure deserves a different decision from harmless condensation that clears as temperatures equalize.
Which opening should the bag receive?
Make the smallest exposure that supports the species' normal fruiting form.
Every extra square centimeter of uncovered substrate increases evaporation and creates another surface that can collect debris.
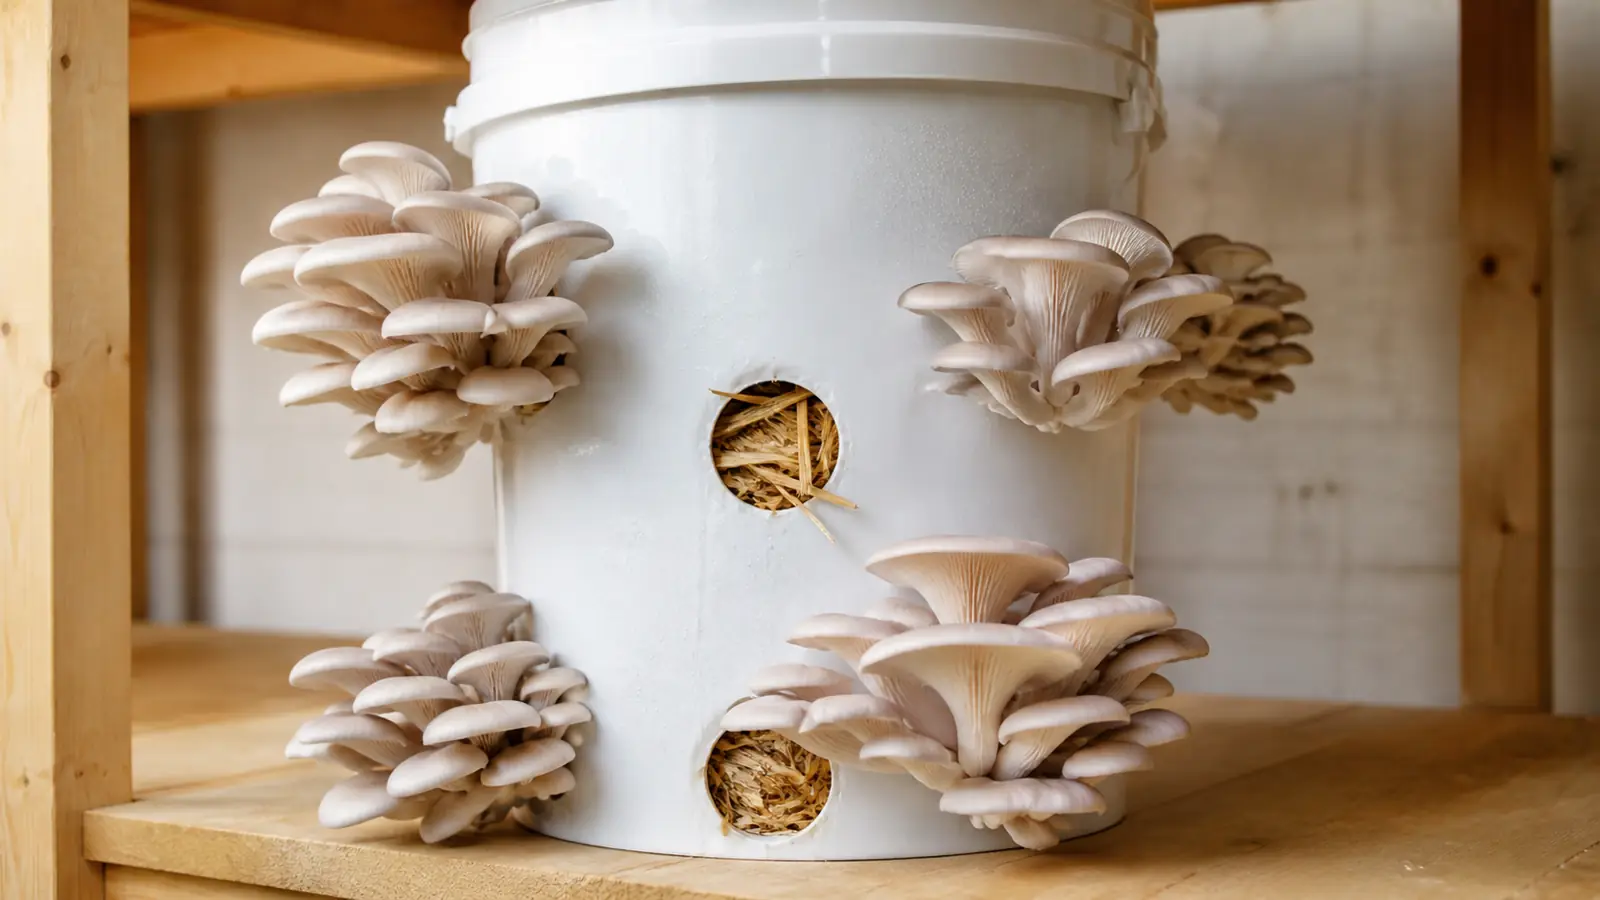
Side-fruiting oyster mushrooms commonly use a slit or small X because a cluster can emerge from one point while most of the block remains wrapped. Lion's mane also benefits from a compact side opening that supports one dense fruit body instead of many undersized starts.

Top-fruiting species and cased crops need a different surface.
Some shiitake blocks mature and brown before the bag is removed more broadly, so copying an oyster slit onto them can interfere with the intended development.
| Fruiting habit | Typical exposure concept | Main tradeoff |
|---|---|---|
| Compact side cluster | Small slit or X at the intended site | Concentrates growth and limits water loss |
| Broad top fruiting | Open top with the remaining bag acting as a moisture collar | Exposes more surface and needs steadier humidity |
| Mature bare block | Bag removed only at the documented maturity stage | Highest exposure and fastest drying |
| Cased surface | Prepared top layer managed as its own moisture zone | Surface condition matters more than bag cutting |
Clean the outside of the bag and use a clean sharp tool. Cut plastic without digging into the substrate, because a deep wound creates damaged tissue and a wet pocket where no opening was needed.
Once the cut is made, fold or tape loose plastic only as the instructions show.
Removing the entire bag for convenience changes the block's water balance and cannot be reversed by spraying the room later.
If pins formed inside the bag during shipping, photograph their position before cutting. The supplier may direct you to expose that active site, but tearing the bag around every internal pin can create too much open surface.
Confirm the handoff
Match the labeled species and block maturity to the supplier's opening diagram
Clean the working surfaces
Wash hands and clean the bag exterior and cutting tool
Make one exposure
Cut the instructed opening without gouging the substrate or uncovering extra surface
Record the change
Photograph the opening and note the date before changing the environment
Where should the kit sit?
Choose the location before you start misting.
The best site has stable species-appropriate temperature, indirect light, gentle replacement air, and enough clearance to inspect every side of the block.
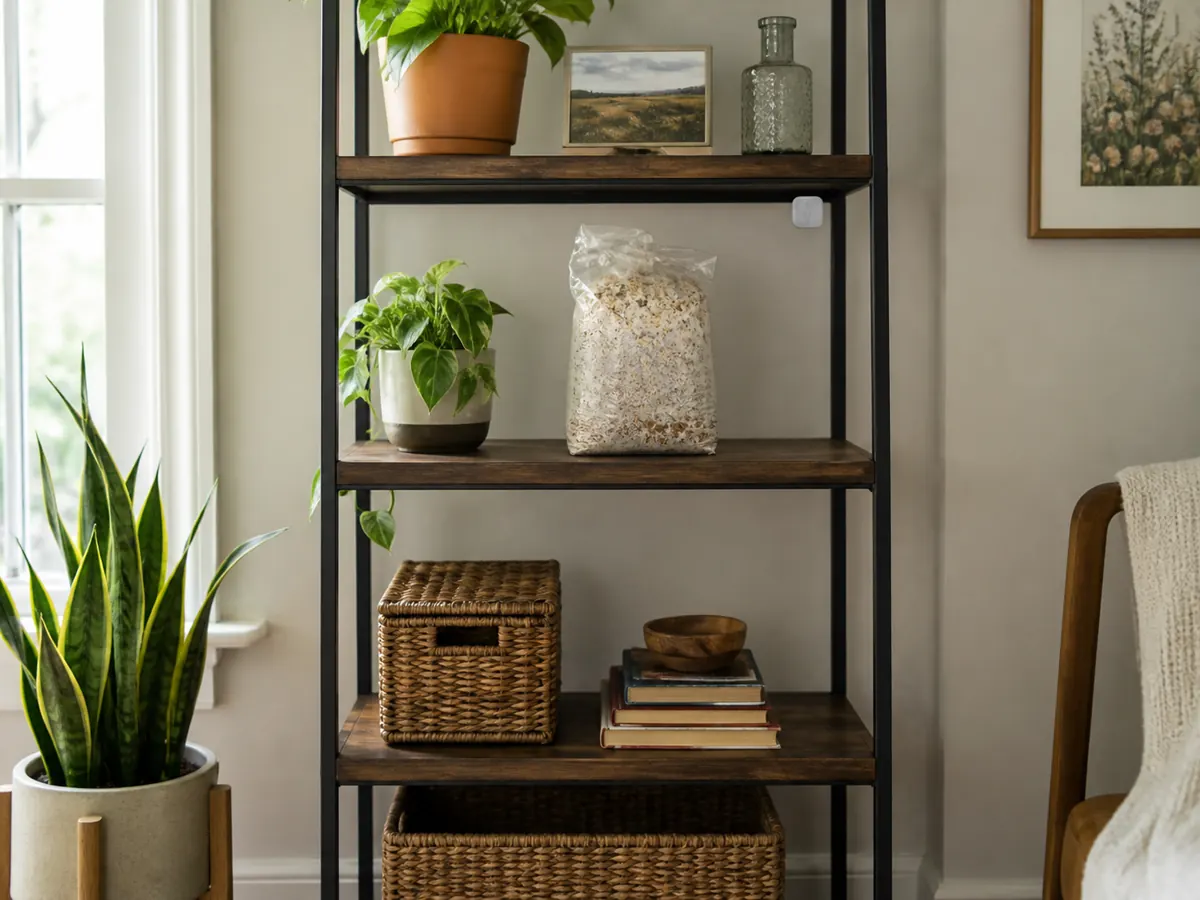
Avoid direct sun because a plastic bag can heat well above room temperature even when the air feels comfortable. Keep the block away from heating vents, air conditioners, stove vapor, dusty fans, compost bins, and ripening fruit.
Place a thermometer and humidity sensor close to the fruiting opening, not across the room.
Room averages can hide a dry air stream at shelf height or a stagnant wet corner around the block.
Leave space behind and beside the kit. A bag pressed against a wall traps moisture on one face, restricts inspection, and can push a developing cluster into a hard surface.
Indirect daylight or a modest white light cycle helps many cultivated species orient and form normally.
Darkness is not a substitute for humidity, and intense light is not a substitute for warmth.
An open shelf may work in a naturally suitable room. When the air is persistently dry, a ventilated humidity tent or small fruiting chamber can create a more stable local zone, but it must exchange air and be easy to clean.
Test the empty setup through a day and night before opening an expensive block.
Temperature swings, direct sun, and vent cycles are easier to correct when no fruiting surface is losing water.
Note
Measure the opening, not the room | The crop responds to the thin boundary of air around its fruiting surface, so a distant household reading can look acceptable while the block dries or suffocates.
How should moisture and fresh air be balanced?
Humidity slows water loss from the exposed surface, while replacement air removes accumulated carbon dioxide and supplies oxygen. Raising one does not correct a shortage of the other.
Look for a fine moist sheen around the fruiting area without puddles, dripping plastic, or water sitting between young fruit bodies. A surface that turns pale, cracks, or stops glistening soon after misting is losing water faster than the local setup replaces it.

Mist the chamber wall or surrounding air zone when the product method allows it, then observe how long the fine moisture lasts.
Do not drive a strong spray into pins or leave water trapped inside a cut bag.
Fresh air should be gentle and continuous enough to support normal form. A fan pointed directly at the block often exchanges air by stripping moisture, which replaces one problem with another.
Long stems, small caps, branching coral-like shapes, or fruit bodies leaning toward an opening can indicate accumulated carbon dioxide for species that normally develop broader caps.
Dry edges and cracked tissue point more strongly to local evaporation, especially when the whole fruit body remains compact.
Change one variable and record the response through the next observation period. Opening the tent, adding a fan, moving the block, and doubling misting at once makes the result impossible to interpret.
Water quality and clean tools matter because the exposed face is no longer protected by the original bag. Use potable water, keep the sprayer clean, and do not share a nozzle with houseplants or cleaning chemicals.
Block mass can support surface observations when the supplier gives a starting reference.
A steady decline during active fruiting is expected, but a sudden large change helps explain why fine misting no longer restores the exposed face.
Growing MushroomsHow Do You Build an Outdoor Mushroom Bed That Lasts?What does the block's response mean?
The fruit body is a report from the block and its local environment. Read shape, texture, color, and the location of the change before deciding which control owns the next correction.
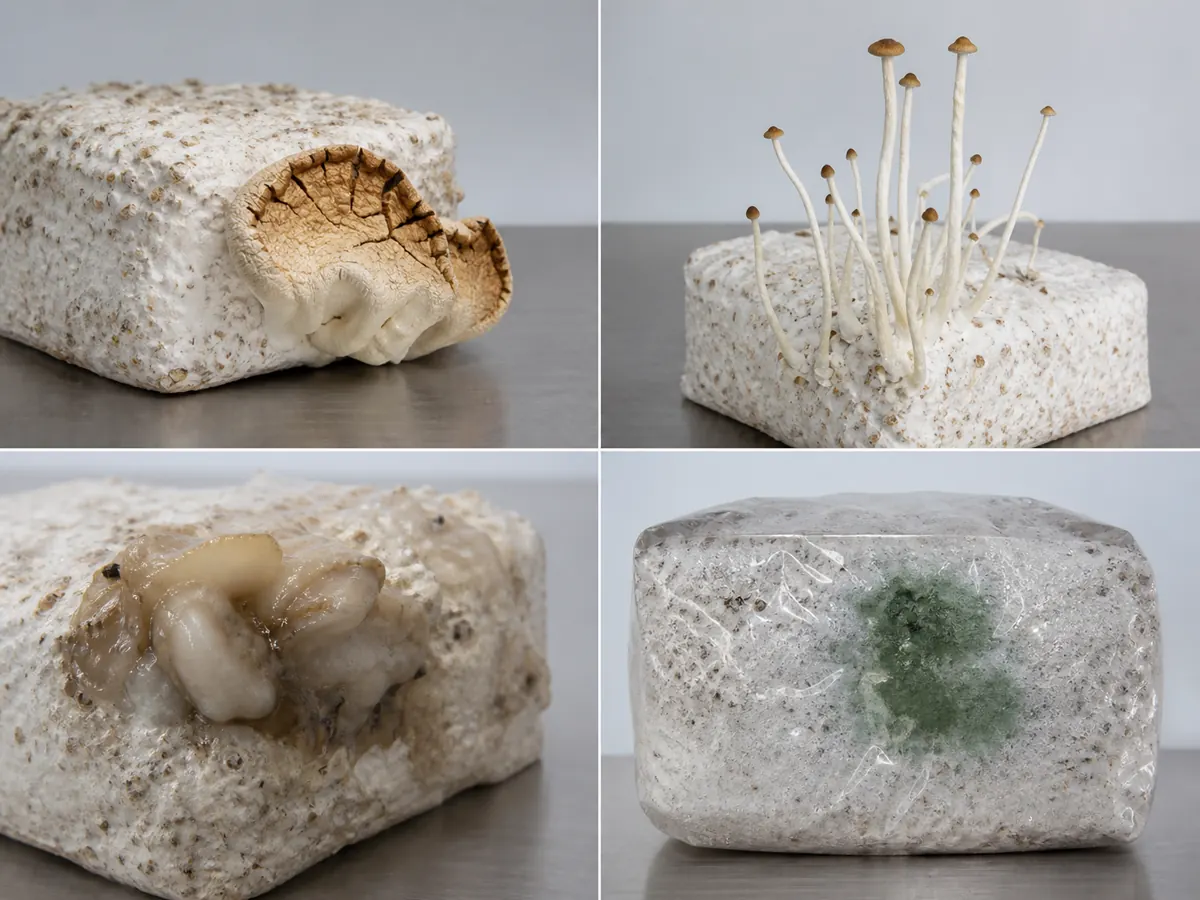
Use the visible pattern to choose the first condition to inspect, then test one bounded response. The image does not authenticate a contaminant or justify opening a suspect bag.
| Visible pattern | First condition to check | Bounded response |
|---|---|---|
| Elongated stems with reduced caps | Replacement air and opening clearance | Increase passive exchange modestly without adding a direct draft |
| Dry margin or cracked surface | Local humidity and air speed | Reduce evaporation, then restore a fine moist surface |
| Tiny pins that darken and stop | Recent temperature, drying, or block exhaustion | Stabilize conditions and remove dead tissue only as directed |
| Soft translucent or foul tissue | Standing water or bacterial decay | Isolate the block and stop spraying the affected area |
| Expanding green, black, pink, or orange boundary | Foreign growth | Seal, isolate, photograph, and follow disposal guidance |
A stable blue-gray mark on bruised mycelium can differ from a fuzzy colony that expands across the substrate.
Color alone is not enough, so compare the boundary, texture, direction of growth, and change over time while the bag remains closed whenever possible.
Use dated photographs from the same angle and light. Growth that crosses a marked boundary gives stronger evidence than a color impression remembered from the previous day.
Small amber droplets can be normal metabolites for some cultures under stress, but pooled cloudy liquid with soft substrate needs supplier review. The distinction comes from structure, change, and the culture's documented appearance rather than a reassuring label applied to every wet bag.
Do not scrape, salt, bleach, or break apart a suspect block indoors
Do not alter air, water, light, and temperature in the same correction
Change the most likely control and document the response
Move a suspect sealed block away from clean kits before seeking advice
Contact the producer when the symptom appeared before opening, several kits from one lot share it, or the printed method conflicts with the crop's labeled species.
The supplier owns information about the culture, formula, treatment batch, and shipping history that cannot be reconstructed from a photograph.
Retire the block when it softens broadly, leaks, smells foul without deliberate opening, or supports expanding foreign growth. A promised second flush does not justify keeping a deteriorating substrate in a home growing area.
Room patterns matter when several kits are present. The same stretched form on every upper shelf implicates shared air movement, while one failed block among sound neighbors points more strongly toward that package or its opening.
When should the kit be harvested?
Harvest timing belongs to the mushroom, not the box.
Oyster caps are often collected while their margins remain slightly rolled and before heavy spore release, while lion's mane is judged by tooth development, color, and texture.
Shiitake uses cap opening and veil development, and a closed brown button crop uses veil tension rather than a broad cap diameter. Read the supplier's species-specific endpoint before the first pins enlarge.
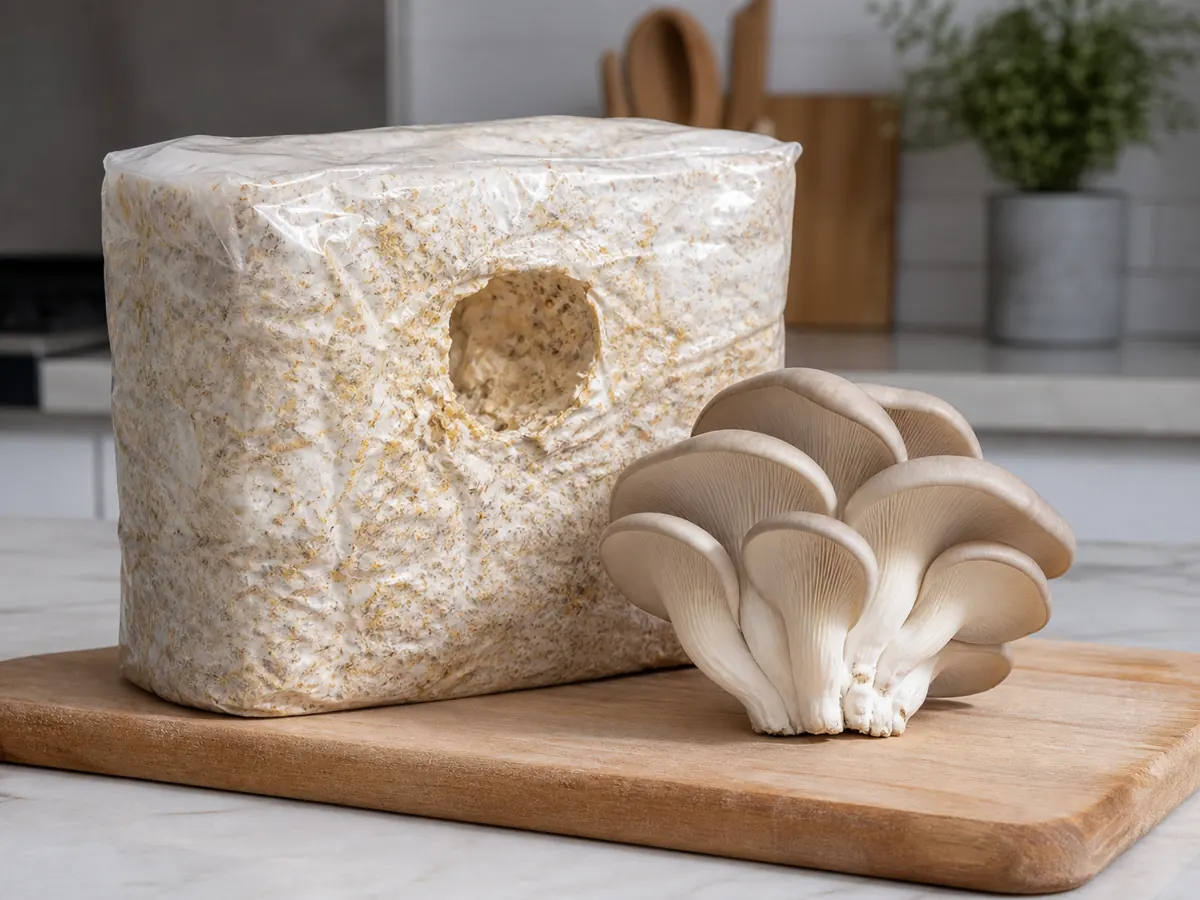
Harvest the entire cluster when its members share a base.
Holding individual caps back can leave crushed fragments at the opening and damage the remaining crop.
Use clean hands or a clean tool, support the block, and twist or cut according to the species and kit instructions. Remove loose base tissue without excavating healthy substrate.
The first-flush weight becomes useful only with the starting block mass, species, dates, and rejected tissue.
A large wet cluster from one product should not be compared with a smaller dry block from another as though the yield percentages were equivalent.
Harvest timing also affects the next flush. Leaving overmature tissue at the opening spends water, drops spores, and creates debris without guaranteeing extra usable weight.
Move harvested mushrooms into appropriate food handling promptly.
A home fruiting kit does not remove the need to confirm species identity, cleanliness, storage temperature, and individual dietary cautions.
Record usable weight separately from the wet cluster base and damaged tissue. That distinction prevents a messy late harvest from appearing more successful than a smaller clean crop.
Can the block produce another flush?
Many sound blocks retain enough moisture and nutrients for another crop, but the block must earn the reset.
Inspect its structure, smell from normal room distance, opening cleanliness, and any foreign growth before adding water.
Allow the rest period and rehydration method specified for the species. Some kits use a measured soak, some use controlled watering, and others recover with normal humidity after debris is removed.
| Postharvest evidence | Decision | Reason |
|---|---|---|
| Firm block, clean opening, no foreign boundary | Rest and rehydrate as instructed | The protected substrate remains coherent |
| Large measured weight loss but sound structure | Restore water by the documented method | The first flush exported water with the crop |
| Soft wet zone or sour leak | Isolate and retire | More water can spread an existing failure |
| Expanding colored colony | Keep sealed and discard appropriately | A second-flush attempt increases exposure |
| Intact but repeatedly unresponsive block | Contact supplier, then compost or discard | Environmental changes cannot restore exhausted capacity |
Do not submerge a questionable block to wash contamination away.
Water can carry cells and spores across the bag, into drains, and onto tools while leaving the underlying competitor inside the substrate.
A clean spent block may be composted where local guidance allows, but it should not be buried beside living trees as an identification experiment. Remove plastic and labels, keep contaminated material contained, and clean the growing area before starting a new lot.
The useful outcome is a documented cycle, even when the yield is modest. Species, lot, opening, dates, local readings, harvest mass, and failure observations tell you whether the next purchase needs a different block, a different location, or a better-controlled fruiting chamber.
Compare a second flush with the condition of the block that produced it. A lower harvest from a firm clean unit can be normal depletion, while a lower harvest beside soft wet tissue is a retirement signal.
Note
Reset only a sound block | Rehydration replaces lost water. It cannot repair damaged filters, foreign colonization, bacterial collapse, or a culture that arrived without enough viable substrate.