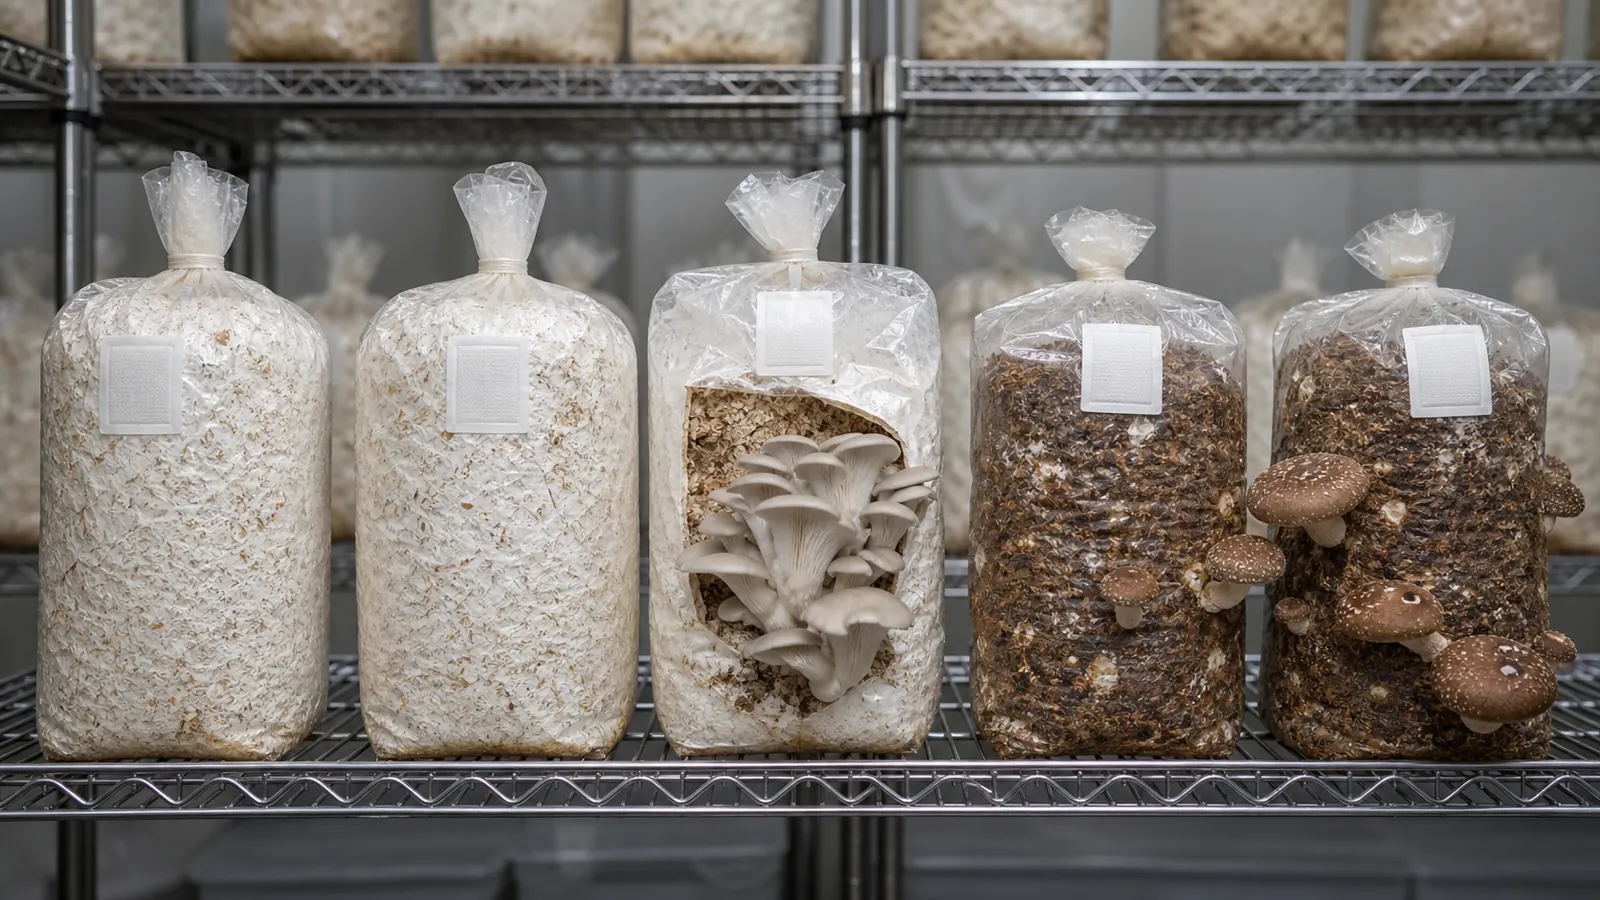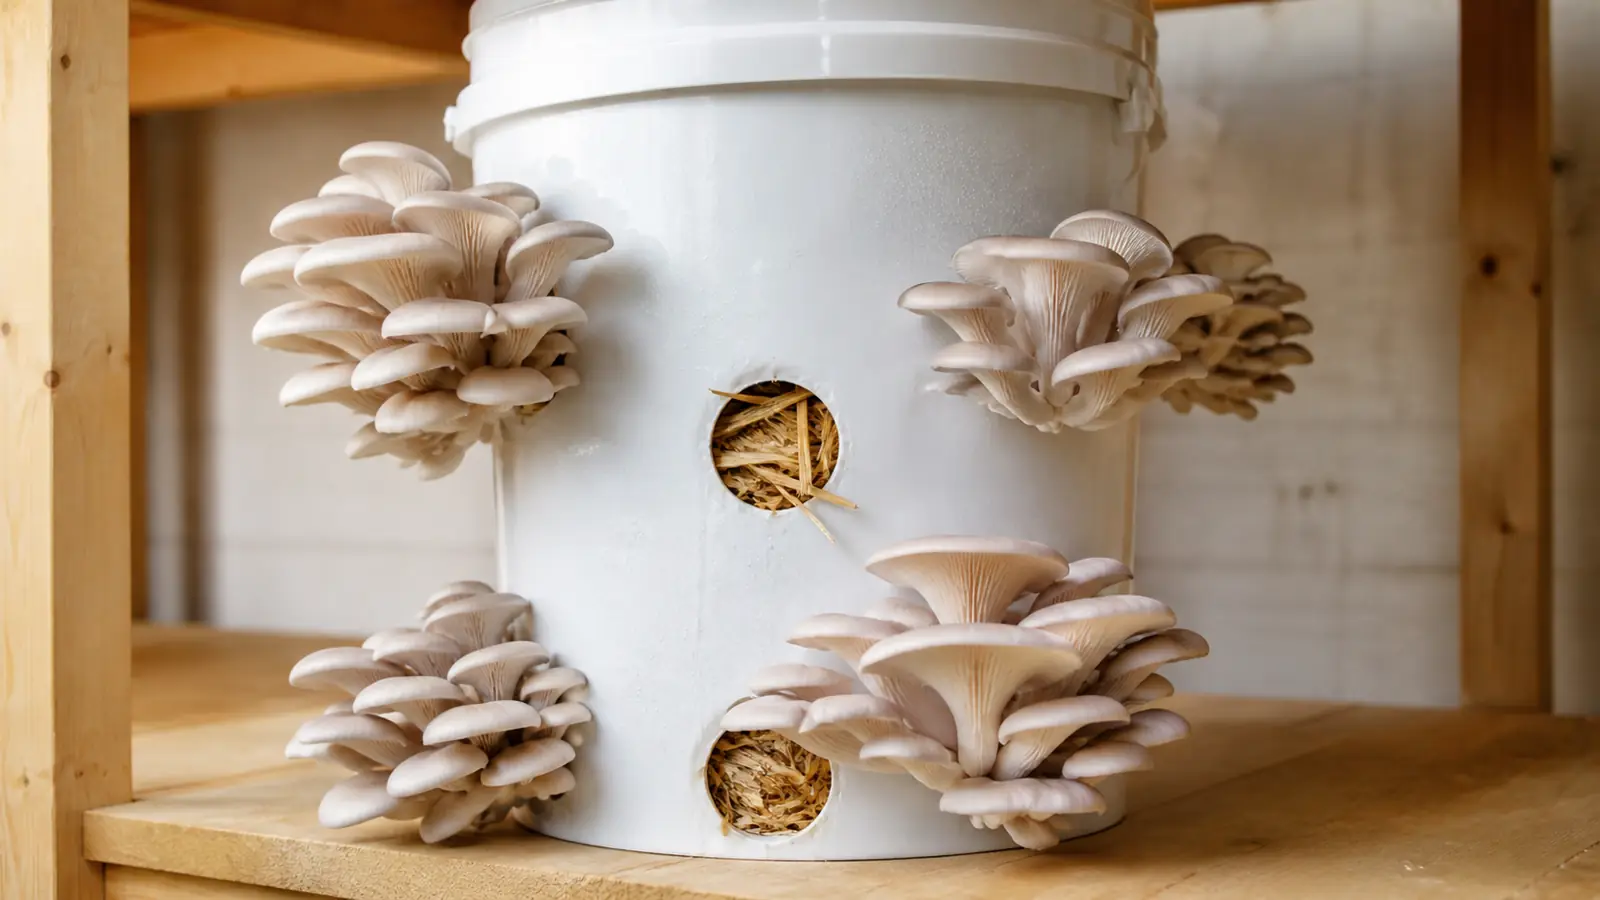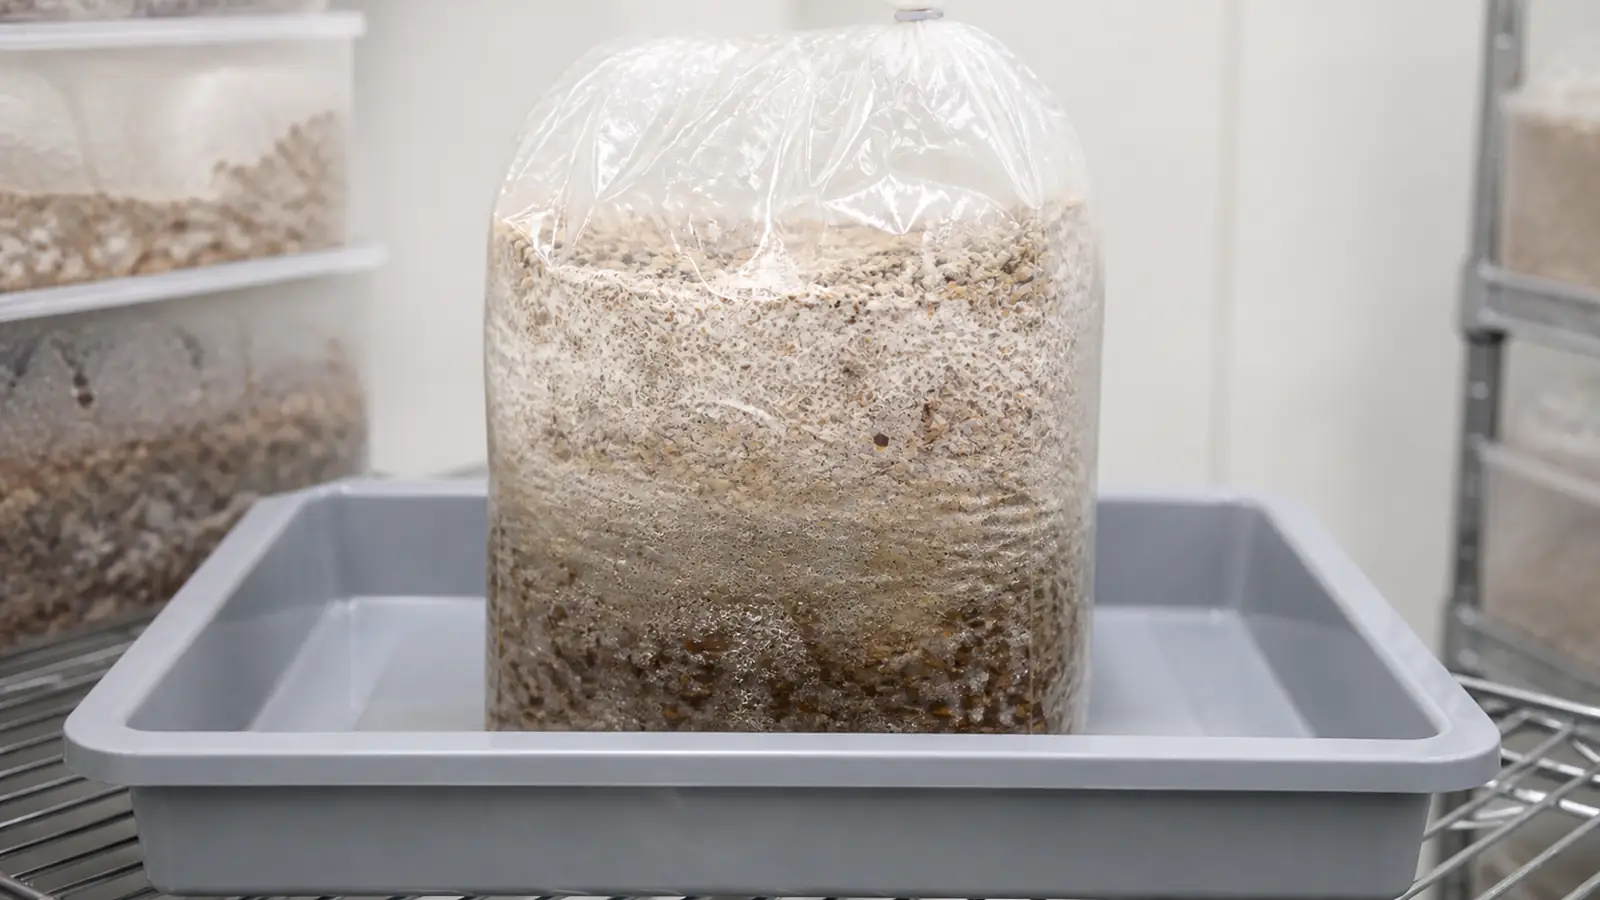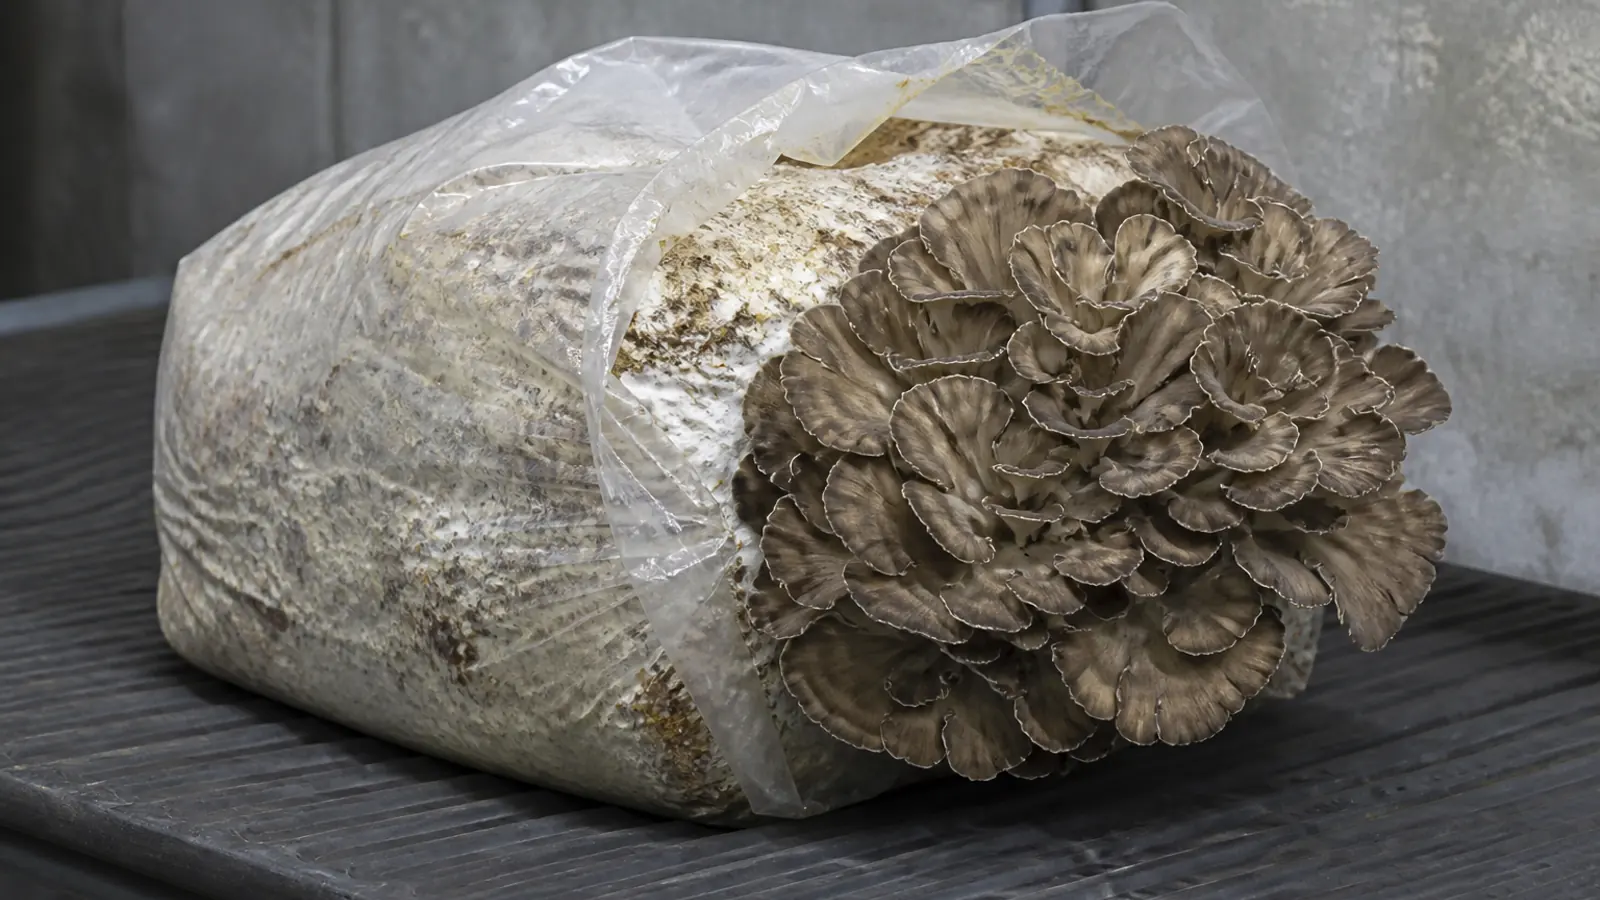
Maitake needs a fully colonized hardwood block to mature and organize a brain-like primordium before the bag is selectively opened. Cool humid replacement air then lets that concealed mass divide into one firm, many-frond cluster.
Maitake rewards patience before it rewards intervention.
A block can look fully white for weeks while the fungus is still consolidating the substrate and organizing the dense folded primordium that will become one many-frond cluster.
The decisive skill is knowing what must remain inside the bag. Open too early and the developing surface dries, but wait without reading the block and contamination or a stalled primordium can consume the same long clock.
Should you begin with a maitake block or spawn?
A prepared block removes the most contamination-sensitive work.
The producer owns the substrate formula, sterilization, inoculation, and early incubation, while you own the stage checks that follow delivery.
Spawn gives you control over materials and fill size, but it also makes every unfinished pocket or foreign colony part of your process. Maitake’s slow cycle means a small sterile-work error can remain hidden for weeks.
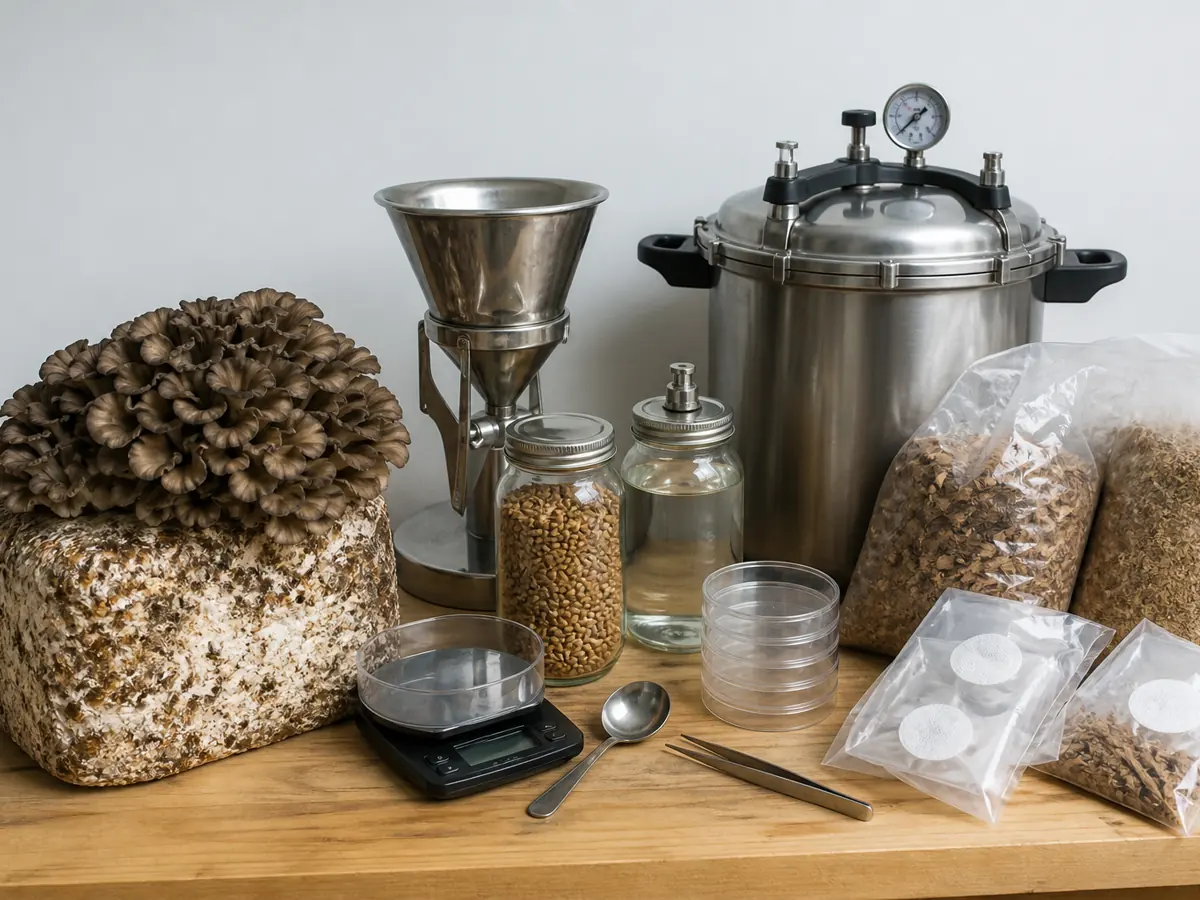
Choose the route by the process you can verify, not by the smaller purchase price. Spawn saves the producer's block-making work only by transferring every substrate and sterile-control decision to your workspace.
| Starting material | Work already complete | Work still required |
|---|---|---|
| Colonized block | Formula, treatment, inoculation, most incubation | Maturation check, primordium care, opening, fruiting, harvest |
| Verified spawn | Culture expansion by supplier | Complete substrate process and every later stage |
The first block should carry a scientific name, strain or lot, current stage, opening instructions, and environmental range.
A bag labeled only “hen of the woods†cannot prove that the culture or process belongs to cultivated G. frondosa.
Avoid cloning a wild cluster for this project. That adds field identification and culture isolation to a grow whose hidden developmental stages already demand close observation.
Growing MushroomsWhat Does a Mushroom Farm Actually Cost to Start?What substrate system supports maitake?
Maitake can use woody mixtures, but sawdust is an ingredient rather than a complete recipe. Particle size, supplement, water, container, filter, sterilization, cooling, inoculum, strain, and fill mass act together.
Research has tested oak sawdust, chestnut chips and sawdust, corn cob, corn straw, soybean straw, and rice straw in different combinations.
Their results show material flexibility and system dependence, not a menu from which the strongest ingredient in each study can be combined.

The table below turns that cutaway into a production record. Use a dedicated test unit when developing a formula, while matched production bags stay closed so they remain valid comparisons.
| Published system | Substrate evidence | Processing boundary |
|---|---|---|
| Residue comparison | Oak sawdust with several agricultural residues and wheat bran | Experimental mixtures were sterilized and compared as complete formulas |
| Chestnut-wood system | Chestnut chips, sawdust, and mixed cereal supplement | Filtered four-liter bags were heat treated before commercial inoculum was added |
| Breeding-study system | Chestnut sawdust, cottonseed hulls, bran, gypsum, sucrose, and soil | Its 50-day dark incubation belongs to that strain and mixture |
Supplement provides accessible nutrition to maitake and to competing organisms. Use it only with a validated pressure process and a clean transfer sequence that protects the cooled material.
Record dry ingredients
Weigh the woody base and each supplement separately
Add measured water
Mix until the material is evenly hydrated without free liquid at the bag base
Fill the filter bag
Preserve small air spaces and keep the filter above loose wet material
Treat the complete mass
Use a validated cycle and the pressure vessel manufacturer’s safety instructions
Cool the center
Keep the bag closed until the interior can receive spawn safely
Inoculate and seal
Distribute verified spawn, close the bag, and label culture, formula, mass, and date
One study adjusted material to about 62.5 percent water before its comparisons, while another used a different chestnut-wood system near 60 percent.
Those values are evidence for moisture control inside their own processes, not universal targets for every particle blend.
Key takeaway
Preserve one complete substrate chain | The formula, water, bag geometry, heat treatment, cooling, spawn, and strain must stay together in the record because changing one can alter the meaning of every later observation.
Why is a white maitake block not ready to open?
Uniform white coverage proves that mycelium has reached the visible substrate. Maitake usually needs further maturation before that vegetative network organizes knots and a fruiting site.
Published systems illustrate how long that protected maturation can take. One strain incubated at 25°C for about 50 days, while another commercial system held bags at 22 to 25°C for eight weeks before fruiting changes.
Those are complete-method examples rather than a five-to-eight-week promise.
Bag mass, spawn rate, formula, internal heat, strain, and handling change how quickly the center binds and matures.

Use dated photographs to distinguish a stable smooth surface from knots that persist and gain relief. The comparison should show organized local thickening rather than a change caused only by condensation or a new viewing angle.
- Colonizing
- White growth advances through visible brown material
- Fully covered
- The outside is white but still smooth and uniform
- Maturing
- The surface becomes denser and raised areas begin to organize
- Knotting
- Compact textured points persist and enlarge in a defined region
Mycelial activity can warm the center above room temperature. Space bags so heat can leave, measure near the substrate, and avoid stacking dense blocks against one another.
Do not squeeze the bag to test firmness every day.
Repeated pressure fractures the developing network and can move condensation toward the filter or weak seal.
Color alone cannot own the stage. A sound older surface may cream or darken slightly, while an expanding green colony, wet translucent channel, or foul odor through the filter requires isolation.
The transition remains closed until the supplied maturation period, whole-block condition, and organized surface changes agree. Opening a smooth white block does not create a primordium and can remove the protected humidity needed to form one.
What does a real maitake primordium look like?
A maitake primordium is a compact gray-white mass with repeated folds, lobes, or brain-like texture.
It develops at a defined part of the bag and enlarges between observations rather than appearing as a flat film across the entire surface.
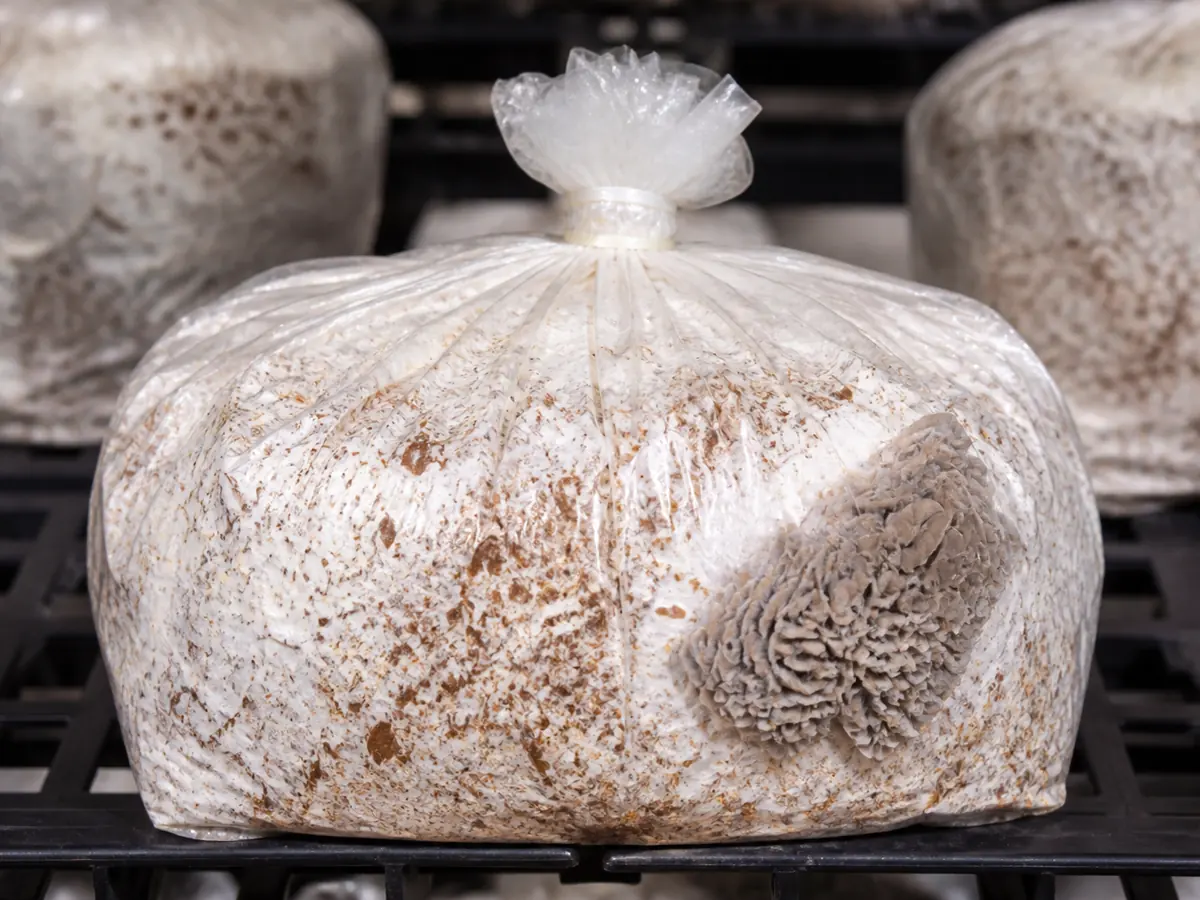
The useful comparison is movement over time. Mark the perimeter of the folded mass on a dated photograph so enlargement can be distinguished from condensation, glare, or a stationary pale lump.
Developmental research describes mycelial knots preceding primordium differentiation.
Penn State production guidance notes that primordia tend to form near the outside perimeter of the substrate surface. Their location must be found before the bag is opened because the cut should expose organized tissue rather than an arbitrary white surface.
| What you see | Likely stage | Decision |
|---|---|---|
| Smooth even white surface | Colonization or early maturation | Keep the sound bag closed |
| Dense raised knots without folded mass | Pre-primordium organization | Continue the verified maturation conditions |
| Firm folded gray-white mass that enlarges | Developing primordium | Mark the site and prepare the fruiting room |
| Wet soft lump with no organized folds | Possible bacterial or structural problem | Isolate and compare over time |
| Colored boundary expanding away from the mass | Foreign colony | Remove the sealed bag from healthy cultures |
Condensation can distort the view, so inspect under steady side light and photograph the same area each day.
Keep the bag in its established orientation while comparing the folds. Rolling or inverting it for a clearer picture can disturb the developing mass and shifts the visual reference needed to judge enlargement.
A primordium is ready for the next decision when it is organized, firm, enlarging, and located where the producer’s opening method can expose it. One pale bump that does not change is not enough evidence.
The room should already be stable before this point. Once plastic is cut, the developing mass begins exchanging water and gases directly with that environment.
Growing MushroomsHow Do Mushroom Sawdust Blocks Work from Mix to Fruit?Where should you open the maitake bag?
Expose the primordium, not the entire block.
Keeping unused substrate covered preserves moisture and leaves the bag filter and plastic to protect the mass that is not producing the cluster.
Penn State describes holes cut around developing primordia, followed by folding the top of the bag so only the fruiting area meets the room. A commercial block may use a different marked opening, and its printed method takes priority.
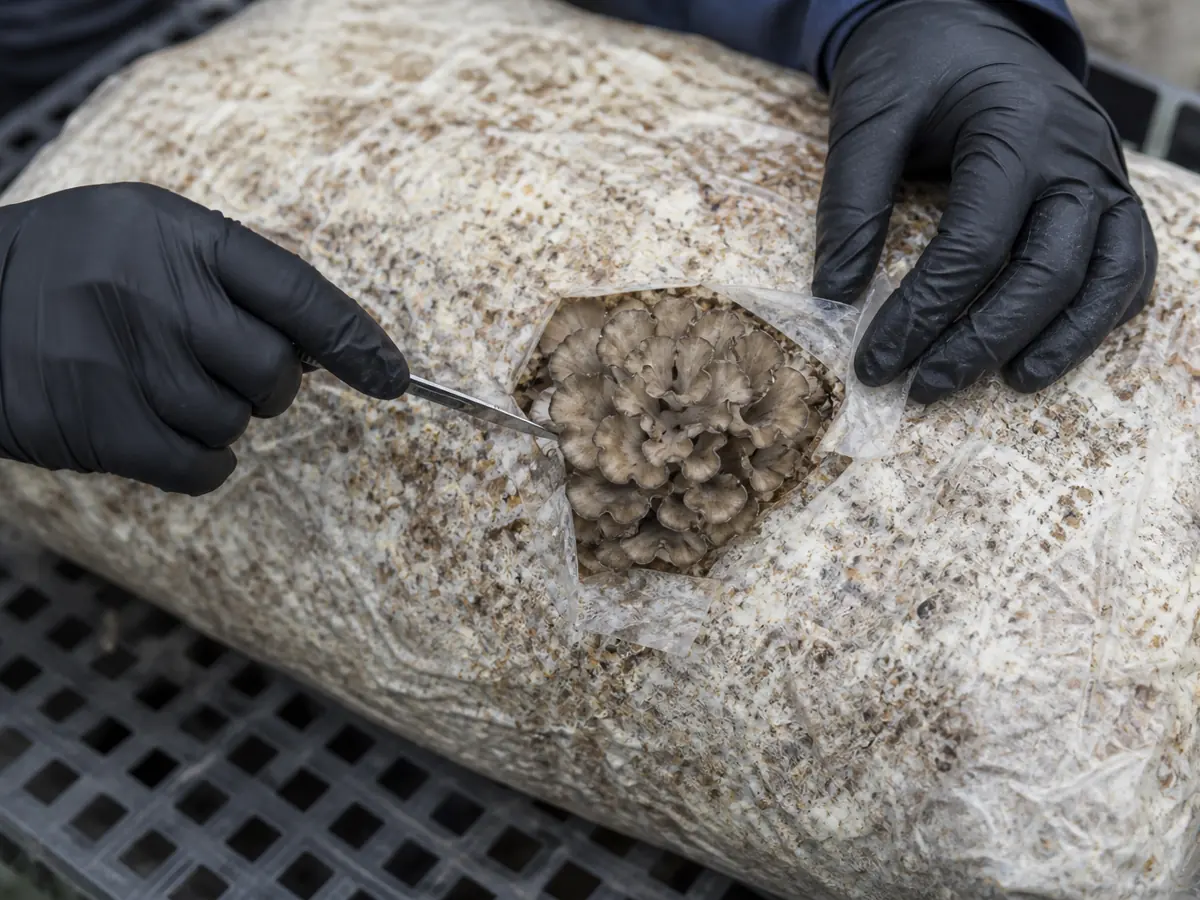
Complete the opening as one prepared sequence so the primordium spends little time beside dirty tools or an unstable room. The steps preserve covered substrate while giving the organized mass a single clear exit.
Stabilize the room
Confirm temperature, humid air, light, drainage, and replacement airflow before cutting
Mark the primordium
Outline the firm enlarging mass without pressing it
Clean the bag and tool
Remove surface debris and reduce transfer from the work area
Follow the bag design
Cut the producer’s marked holes or expose only the developing site
Preserve covered substrate
Fold or retain plastic as directed instead of peeling the whole block bare
Reserve cluster space
Keep the opening clear of shelves, walls, and direct fan or humidifier discharge
The developing primordium is more fragile than a mature cluster. Avoid touching its folds, stretching the opening repeatedly, or spraying water into the cut.
Let humid room air reach the exposed mass
Keep the remaining substrate wrapped
Open a bag with an unorganized or wet collapsing surface
Cut several extra sites to chase a larger yield
More openings divide the block’s water and nutrients among competing fruiting sites.
They also multiply the exposed edges that can dry or collect contaminants.
Watch the first opening for continued enlargement before making any supplier-supported adjustment. An unchanged cut for one day is not a failure, but shrinking folds or a whitening dry surface indicate that the local environment needs review.
How do cool air and low carbon dioxide shape maitake?
Maitake fruiting follows warmer dark incubation with a cooler, humid, lighted environment.
Published systems used different exact ranges, so the useful agreement is the stage change rather than one copied setpoint.
One developmental study fruited its strain at 18 to 22°C with 85 to 95 percent relative humidity and light. Another system reduced temperature to 15°C plus or minus 3°C and raised humidity to 80 to 90 percent for its fruiting period.
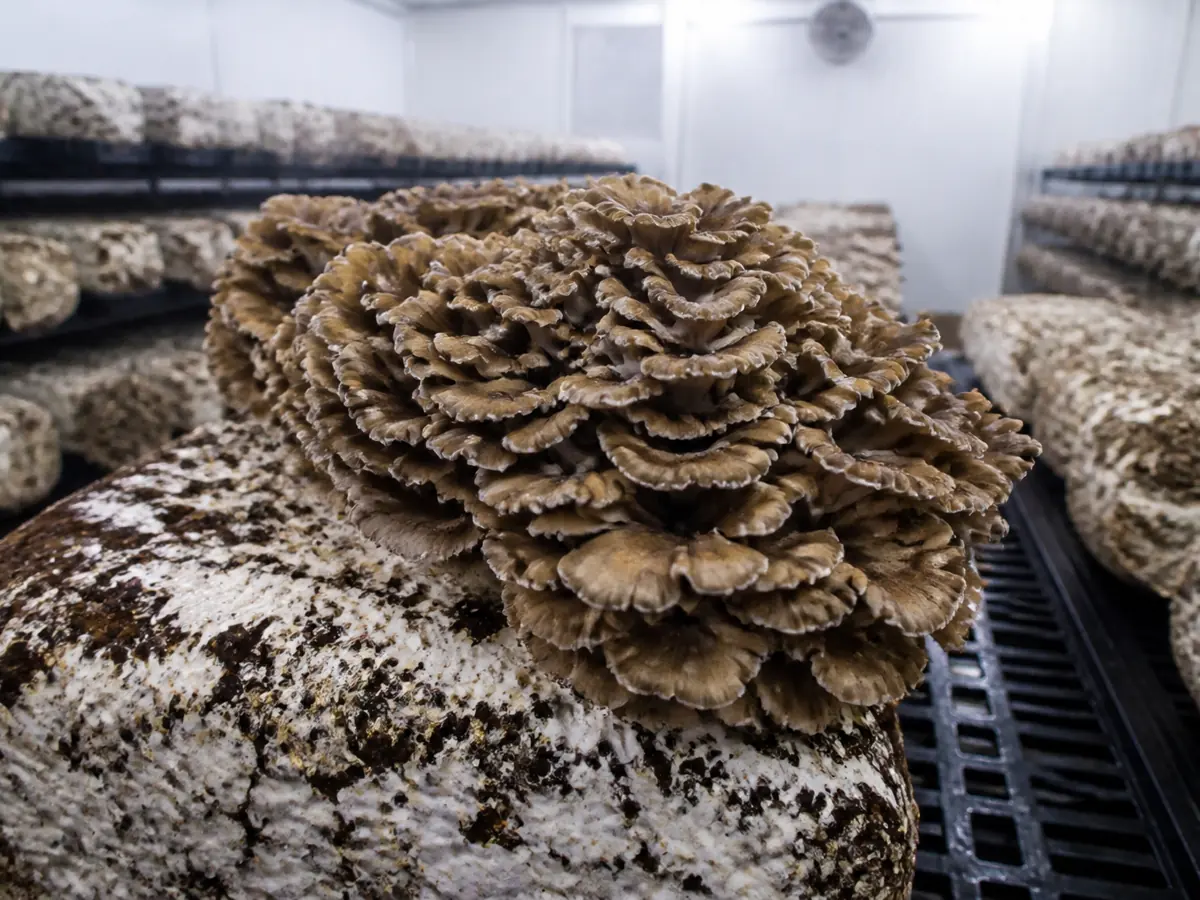
Measure where the fronds actually develop rather than at the doorway or ceiling. A shelf post, neighboring cluster, or humidifier discharge can create a local pocket that the room average does not reveal.
Carbon dioxide changes the architecture of the crop.
A controlled sawdust-bag study found favorable initiation and development between 500 and 800 parts per million, while levels above 1,000 produced abnormal lower-quality fruit bodies.
| Control | What it does | How to verify it |
|---|---|---|
| Temperature | Supports the strain’s fruiting transition | Measure beside the exposed primordium |
| Humid air | Slows surface water loss | Inspect margins and use a crop-height sensor |
| Replacement air | Removes local carbon dioxide | Read cluster architecture and air path together |
| Light | Supports normal differentiation and orientation | Provide regular diffuse light without heating |
| Drainage | Prevents pooled water around blocks | Keep shelves and floor washable and free draining |
Treat the carbon-dioxide study as strong evidence for gentle exchange, not a guarantee that one inexpensive sensor controls every pocket around a cluster. Shelf obstruction and expanding neighboring crops can create a stale layer even when the room average looks acceptable.
Humidity cannot replace fresh air. A sealed wet enclosure can hold high relative humidity while carbon dioxide accumulates around the fronds.
Test the empty room before opening the first bag. Stable conditions without a crop make later changes easier to attribute to block position, crop respiration, or equipment discharge.
Growing MushroomsHow Do You Build an Outdoor Mushroom Bed That Lasts?Which frond shapes show that the room is working?
Healthy maitake develops many firm branching fronds from one joined base.
The gray-brown caps divide and expand while pale growing margins remain supple rather than crisp or waterlogged.
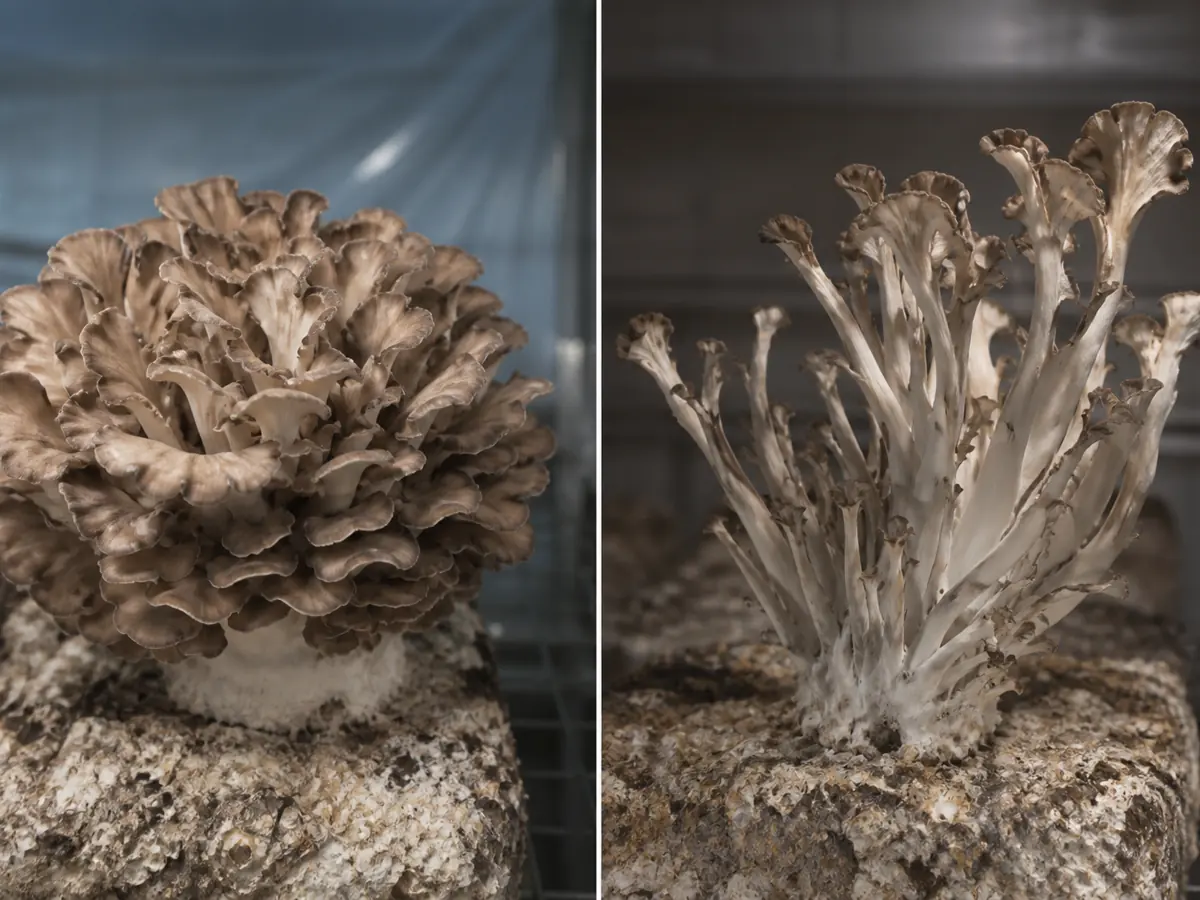
Long intervals without visible division can reflect stale air, unsuitable temperature, a dry primordium, or a weak block. Diagnose the local pattern before changing the whole room.
If one cluster distorts behind a shelf post while another develops normally, inspect the local air path first. Increasing the main fan can dry every sound cluster while leaving the blocked pocket unchanged.
- Move direct airflow away from fronds.
- Clear physical obstruction around the developing cluster.
- Confirm exhaust and replacement air at crop height.
- Adjust one control and compare the next growth interval.
Once the fronds are dividing, do not use cap color as the only maturity or climate signal because strain and light affect tone.
Firmness, repeated division, edge condition, and whole-cluster shape give a stronger combined record.
The block’s response should guide small corrections. A crop that is expanding normally needs stability more than another attempt to optimize a number.
Which maitake bag changes require isolation?
A mature maitake block can become dense, cream, or lightly tan, and the primordium itself develops gray-white folds before darker fronds appear.
These expected changes remain organized and firm.
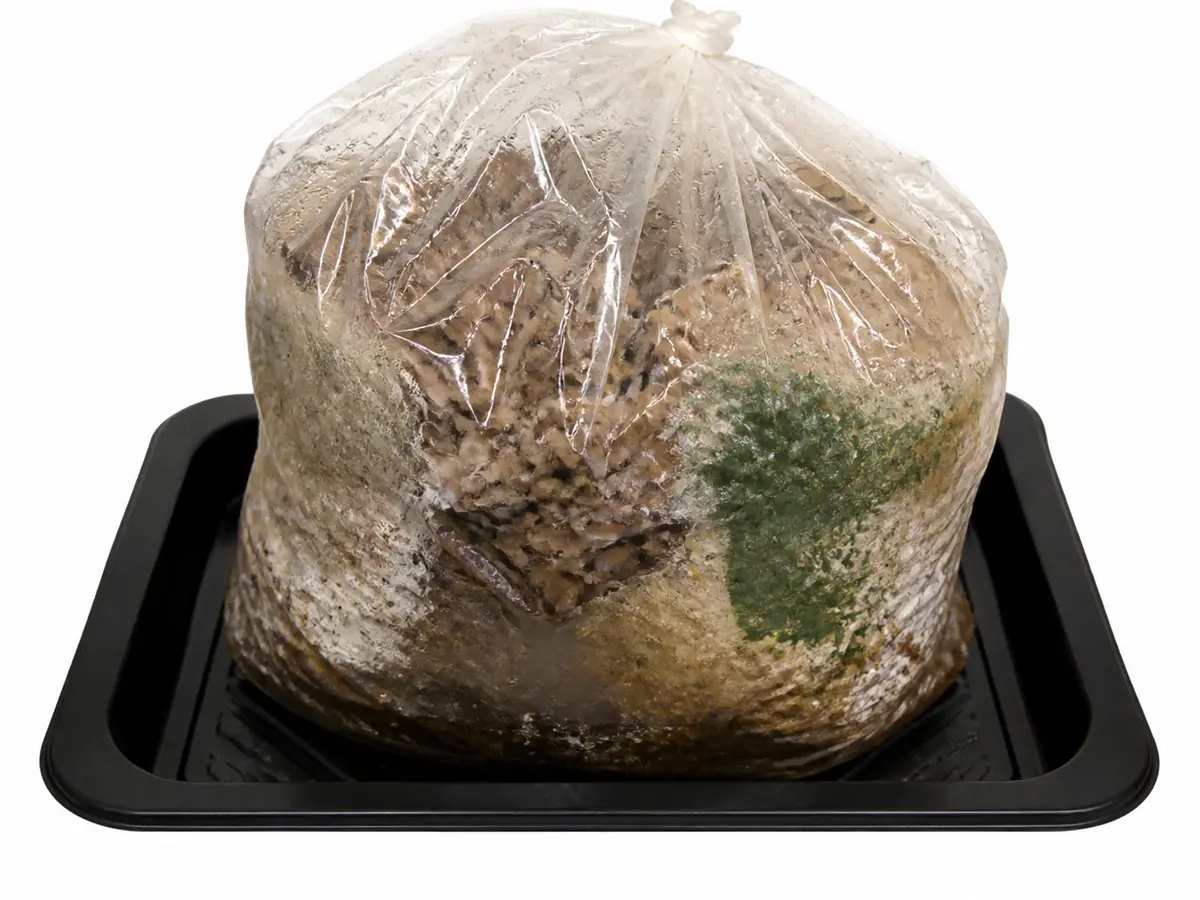
Move the bag on a washable tray and record the first abnormal boundary before cleaning its former shelf position. That sequence preserves evidence while limiting the path that a leaking or sporulating unit crosses.
An expanding green, black, pink, or orange colony is not normal aging. A wet compressed base, spreading translucent channel, foul odor through the filter, or soft collapsing primordium also changes the decision from adjustment to containment.
Warning
Move the sealed bag before examining it closely | Maitake shares a room for many weeks, so opening a suspect container can spread material across several valuable crops at once.
Choose the immediate action from structure and movement, then use the later review to trace where the defect entered. A dry primordium can stay in the adjustment lane, while an expanding colony or wet collapse leaves the room sealed.
| Bag state | Immediate action | Later review |
|---|---|---|
| Sound dense surface and firm primordium | Keep observing | Compare daily enlargement |
| Dry stalled primordium without foreign color | Separate from direct draft | Review local humidity and air path |
| Expanding colored colony | Isolate sealed | Review treatment, transfer, and incubation records |
| Wet collapsed base or foul odor | Isolate and retire | Check water, packing, cooling, and bag integrity |
Do not cut around a foreign patch or harvest through a contaminated block.
The visible boundary does not show how far competing growth or bacterial activity extends inside the woody mass.
Record the culture lot, formula, bag mass, treatment, cooling time, inoculation date, stage changes, and first abnormal observation. Several bags failing at the base suggest a different upstream cause from one exposed primordium drying beside a vent.
Clean the isolation path and any washable surface the bag touched. Diagnose the earliest shared defect before changing a fruiting room that may not have introduced the problem.
When should a maitake cluster be harvested?
Harvest one cohesive cluster when its gray-brown fronds have expanded and remain firm, with pale growing margins narrowing but not yet dry and brittle.
Waiting for every small frond to flatten can push the oldest thin edges beyond their best texture.
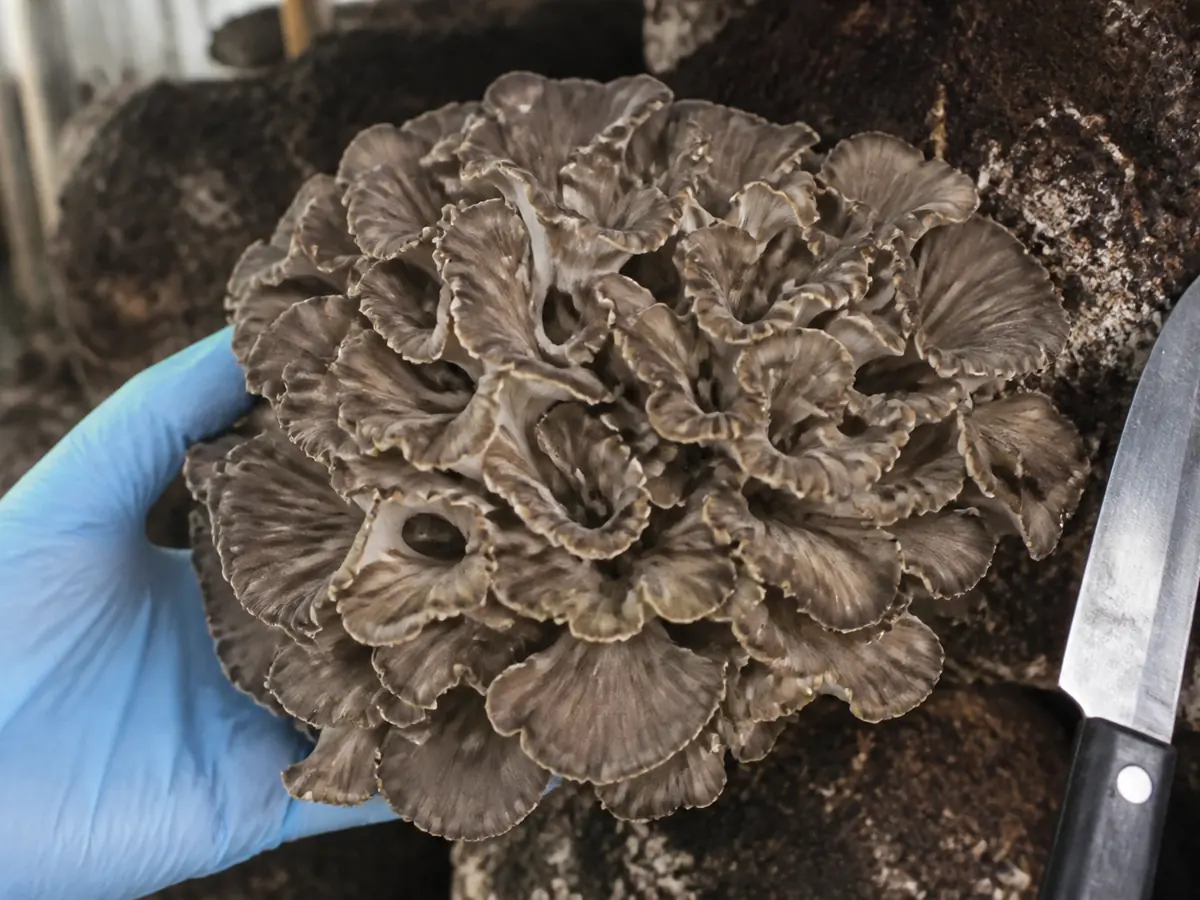
Support the cluster and cut the joined base cleanly near the substrate. Avoid pulling a deep crater from the block, then trim attached woody material away from the harvested food.
Cool the cluster promptly in a shallow breathable container. Crowding warm fronds in a sealed bag traps moisture between their many folds and makes bruising harder to inspect.
- Keep the harvested cluster intact until it has cooled.
- Brush or trim substrate rather than soaking the folds.
- Refrigerate promptly and cook cultivated maitake before eating.
- Separate any culinary or personal-safety decision from the grow-room evidence.
A clean harvest does not prove that the block can support another flush.
Inspect the remaining surface for structure, drainage, odor, foreign color, and the producer’s supported cycle.
Rehydrate only by the block producer’s method. Repeated soaking can turn a weakening woody mass into a waterlogged container without creating another organized primordium.
The most useful record closes where the next crop begins. Save the time from full coverage to knotting, knotting to primordium, opening to frond division, and division to harvest alongside room readings and photographs.