An outdoor mushroom bed works when a bed-adapted culinary species receives enough clean, moist substrate to colonize through changing weather. Match wine cap to hardwood chips or straw, size the bed by volume, distribute purchased spawn broadly, and identify every fruit body before it reaches the kitchen.
An outdoor mushroom bed is a ground-level layer of food where you inoculate clean wood chips, straw, or mature compost with a bed-adapted fungus and keep it moist through colonization and seasonal fruiting.
Wine cap is the most forgiving place to start because it colonizes biologically active garden mulch. The method is slower and less predictable than fruiting an indoor block, but it needs little equipment and a productive patch can continue for several seasons.
Species, substrate, and drainage decide the result before watering begins because a shaded corner cannot rescue the wrong mushroom, too little food, contaminated material, or a flooded low spot.
Which mushrooms are suited to a ground-contact bed?
Choose the mushroom before you choose the mulch. Outdoor beds favor saprotrophs that can compete in straw, chips, or compost already occupied by bacteria and other fungi.
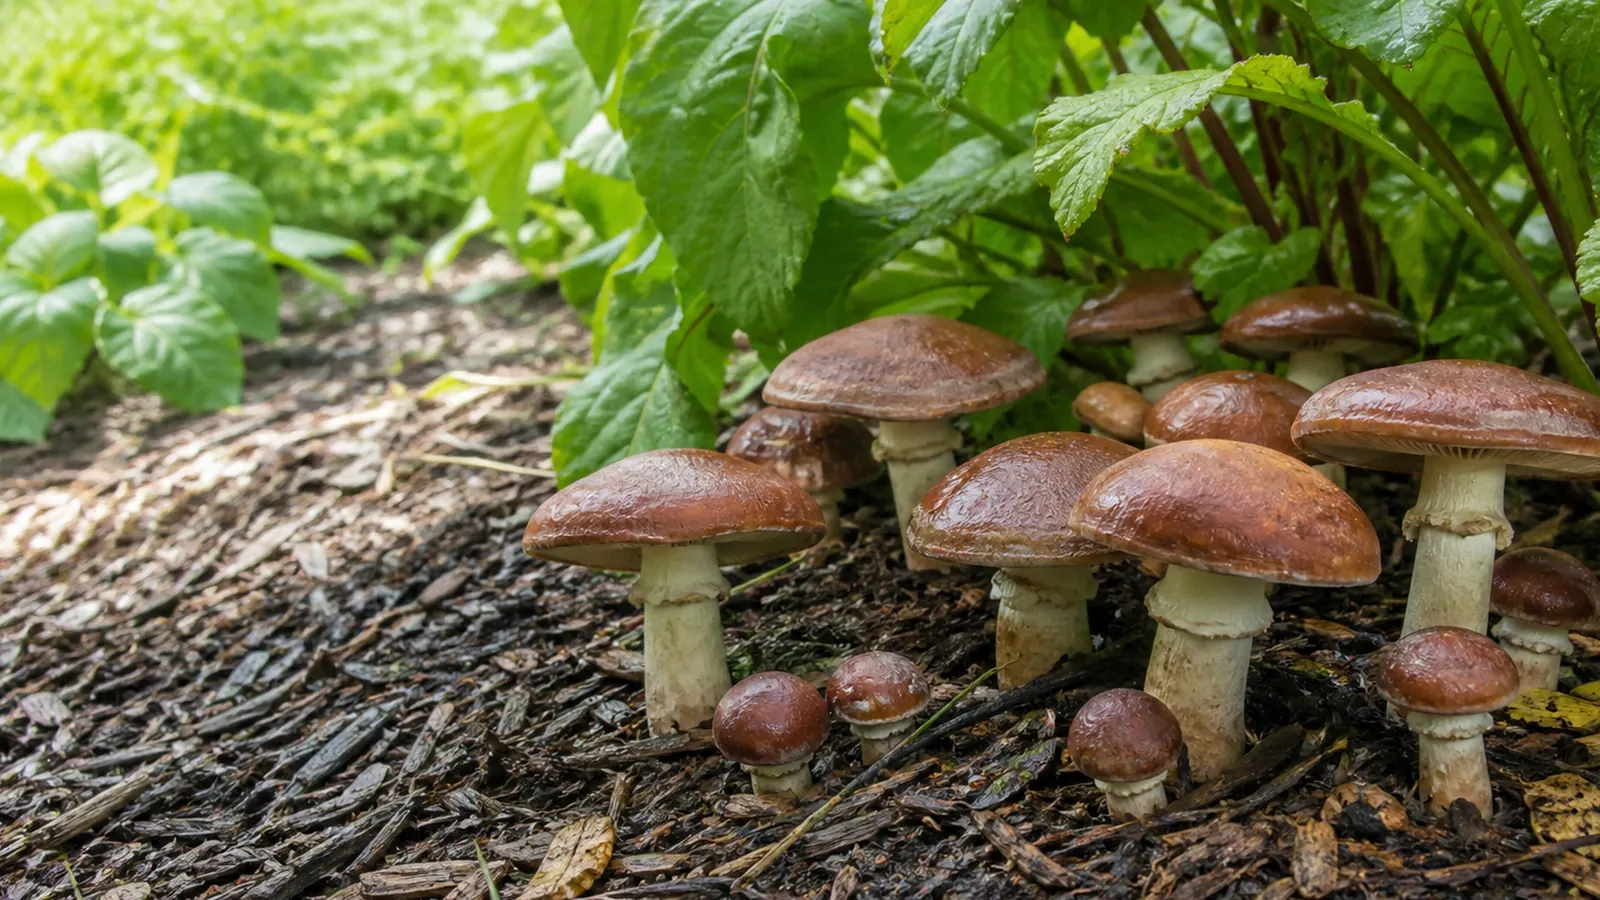
Wine cap, Stropharia rugosoannulata, is the default beginner crop for a hardwood-chip or straw bed. Its mycelium can spread through mulched paths, berry plantings, and the spaces around large garden plants, provided the bed holds moisture without staying saturated.
Almond Agaricus, Agaricus subrufescens, belongs in mature compost instead of a plain chip bed because this warm-season crop needs material that holds water while retaining enough structure for air to move.
Oyster mushrooms can fruit from outdoor straw projects, but their usual methods include pasteurized straw in bags or containers, hardwood logs, totems, and controlled blocks. Shiitake, lion's mane, and nameko are even stronger signals to change methods because extension tables assign them mainly to logs, stumps, or totems.
| Mushroom | Suitable bed food | What the choice means |
|---|---|---|
| Wine cap | Mixed hardwood chips or clean straw | Best-supported beginner bed with a broad garden use |
| Almond Agaricus | Finished, mature compost | Needs a compost bed and warm-season moisture management |
| Oyster mushroom | Prepared straw in selected outdoor projects | Faster material and contamination dynamics than a perennial chip bed |
| Shiitake or lion's mane | Hardwood logs, totems, or controlled blocks | Choose a wood-based method built for the species instead |
The culture should come from a reputable supplier, name both species and strain, and be legal for outdoor use where you live because a fungus released into a garden can spread beyond the prepared rectangle.
Do not substitute spores, spent mushroom compost, or an old grocery-store mushroom for live spawn because spawn is actively growing mycelium carried on clean material that gives the culture a strong start.
Growing MushroomsWhat Does a Mushroom Farm Actually Cost to Start?Where should you put an outdoor bed?
Watch the proposed site after rain and again during the driest part of the afternoon. The useful spot stays cooler than exposed pavement, drains rather than puddles, and lies close enough to a hose that watering will not become an avoided chore.
Shade protects the substrate from rapid water loss, but the bed does not need cave-like darkness. Dappled light below shrubs, the north or east side of a structure, or a mulched path beneath tall vegetables can work because each combines indirect light with shelter from wind.
Reject sites that collect runoff from treated wood, roads, roofs with questionable drainage, or contaminated soil because fungal colonization does not make every pollutant harmless or remove metals.
- Light
- Indirect or dappled light with protection from harsh afternoon sun
- Drainage
- Water enters the chips but does not stand around them after rain
- Access
- A hose or watering can reaches the whole bed without trampling it
- Feedstock
- Known, untreated hardwood chips, clean straw, or suitable mature compost
- Boundary
- A permanent label records species, strain, supplier, and inoculation date
Existing mulch can be useful if its source is known, but decorative bark of uncertain treatment and freshly painted landscape timbers do not belong beside a food crop. Avoid chips from diseased or chemically treated trees, and ask the arborist or supplier what wood entered the load.
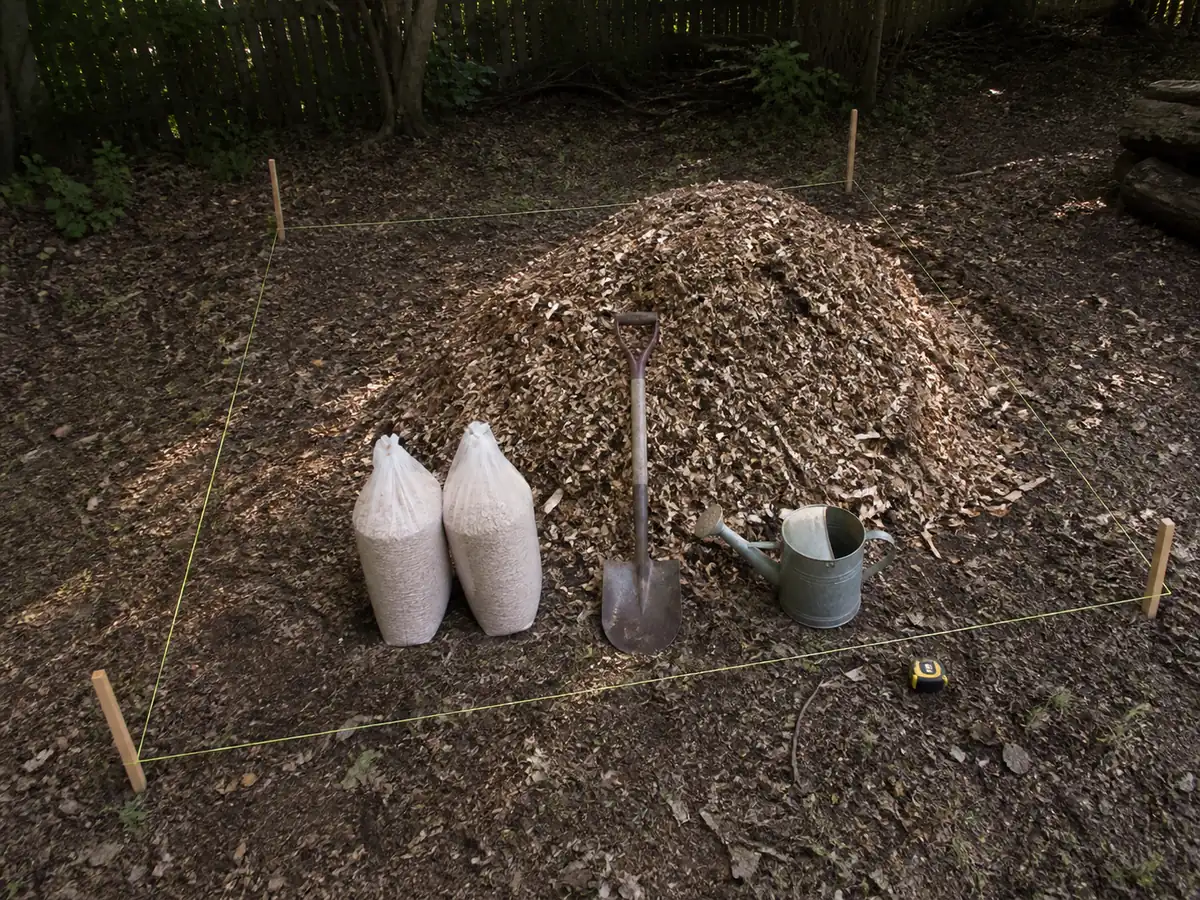
Mark the corners before adding material because a broad bed is easier to keep evenly moist than a narrow ribbon, while one wider than your reach encourages footsteps that compress the center.
How much spawn and mulch will you need?
Material volume comes from the bed's inside dimensions, so multiply length by width by depth in feet for cubic feet and divide that result by 27 for cubic yards.
A 4-foot by 8-foot bed at a finished depth of 4 inches uses 4 x 8 x 0.333, or about 10.7 cubic feet. That equals roughly 0.40 cubic yard before settling, so a few small mulch bags rarely build the bed shown in a wide garden photograph.
The depth describes the final substrate layer rather than a soil-filled trench, with fungal food staying above mineral soil where chips can drain and exchange air after turf or tall weeds are removed.
Use the spawn rate printed for the exact culture you bought. A Washington State University trial used about 2 pounds of sawdust spawn in each 16-square-foot, 4-inch-deep wine cap bed, which would scale to about 4 pounds in the worked 4-by-8-foot example, but it remains one trial example rather than a universal recipe.
- Measure the bed's finished inside length and width.
- Convert the planned depth from inches to feet by dividing by 12.
- Order enough substrate for the calculated volume plus modest settling.
- Buy labeled spawn at the supplier's stated area or volume rate.
- Reserve clean cover material and enough water to wet layers during construction.
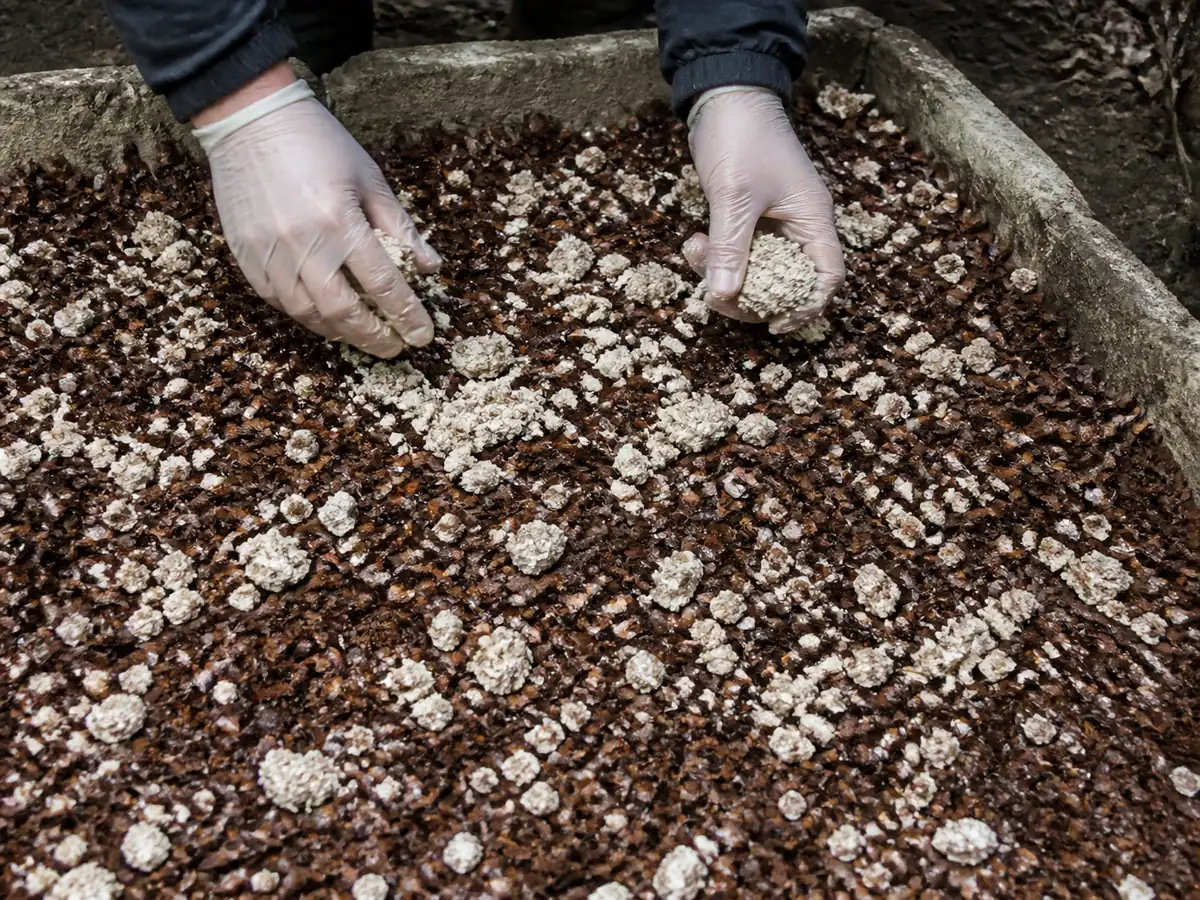
Sawdust spawn usually distributes through chips more evenly than a handful of large blocks. Grain spawn can provide many inoculation points, but exposed grain also attracts animals and should be covered promptly with the final substrate layer.
Plan water as part of installation rather than an afterthought. Dry chips can shed water at first, so wet them in thin layers and pause long enough for moisture to enter the wood instead of running off the surface.
How do you layer an outdoor mushroom bed?
Choose a mild installation day that fits the supplier's temperature guidance and local weather rather than relying on spring or fall as universal planting windows.
The goal is broad contact between spawn and moist food because large clumps leave long gaps for the crop to cross, while heavy compaction removes air spaces from the bed community.
Prepare the ground
Cut tall growth low, remove persistent weeds, and level obvious hollows without digging a deep soil trench.
Wet the base
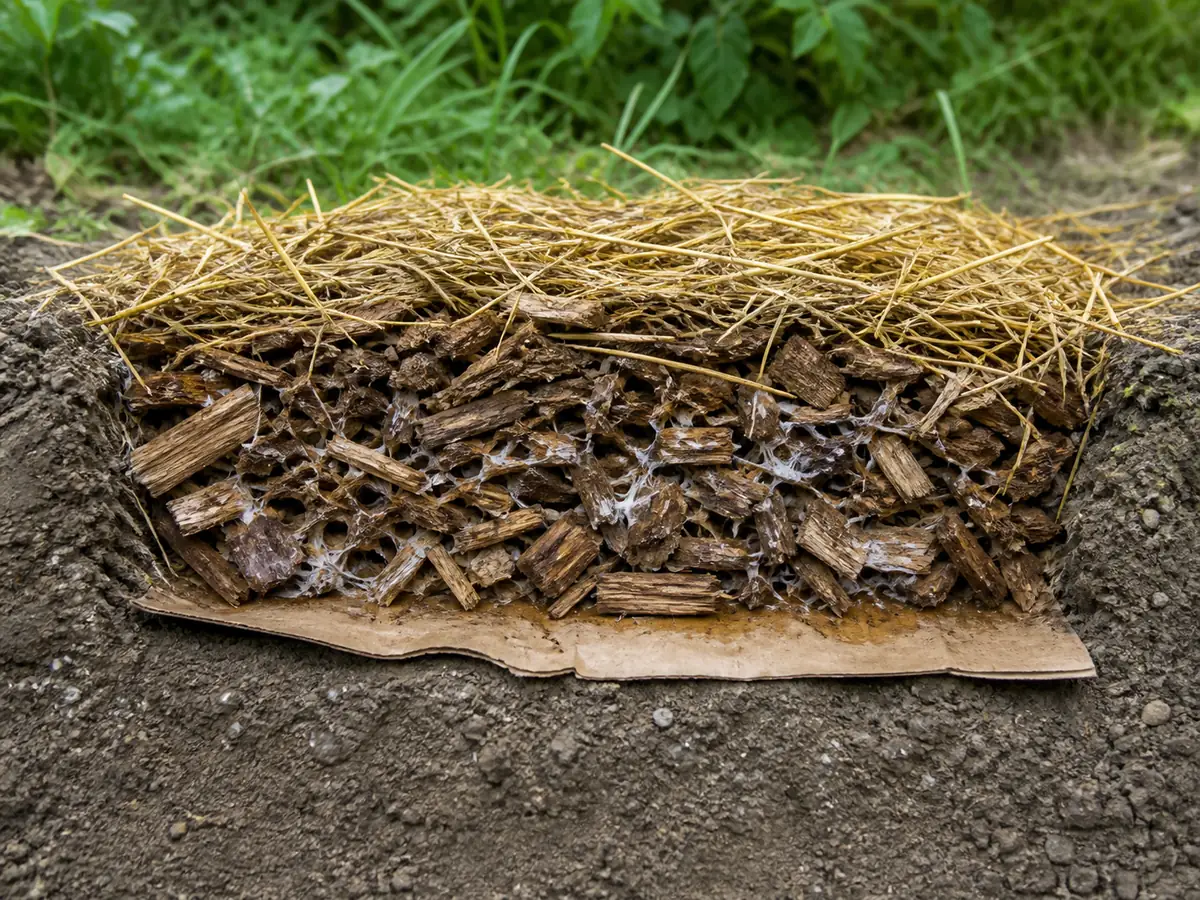
Soak plain cardboard if you use it for weed suppression, lay it flat with small overlaps, and leave drainage paths at the bed edge.
Add the first food layer
Spread wetted chips or straw in a shallow, even layer so no corner begins as a dry mound.
Distribute the spawn
Break sawdust spawn into small pieces and scatter it across the full area at the supplier's rate rather than emptying it in rows or pockets.
Complete the substrate
Add the remaining food in shallow passes, distributing any remaining spawn between passes and stopping near the planned finished depth.
Settle without packing
Water slowly until all layers are evenly damp, then press only enough to remove unstable voids while preserving coarse pore space.
Cover and label
Add a thin loose cover of straw, leaves, or chips, then mark the species, strain, source, and inoculation date beside the bed.
Cardboard is optional weed control, not the primary food layer. Avoid glossy stock, plastic tape, and a thick stack that holds water as a separate saturated sheet.
Finish by checking several places with a ruler because even finished depth makes later dry patches or puddles easier to trace to weather and drainage.
Growing MushroomsHow Do Mushroom Sawdust Blocks Work from Mix to Fruit?How wet should the bed stay?
Push two fingers about 2 inches into the substrate and lift a small handful. Chips should feel cool and evenly damp, with no dusty interior and no water squeezing freely from the mass.
The exposed surface often dries before the active layer below it. Watering from surface color alone can saturate an already moist bed, so open one inspection point near the edge and replace the chips after each check.
Because rainfall, tree roots, wind, chip size, and bed area change the interval, a Washington trial increased irrigation as August became drier instead of carrying one spring schedule into summer.
- Water slowly enough for chips to absorb moisture instead of floating or washing spawn toward one edge.
- Recheck after watering to learn how deeply that amount reached.
- Restore a thin loose cover when sun and wind dry the surface too quickly.
- Pause irrigation when rain has wet the full depth and the bed drains slowly.
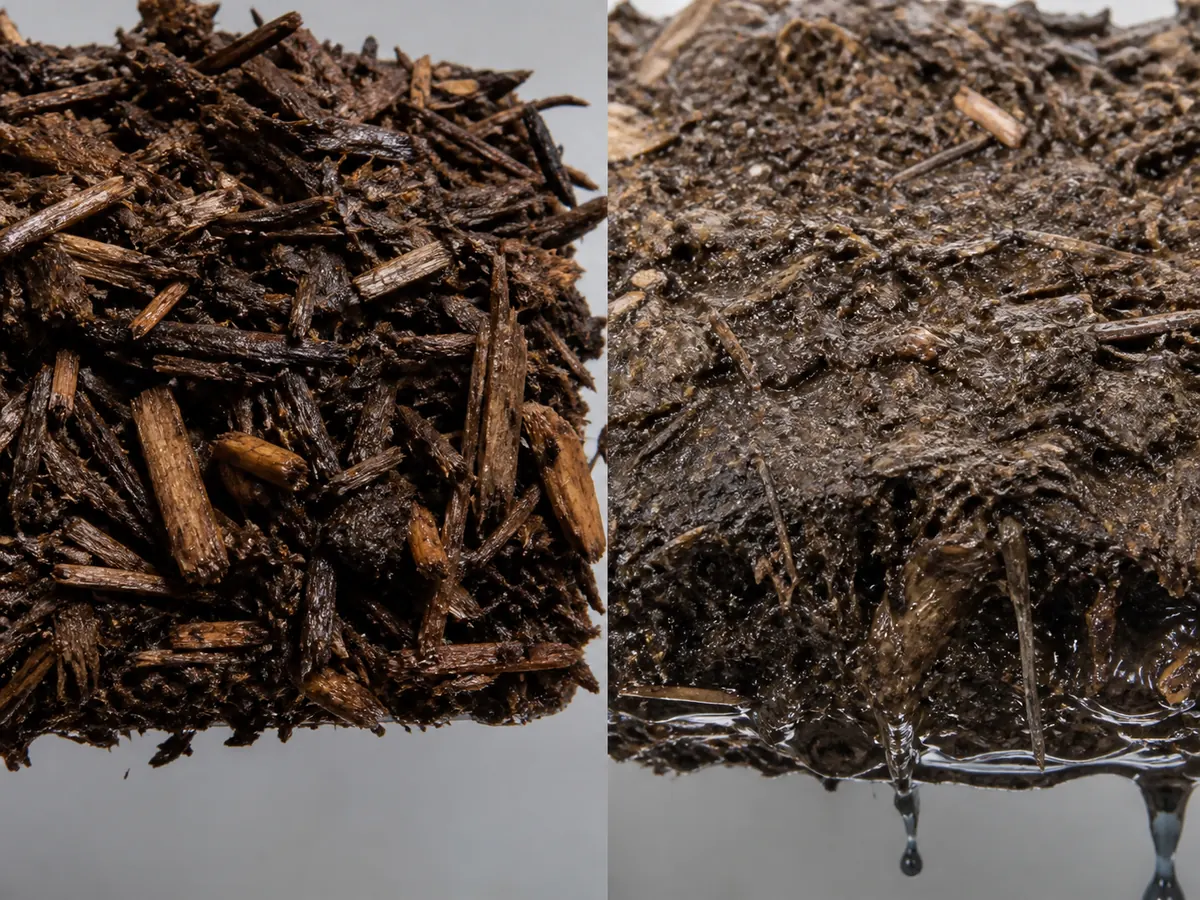
A sour or stagnant odor, persistent standing water, and matted fines point toward excess water or poor drainage. Lift the cover, clear blocked edges, and correct the source rather than adding fresh dry chips only to hide the wet layer.
Dry chips look pale inside and separate instead of holding a cool, flexible feel, so rewet in several gentle passes and improve shade or cover before the next dry spell.
Moisture and air must remain together within open substrate rather than under a sealed plastic roof that traps heat and excludes fresh air.
How long before an outdoor bed fruits?
Mycelium is the feeding body of the cultivated fungus. Mushrooms are temporary reproductive structures, so a bed can be alive and spreading well before it produces a cap.
Inspect one small edge rather than turning the whole bed. Healthy wine cap growth often appears as white threads and patches connecting neighboring chips, with more pieces holding together as colonization advances.
One white patch does not identify every fungus in the bed, so confirm that growth begins from known spawn points, connects the intended food, and advances with the crop's expected texture.
Cornell and N.C. Cooperative Extension give wine cap a broad fruiting window of about two to six months when seasonal temperatures remain suitable. That range describes possibility, not a deadline because bed temperature, moisture, culture vigor, inoculation date, and weather cues differ.
A colonized bed that has not fruited can still progress normally if you keep the substrate stable, record rain and temperature changes, and avoid weekly digging that breaks connections and exposes moist chips.
Growing MushroomsHow Does a Mushroom Grow Kit Actually Work?Is everything that appears in the bed yours?
An inoculated bed remains open to spores and fungi already present in soil, compost, chips, and nearby vegetation. A mushroom that emerges inside the marked rectangle is therefore a candidate for identification, not proof of the planted crop.
Compare the whole specimen with the supplier's species description and a reliable field source. Cap color, underside structure, stem features, ring or veil remnants, growth habit, bruising, odor, and changes from young to mature stages must tell one consistent story.
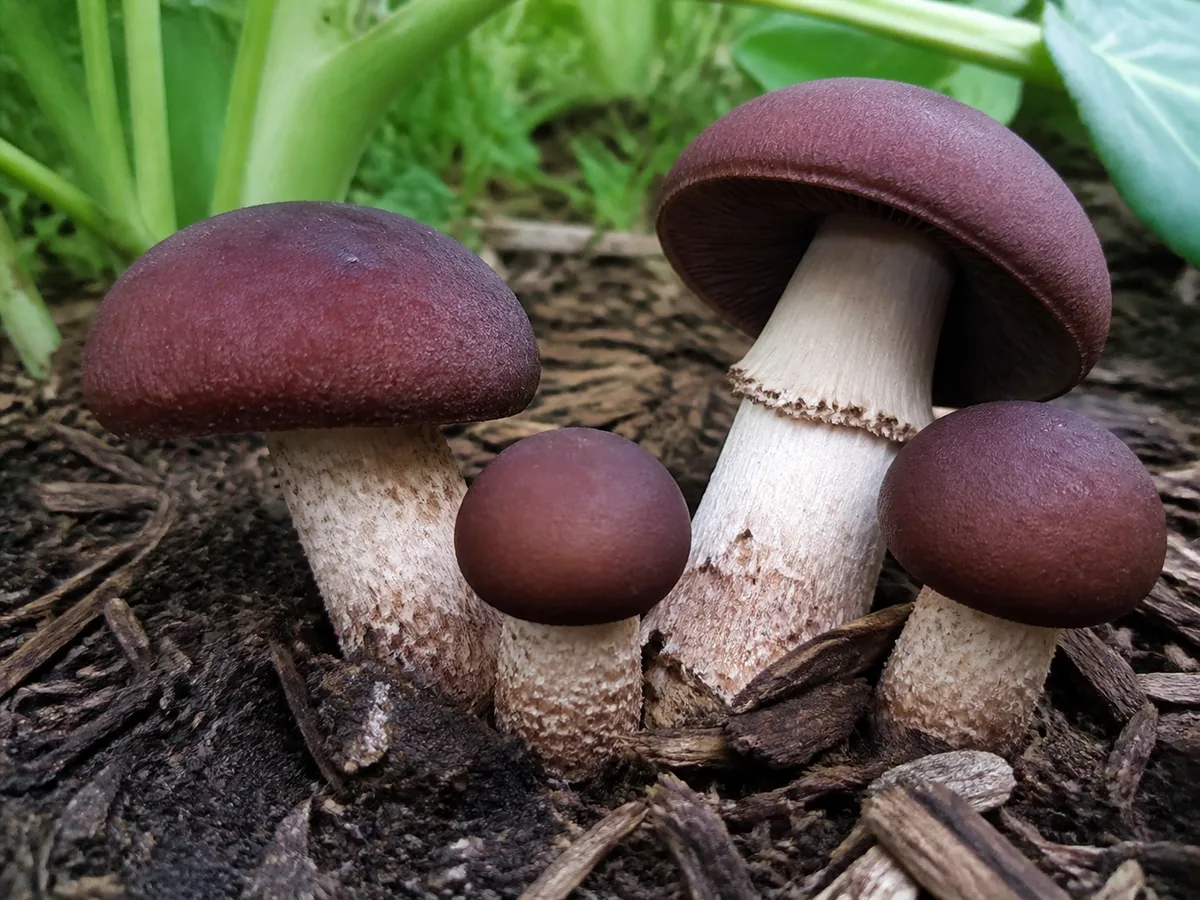
Because wine caps can begin burgundy and fade as they expand, confirm the expected gills, thick pale stem, ring features, habit in chips, and dark purplish-brown spore deposit rather than trusting one brown-red cap.
Warning
Never eat a mushroom solely because it grew in an inoculated bed. The bed boundary is not identification, so leave any specimen that fails several independent feature checks out of the harvest and ask a qualified local identifier to examine it.
Do not taste an unknown mushroom as an identification test. Wash your hands after handling questionable specimens and keep children and pets away from the fruiting area.
- Photograph the cap, underside, stem base, and surrounding substrate before moving the specimen.
- Keep unknown mushrooms separate from the confirmed crop and from kitchen containers.
- Use a spore print as supporting evidence only, because several unrelated mushrooms can share a print color.
- Discard any specimen whose identity, condition, or exposure to chemicals remains uncertain.
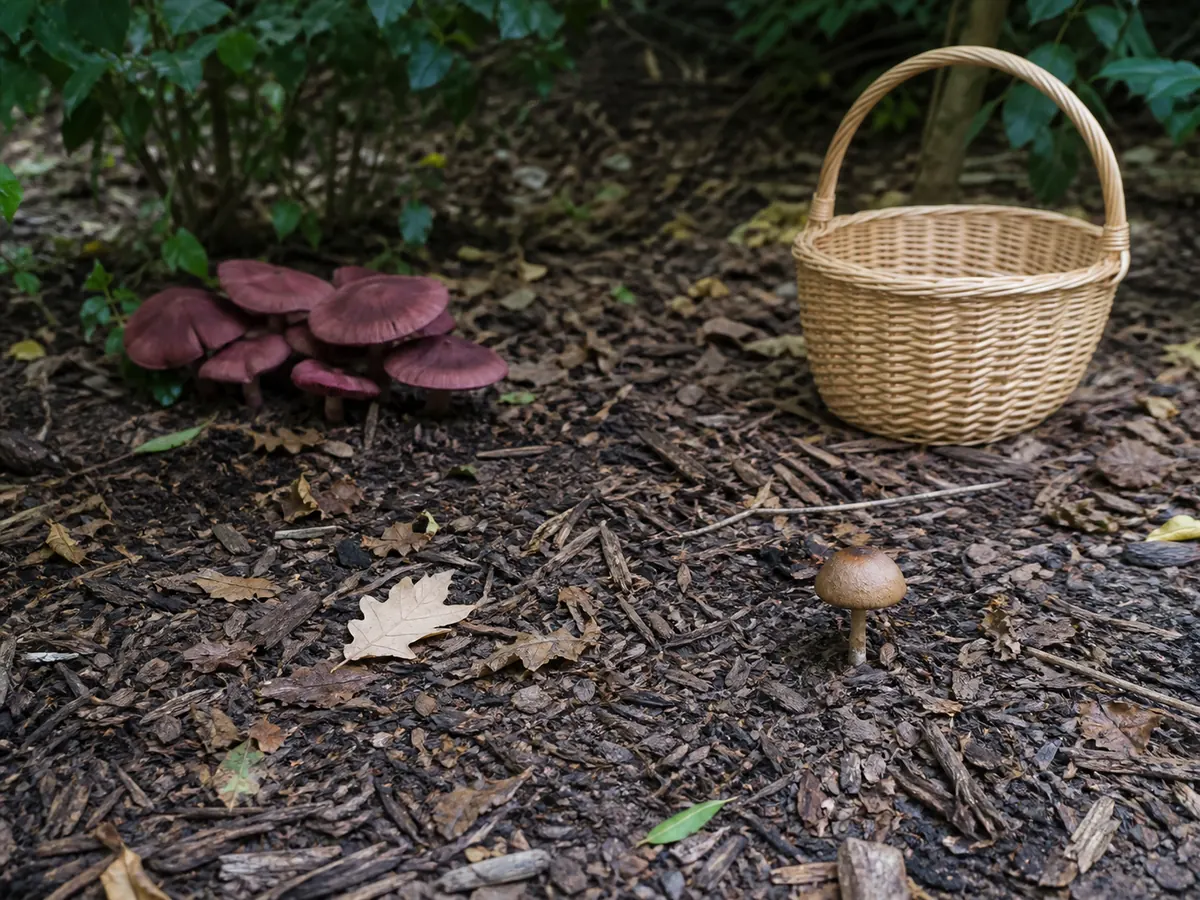
If an exposure occurs, retain photographs and an intact sample for poison-control or medical identification, keep the sample away from food, and label when and where it was collected.
How do you harvest without harming the bed?
Harvest only after identity is settled and while the mushrooms remain firm. Wine cap quality is usually best before the cap becomes broad, faded, insect-damaged, or brittle at the edge.
Use a clean knife to cut a cluster at the base, or lift it with a gentle twist when that removes little substrate. Large plugs of attached chips should be returned to the bed because they contain the living network that can support another flush.
Outdoor mushrooms bring soil, small insects, and wet debris into the harvest, so brush and trim them outside, avoid pre-storage soaking, and separate the confirmed crop from specimens still under review.
Follow species-specific cooking guidance and try a modest portion the first time. Correct identification does not prevent individual sensitivity, spoilage, or problems caused by undercooking a species that needs thorough heat.
After harvest, close large gaps with clean damp chips and let the bed recover without flooding it, because mycelium needs a stable moist layer and favorable weather rather than a shock on demand.
How do you renew the bed each season?
Wood chips are food, so the bed becomes thinner as the fungus and other decomposers use them. Add fresh compatible chips when the established layer has visibly broken down, keeping some colonized material in contact with the new food.
An established wine cap patch can persist for several seasons and start another clean bed if you move a modest amount of strongly colonized chips while leaving enough material for the original patch to recover.
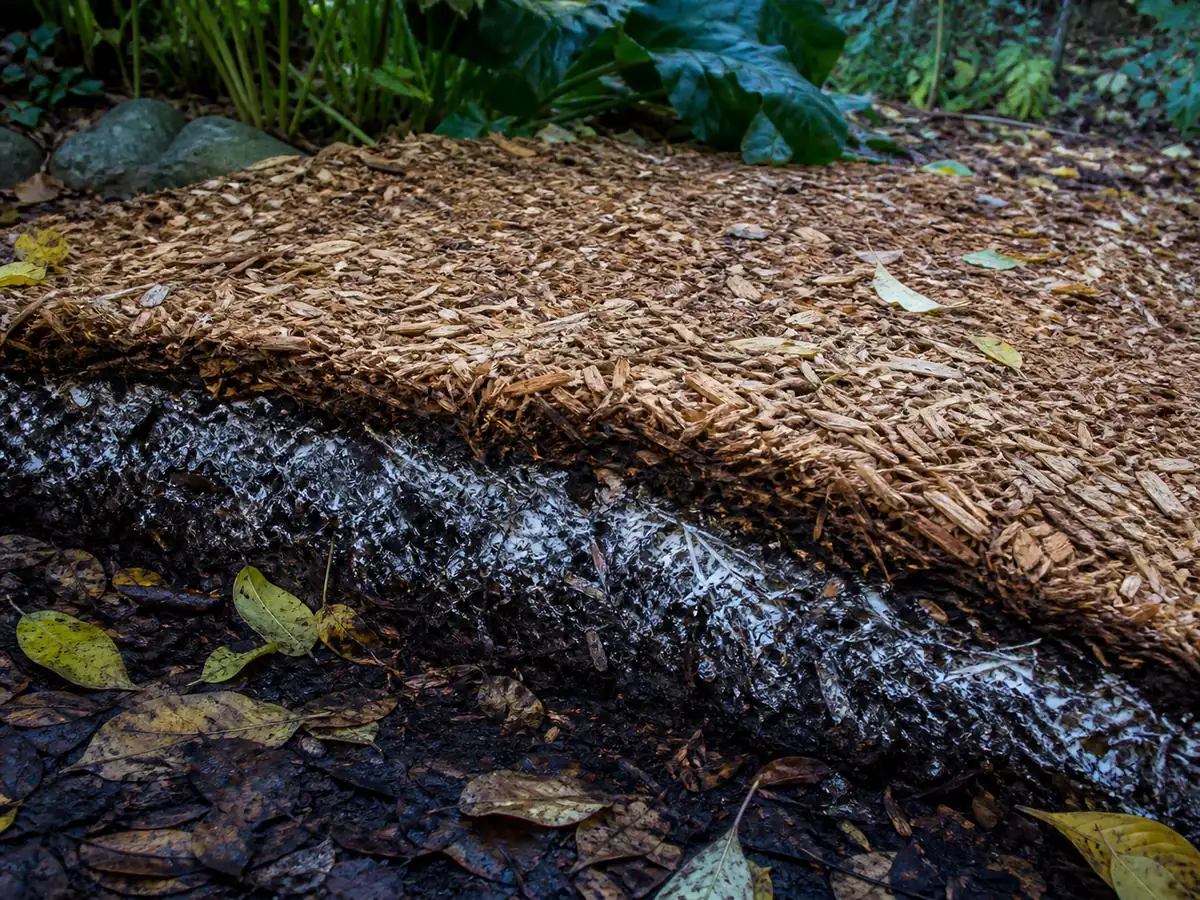
Record the inoculation date, substrate source, watering changes, visible colonization, fruiting dates, and harvest weight. Those notes turn a disappointing season into evidence about whether the cause was timing, moisture, site choice, animals, or exhausted food.
| What you see | Likely owner | Best next action |
|---|---|---|
| Pale loose chips with little binding | Repeated drying or weak contact | Rewet in gentle passes, restore cover, and reassess shade before adding more spawn |
| White growth through chips but no mushrooms | Seasonal cue or immature colonization | Keep conditions stable and wait through the species' suitable fruiting weather |
| Standing water with sour odor | Drainage, compaction, or excessive irrigation | Stop watering, open drainage at the edge, and remove any unsafe decomposed material |
| Bed thinned into dark crumbly material | Food supply has been consumed | Top-dress with clean compatible substrate while preserving colonized contact points |
| Many unrelated fruit bodies | Open outdoor ecology, not automatic crop failure | Identify each one separately and harvest none that fail the planted species check |
| Repeated animal digging | Exposed grain or accessible loose cover | Reset displaced chips and use a breathable barrier that does not seal the bed |
Retire the bed if its site or feedstock proves contaminated, if chemical runoff reaches it, or if correcting drainage would require moving questionable material through the garden. A missed crop costs less than uncertain food safety carried into another season.
If the bed is clean, colonized, and merely late, patience is a valid action. Outdoor production gives weather a real vote, and the most durable response is to correct only the condition the bed's evidence names.