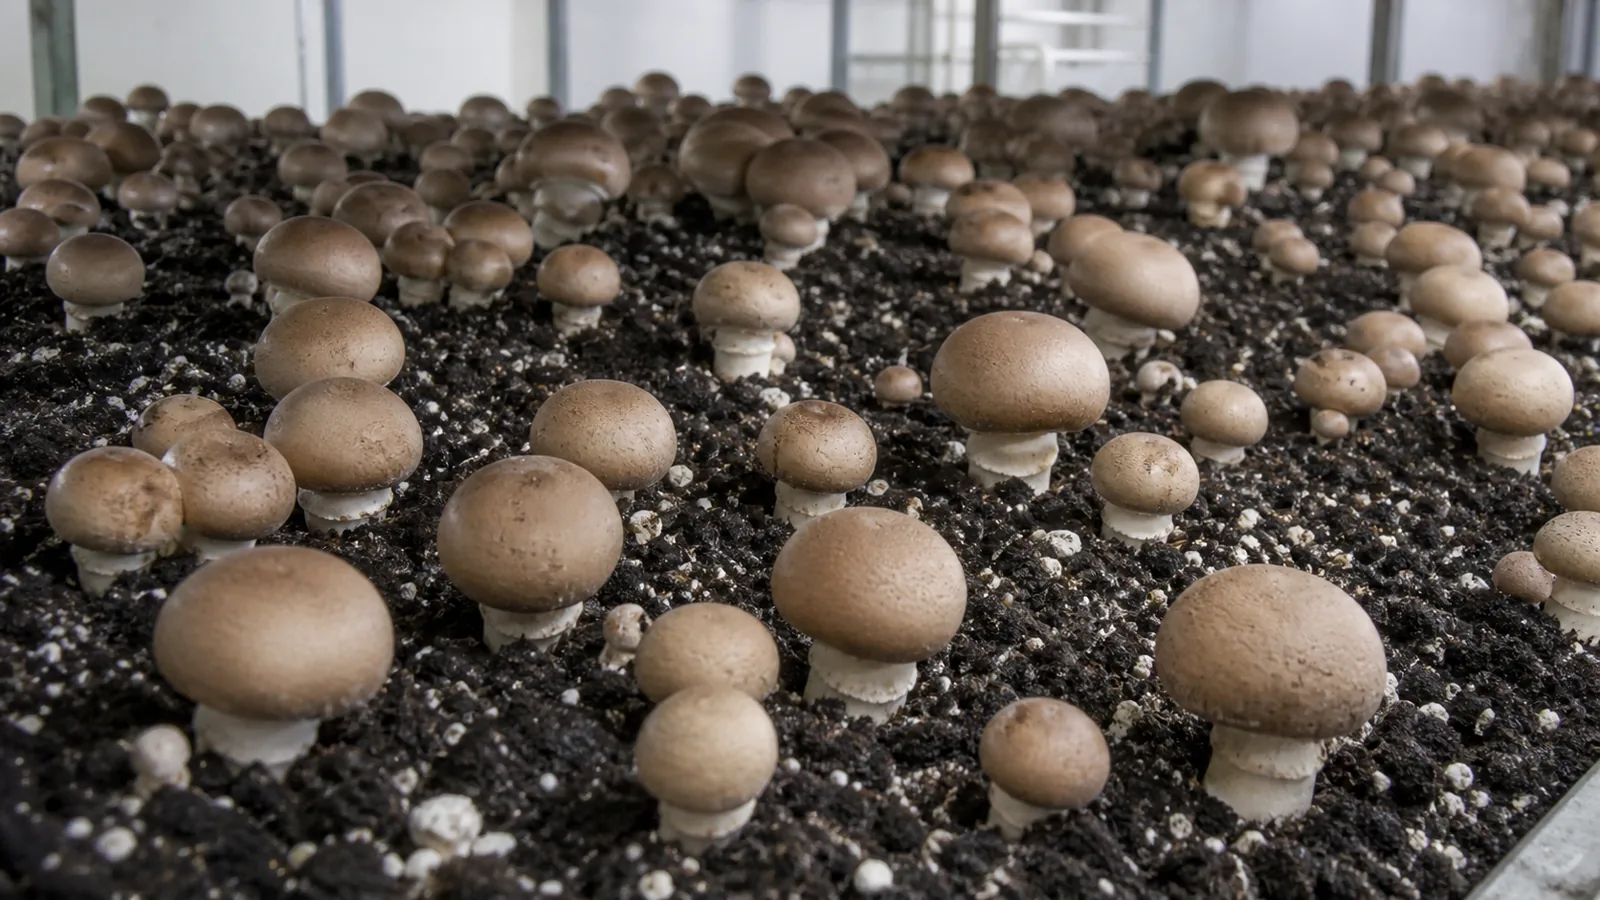
Cremini is the closed brown harvest stage of Agaricus bisporus. Grow it on conditioned mushroom compost, complete the spawn run, add an even moisture-holding casing, then harvest firm brown buttons before the veil stretches into the portobello stage.
Cremini is not a separate species from portobello. It is a brown Agaricus bisporus crop harvested while the cap remains compact and the veil is still closed.
That identity changes the entire method.
Cremini grows through selectively prepared compost and a distinct casing layer, not through the cut face of a generic hardwood block.
What makes a mushroom cremini?
- Cultivated subject
- Verified brown Agaricus bisporus strain
- Production layers
- Selective compost below a distinct porous casing
- Harvest boundary
- Firm compact brown cap with the veil still closed
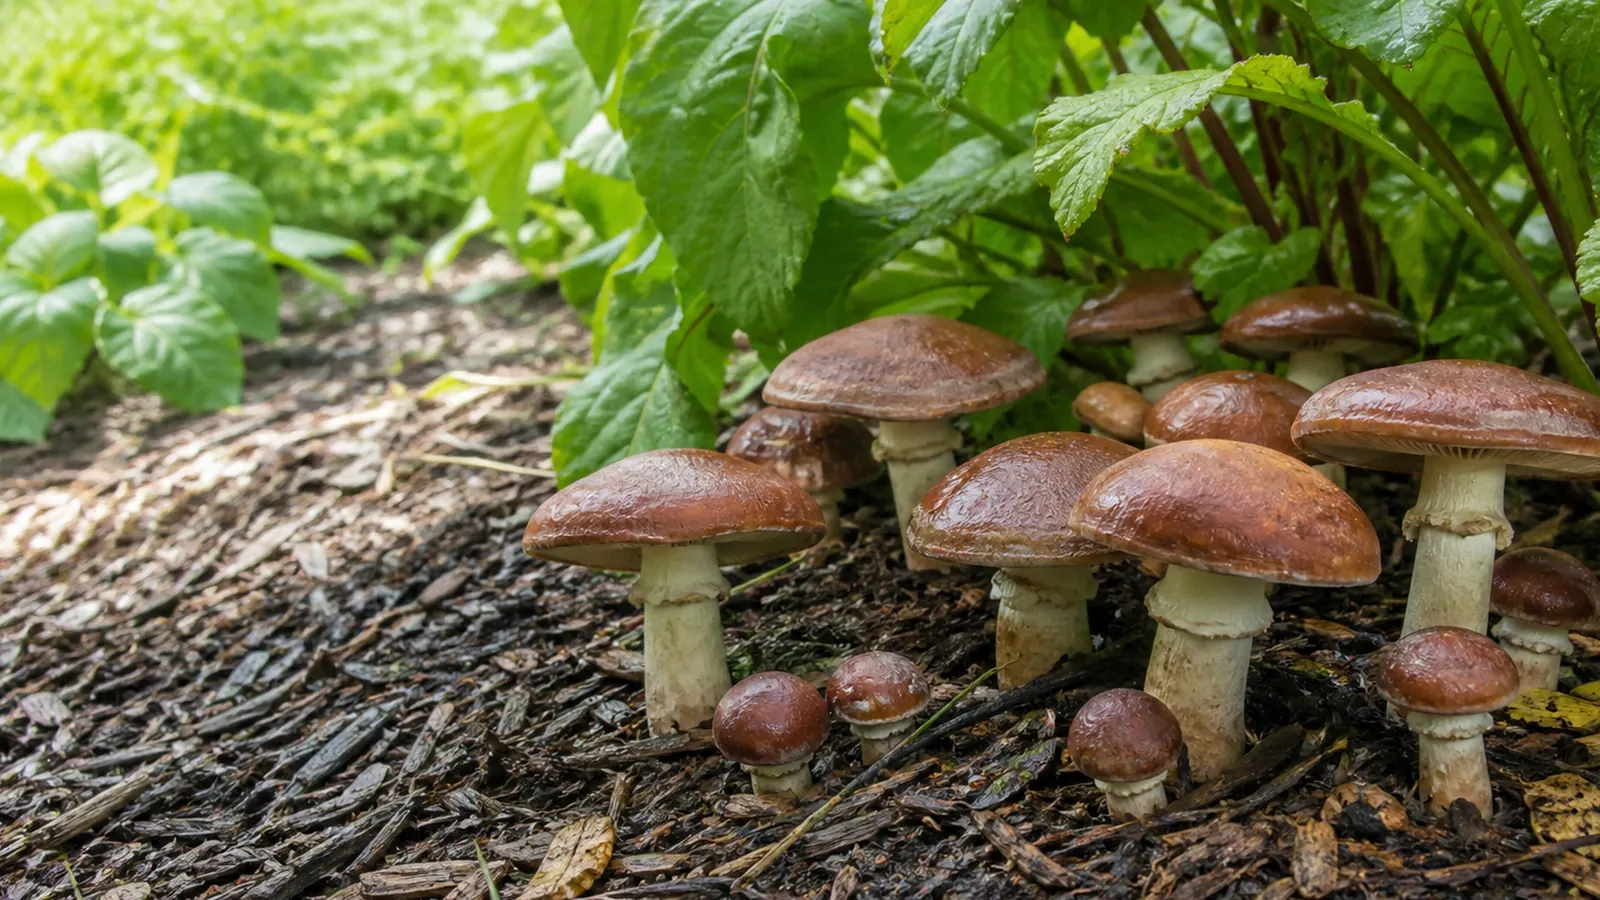
A small brown button, a cremini, and a portobello can all come from the same brown A. bisporus crop. The names describe color and maturity choices more than separate cultivation organisms.
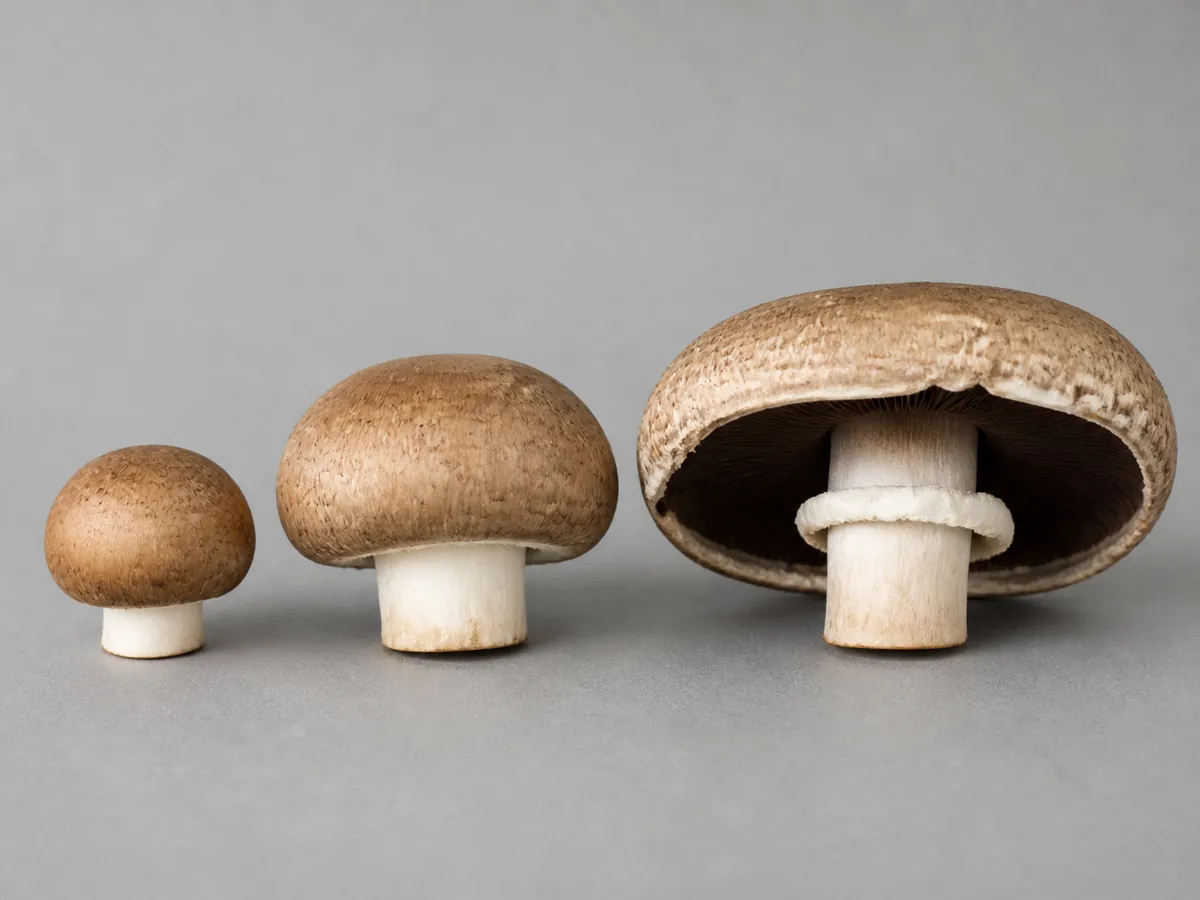
The young cap expands around a short stout stem while a pale veil protects the developing brown gills.
Once that veil stretches and tears, the mushroom has moved beyond the closed cremini endpoint even though it remains the same species.
| Market form | Cap and veil | Cultivation meaning |
|---|---|---|
| Brown button | Small rounded cap, veil closed | Early harvest from a brown strain |
| Cremini | Firm brown cap, compact profile, veil closed | Target stage for this guide |
| Portobello | Broad mature cap, veil open, gills exposed | The same crop held longer |
Buy commercial brown A. bisporus spawn from a traceable supplier. A brown wild Agaricus or a grocery-store cap does not provide a verified clean culture, production history, or safe shortcut into cultivation.
Record the strain, spawn lot, compost lot, casing material, and intended harvest size before starting.
If those records change mid-crop, later yield and quality comparisons cannot identify which input mattered.
Brown color alone does not define the endpoint. A pale closed cap can be cremini, while a dark broad cap with an open veil has moved into the portobello stage.
Photograph a representative sequence from the first flush and keep the scale constant.
That local maturity reference is more useful for harvest training than a retail diameter copied from another strain.
Cultivation identity and food identity must stay together. Keep unknown lawn Agaricus out of the room, and never use a cultivated bed as proof that a wild brown mushroom is edible.
The closed veil also gives the production team a shared endpoint before the crop begins.
Without that agreement, one person can harvest compact buttons while another waits for broad caps and both results are mislabeled as cremini.
Growing MushroomsWhat Does a Mushroom Farm Actually Cost to Start?Should you make or buy the compost?
Conditioned Agaricus compost is the best starting route for a small first crop. Making it is a managed biological and thermal process, not a matter of mixing fresh manure and straw in a tub.
Commercial production moves through composting phases that transform raw agricultural material into a selective food source.
Pasteurization and conditioning reduce pests and competitors and allow heat and ammonia to settle before spawn enters.
Fresh-looking material can still be chemically or biologically unfinished. A sharp ammonia odor, unstable heat, or greasy anaerobic pocket is a stop condition rather than a signal to add more spawn.
Penn State describes composting, spawning, case run, pinning, and harvest as linked stages whose settings vary by farm.
The useful lesson is the stage order and its control points, not a copied commercial timer for a small tray.
Buying compost moves the upstream work to a supplier, but it does not remove quality control. Keep one unopened sample or supplier record so a later problem can be traced beyond the grow room.
Inspect conditioned compost before spawning and keep the arrival check tied to the supplier's lot.
- Compare its structure and moisture with the supplier's specification, then reject raw ammonia odor, free liquid, pest activity, or cold decomposing pockets.
- Break a delivered mass into the documented bed depth promptly and measure representative centers, because a dense pile can continue producing heat overnight.
- Confirm the permitted storage interval and conditions before delivery, since compressed compost can overheat or dry during an improvised delay.
- Make compost only where raw inputs, runoff, aeration, temperature, ammonia, and finished substrate can be managed separately. A small indoor bin cannot reproduce those controls merely because it contains the same named ingredients.
What should feed a cremini crop?
The compost and casing perform different jobs. Compost supplies the selectively prepared nutrition, while casing holds water and creates the surface environment where fruit bodies initiate.
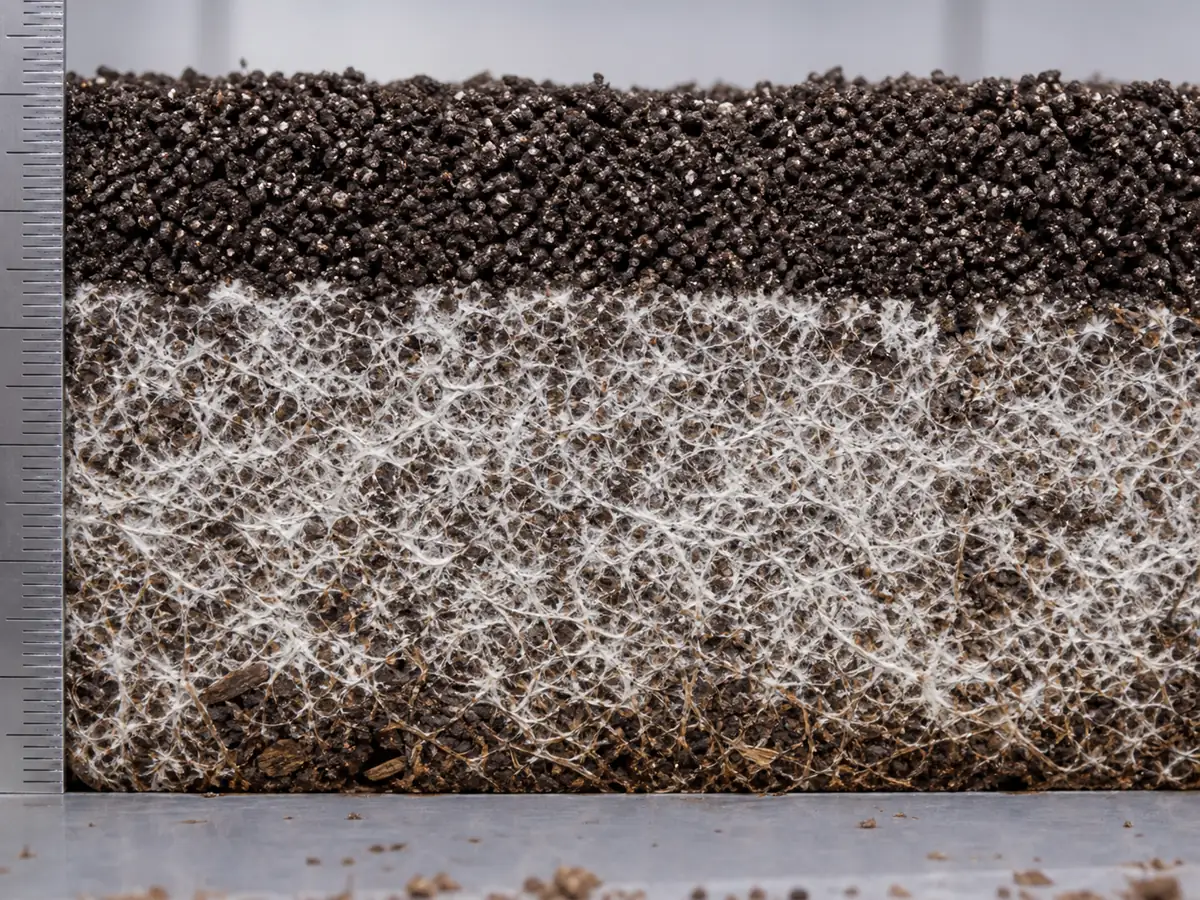
Grain spawn carries the culture into the compost.
It is an inoculum distributed through the bulk material, not a replacement for the conditioned compost mass.
| Layer or input | Primary job | Evidence to record |
|---|---|---|
| Conditioned compost | Nutrition and selective growth medium | Supplier, lot, wet mass, depth, arrival condition |
| Grain spawn | Distributes the verified culture | Strain, lot, rate, mixing date |
| Casing | Water reservoir and fruiting interface | Material, treatment, depth, wet mass |
| Room air | Removes heat and carbon dioxide | Temperature and pattern near crop height |
Do not enrich the casing casually. Added food can favor competitors at the exposed surface and blur the biological distinction that makes the two-layer system useful.
Bed depth and density affect heat, water movement, and gas exchange.
Level the compost without crushing its structure, then keep trays comparable so a dry edge or hot center can be mapped rather than guessed.
Weigh each filled tray and mark its position. When one tray later pins poorly, the record can distinguish a lighter dry fill from a room-zone effect.
Spawn distribution sets the path length for colonization.
Large clumps can create fast white islands separated by slow compost, while an even documented pattern gives each observation point a comparable start.
Do not mix casing into compost to simplify the bed. That destroys the clear nutritional and water-management boundary the later crop needs.
Use the same bed depth across control trays because the thermal and gas profile changes with thickness. A formula comparison made in shallow and deep trays is also a container comparison.
The visible cross-section helps you decide where water, food, spawn, and air belong before changing a setting.
If the layers cannot be distinguished after filling, later moisture observations lose their context.
Growing MushroomsHow Do Mushroom Sawdust Blocks Work from Mix to Fruit?What proves spawn run is complete?
Spawn run is complete when A. bisporus has established through the intended compost bed without persistent raw pockets or foreign expansion. The compost will not necessarily become a smooth snow-white block.
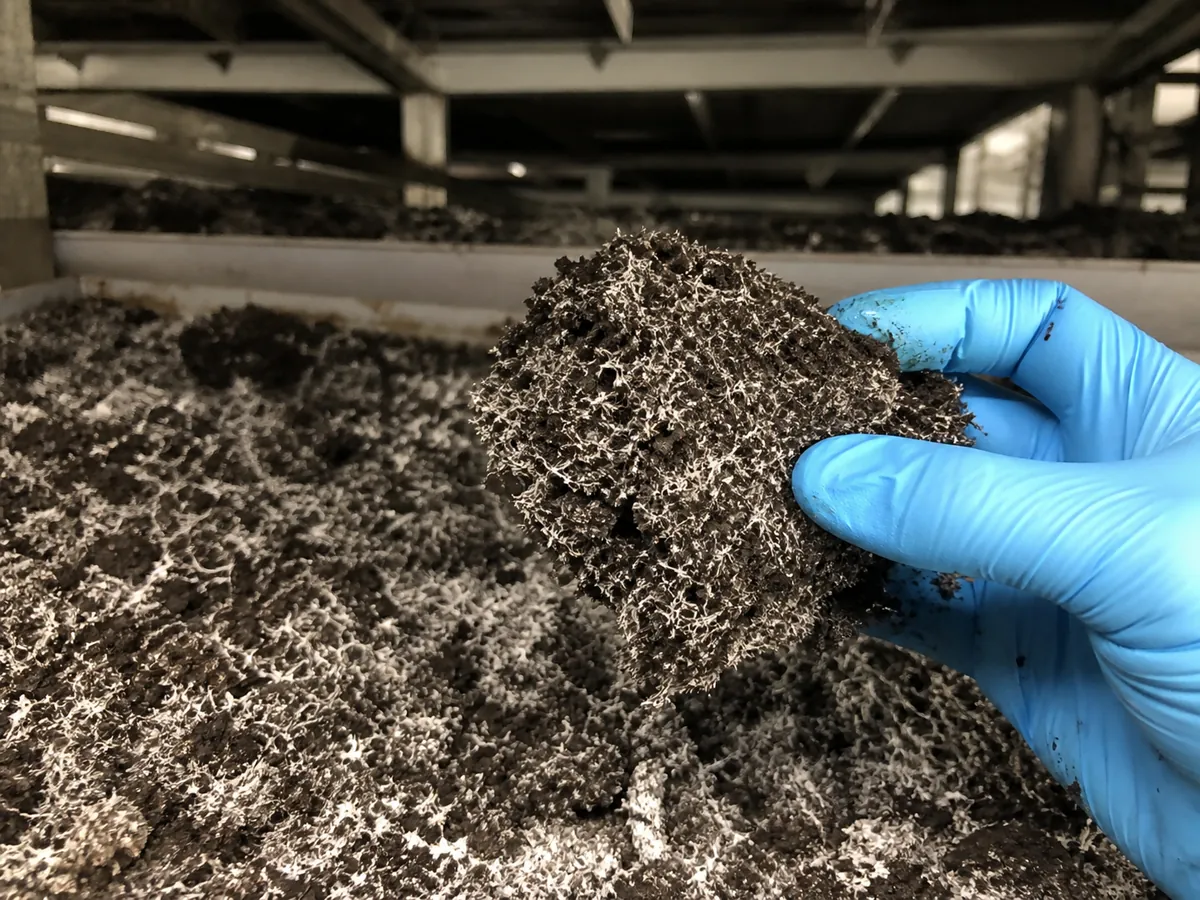
Inspect several fixed points rather than the most attractive surface patch.
Fine white threads should appear through representative compost, and the bed should show a coherent pattern across center, edge, top, and depth.
Higher spawn rates can shorten the run, but they also change biological heat and cost. Treat the selected rate as part of the complete batch instead of correcting a slow cold bed by adding random extra grain later.
- Advancing
- White threads appear in new representative compost zones between dated checks
- Uneven
- One edge or depth remains raw while another becomes dense
- Ready to case
- Colonization is coherent, heat is controlled, and no ammonia or foreign boundary persists
- Isolate
- Wet collapse, unusual color, insects, or a sharp expanding colony appears
Measure near the crop rather than relying only on a wall thermostat.
A dense active bed can remain warmer than room air, and stacking trays closely changes that local heat load.
Do not add casing to hide an unfinished surface. The next layer makes visual inspection harder, so every questionable zone should be explained or isolated first.
Measure the bed center as well as room air during active spawn run. Metabolic heat in a deep tray can move the substrate outside its intended range while a wall sensor remains unchanged.
Edge colonization may look faster because the clear tray wall makes it easier to see.
Use planned inspection points and, when necessary, a sacrificial sample rather than declaring completion from the perimeter.
Group trays by observed readiness instead of forcing every unit onto one casing date. A late tray already has a different biological starting point and should keep that evidence.
When the whole batch advances slowly, compare the verified spawn lot, compost condition, bed temperature, and inoculation rate before extending the calendar. Time is an observation, not a treatment for damaged culture or unfinished compost.
Why does casing start a new phase?
Casing provides a porous water reserve above the compost and supports the transition from vegetative growth to mushroom formation. It should remain physically distinct from the nutritional layer below.
Commercial guidance commonly describes a peat-based casing near 70 to 75 percent moisture and around 1.5 to 2 inches deep.
Those figures belong to complete production systems, but they show why uniform depth and water-holding structure matter.
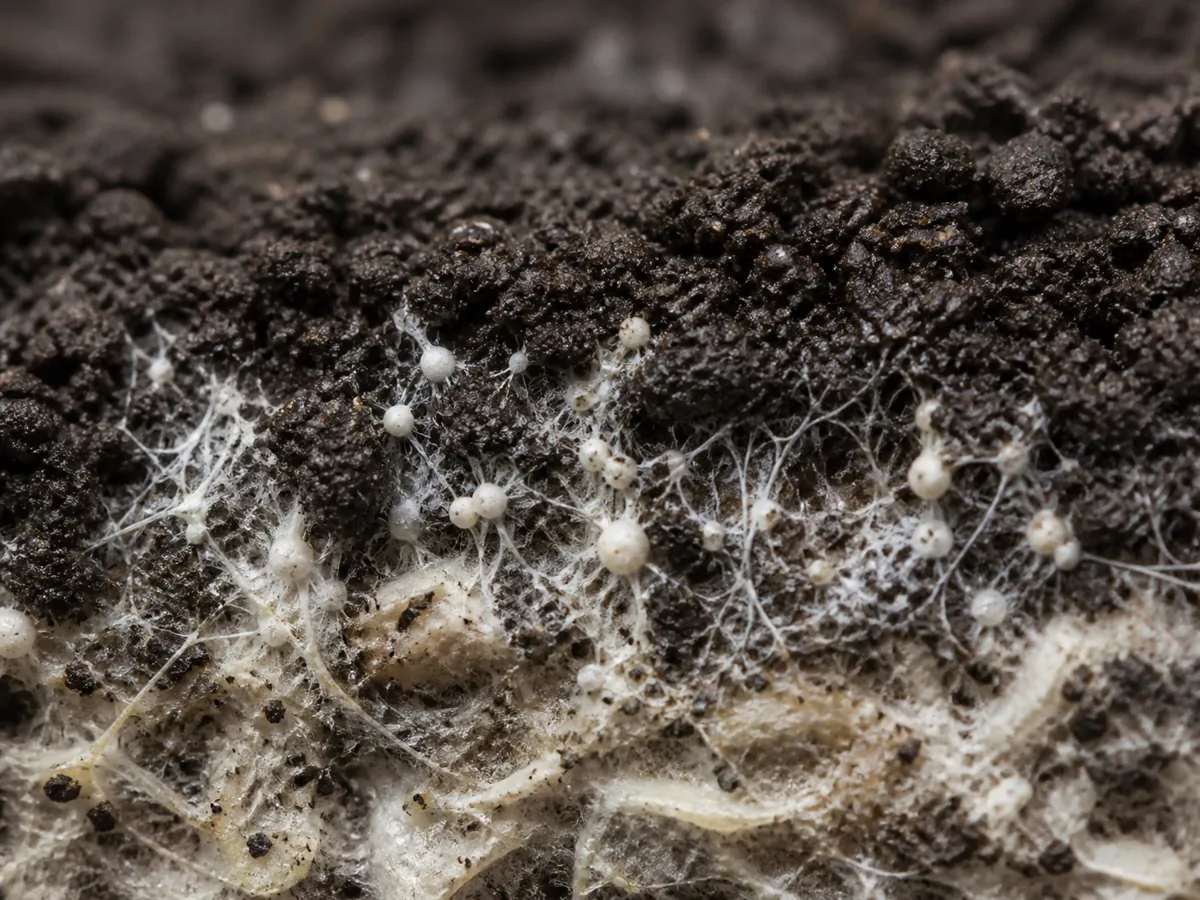
A squeezed handful can support inspection, but it should not replace measured wet inputs and tray mass. Two casing materials can feel similar while holding different amounts of plant-available water and air.
Prepare consistently
Use one material batch and the sanitation method assigned to it
Measure depth
Level the casing across corners and center without compacting it
Record water
Note wet casing mass and any water added during case run
Watch entry
Allow controlled mycelial development without turning the entire surface white
Map variation
Mark dry lanes, dense sectors, and early knots before changing the room
Microbial communities in compost and casing influence A. bisporus development, which is one reason a sterile-looking shortcut is not automatically a productive system. The goal is a controlled selective surface, not a claim that every organism has been removed.
Standing water closes pores and can carry a local problem across the tray.
If the surface keeps drying, locate the draft or shallow sector before repeatedly flooding the whole bed.
Apply casing only after the compost stage has earned the transition. Level it gently because thin corners dry first and thick zones can delay gas movement and pinning.
Track water by mass and delivery location.
A tray that receives the correct total volume can still have saturated depressions and dry ridges when the surface is uneven.
Case run should show organized entry rather than a solid sealed mat. A closed white surface exchanges poorly and makes each later watering more likely to pool.
Do not rake or scratch the casing unless the selected production method requires it. Mechanical disturbance changes the surface and should be recorded as a treatment.
Growing MushroomsHow Do You Build an Outdoor Mushroom Bed That Lasts?How do you create an even pin map?
Pinning should be read across the complete bed. A dense corner and an empty center are evidence about casing depth, moisture, temperature, case-run development, or airflow, not merely a disappointing count.

Initiation usually involves a coordinated shift in temperature, replacement air, and surface evaporation.
Change those conditions gradually and document the time, because simultaneous large changes erase the cause of the response.
| Pin pattern | First comparison | Practical meaning |
|---|---|---|
| Even small pins | Hold the current transition | The bed is responding coherently |
| Pins only at edges | Casing depth and edge evaporation | The center may be wetter, warmer, or less developed |
| Empty dry lane | Direct draft or shallow casing | Correct the draft or casing depth before watering the whole bed |
| Dense pins that stall | Water reserve and crop load | The casing may not support every initiated fruit |
Light is useful for working and crop inspection, but A. bisporus does not need a bright window. Direct sun adds heat and water loss to one side, creating a room defect that resembles a casing defect.
Mushrooms expand quickly before harvest and draw substantial water from the casing and compost system.
A surface that was adequate for pinning can become depleted during enlargement, so monitor tray mass and texture as the flush develops.
Once the spatial evidence is recorded, do not chase perfect geometric spacing. Natural variation is expected, and thinning or touching every pin can damage neighbors and introduce new handling differences.
Preserve the first pin map with an overhead photograph.
Mark the positions of doors, humidification, air returns, tray edges, and earlier dry spots before correcting the room.
Pins need stable conditions through expansion. Repeated visible drying followed by heavy watering favors uneven cohorts because new initials and enlarging mushrooms do not tolerate the same disturbance equally.
Replacement air must reach crop height without crossing the casing as a drying jet. A reading at the room return can hide a stagnant layer between caps or a fast lane below a fan.
When one area stays empty, compare casing depth, wet mass, compost temperature history, and airflow before adding water.
Missing pins often preserve evidence of an earlier difference.
Count a fixed sample area rather than estimating the entire tray from its densest patch. Pin density, survival into market mushrooms, and usable harvest mass answer different questions about the crop.
Which bed patterns need isolation?
A localized defect can come from environment, competitors, pests, or disease-like damage. The safe first step is to map and contain the sector rather than name it from a photograph.
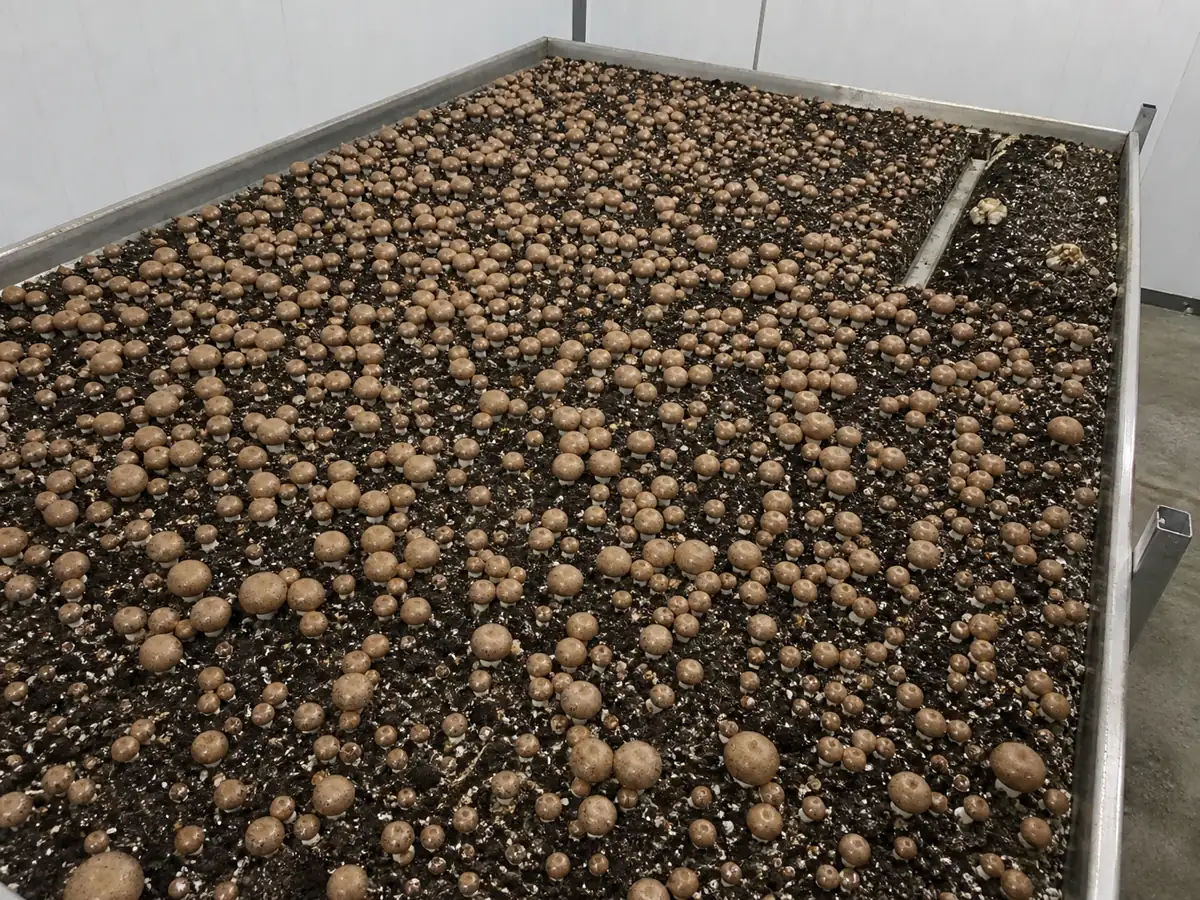
Environmental stress often follows room geometry, such as a dry line facing an outlet or a warm center shared by several trays.
A foreign colony may form a sharper expanding boundary that belongs to one handling or input event.
Warning
Do not move suspect casing between trays | Keep tools, hands, water, and removed tissue from carrying an uncertain problem into clean sectors.
Wet translucent mushrooms, persistent malformed clusters, flies, foul liquid, or unusual colored growth all justify a hold. Remove affected material according to the operation's sanitation plan and avoid applying an unverified pesticide or home remedy.
Compare the same location across neighboring trays.
Repeated failure at the same rack position points toward air, heat, or water delivery, while one isolated tray points more strongly toward its batch history.
Photograph the boundary before cleanup and preserve the compost, casing, spawn, and handling records. A clean room after disposal provides little learning if the introduction point was never documented.
Colored growth is not the only isolation trigger.
Sour wet collapse, insect concentrations, persistent ammonia, or a sector that heats independently can threaten neighboring trays before a familiar mold color appears.
Do not cut into a suspect bed in the production room for a better photograph. Keep it covered, move it under the site's containment plan, and clean the route and tools used for removal.
Compare failures after containment. One isolated tray suggests a container or handling event, while the same pattern across a compost lot points farther upstream.
Review water tools as possible carriers when similar patches appear along a watering sequence. The order of serviced trays can reveal a handling path that room temperature data cannot.
When should cremini be harvested?
Harvest cremini while the brown cap is firm and compact and the pale veil remains attached around the stem.
Veil stretching and visible dark gills show that the mushroom is moving toward the open portobello stage.
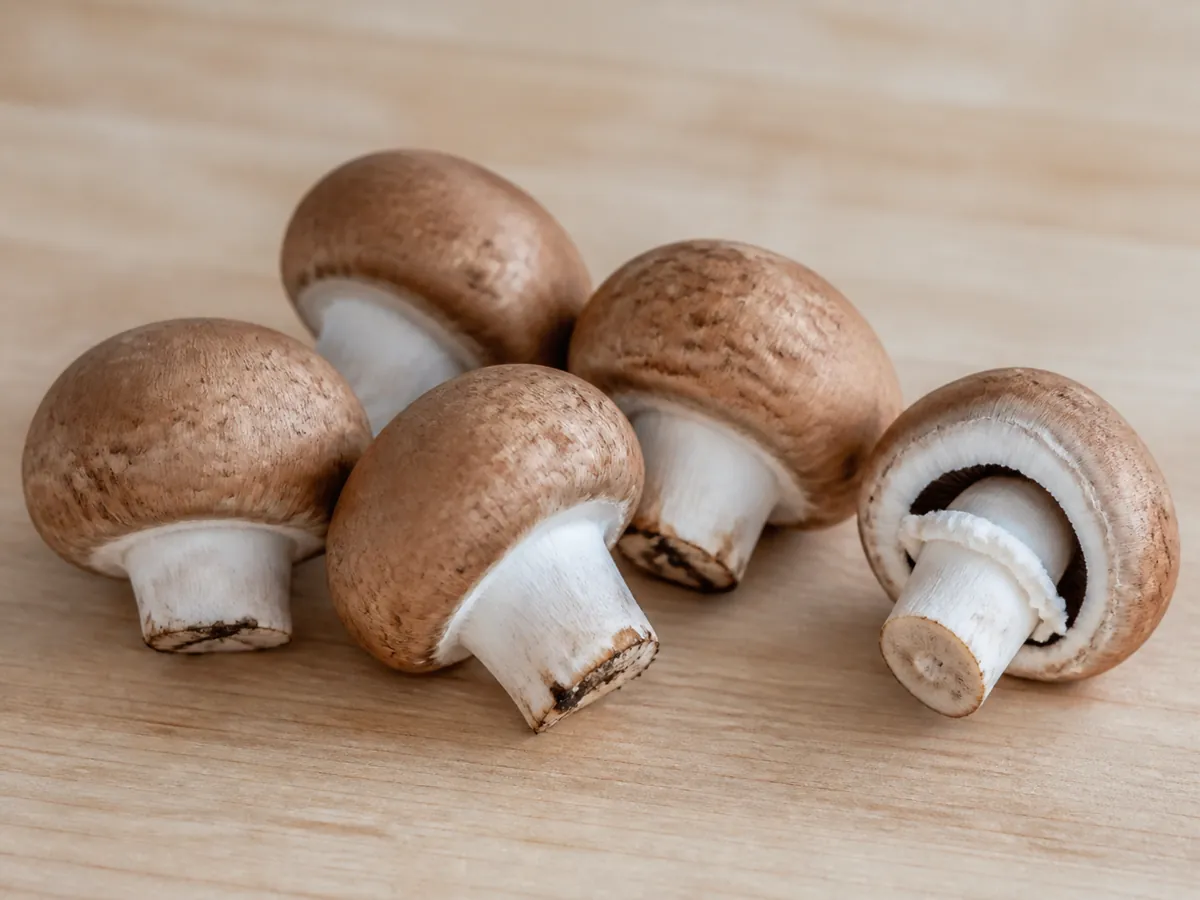
Twist or cut according to the farm method, then remove loose base tissue without excavating a broad hole. The casing around each harvest site still belongs to the water reservoir for remaining mushrooms and later flushes.
Grade by maturity before diameter.
Two caps of the same width can have different veil tension, and the one exposing gills is already beyond the intended closed-button endpoint.
Shorten inspection intervals as the first veils stretch. A stable daily schedule during pinning can become too slow when a warm productive flush reaches market size.
Support the casing around each mushroom during removal.
A wide crater loses water and exposes compost, so remove loose stem tissue without excavating the nutritional layer.
Separate closed caps from mushrooms with torn veils during grading. Both may remain usable under the appropriate food-safety system, but mixing them hides whether the crop met its intended cremini endpoint.
After the flush, clean harvest holes gently and restore water only through the validated casing program.
Heavy soaking can fill voids, spread debris, and turn a productive bed into a saturated one.
Note
Let the veil set the name | Keeping the crop longer may produce a sound brown mushroom, but it no longer produces the same closed cremini stage this method was designed to deliver.