
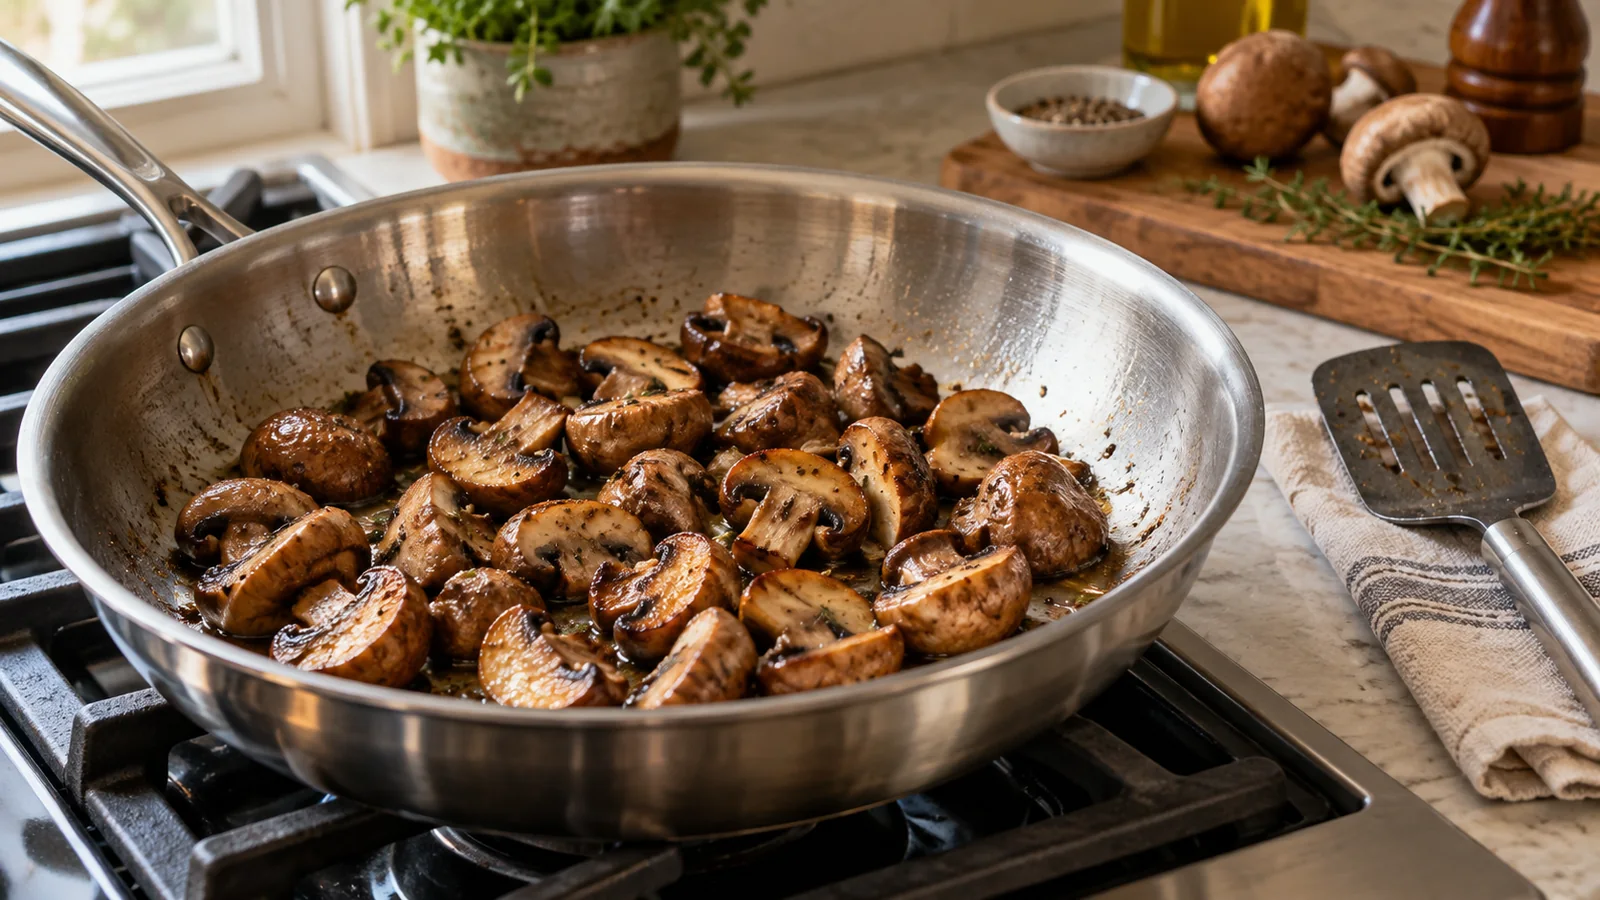
For browned sautéed mushrooms, cut the pieces to a similar size, let the released liquid evaporate, and give the surfaces time against the pan. Turn them once color develops, lower the heat as the pan dries, and add delicate flavorings near the end so they do not cook through the whole browning stage.
How should you prepare mushrooms and the pan?
Mushrooms brown only after the free liquid around them has cooked away and their faces get time against the hot pan. Your preparation sets up that contact, with useful cut faces, similar thickness and enough flat cooking area. The rim tells you what the skillet can hold, while the flat base tells you what it can brown at once.
Piles can fit inside a pan with most of their pieces never touching the bottom. For the traditional uncovered method, splitting that pile into manageable batches usually gives you more control than trying to sear it all at the same time.
Thickness and the Bite You Want
Button and cremini mushrooms are both cultivated forms of Agaricus bisporus. Slicing their rounded caps exposes broad faces, while quartering keeps thicker pieces with a more solid center. The two cuts give different results, even from the same starting weight.
Very thin pieces shrink as they cook and can get small before they have the texture your dish needs. Thick quarters give more substance, but a browned outside does not tell you that the center has reached the same tenderness as a thinner slice. Keeping the thickness similar within a batch makes the endpoint easier to judge.
The advice on cooking cremini ties these cut choices to round caps, usable stems and the dish you have in mind. So a bag of small slices and a pack of large whole mushrooms need different preparation, even though the food is the same cultivated species.
Oyster mushrooms, Pleurotus species, bring thin fans and a joined base in place of a row of thick round caps. Their edges can finish before the heavier portions, so cooking oyster mushrooms means watching those thin margins.
Shiitake, Lentinula edodes, can have fibrous stems that cook differently from the cap flesh. Pieces of equal length do not always have equal tenderness, and preparing shiitake starts from that difference.
For a mixed batch, grouping pieces by how they cook works better than cutting them to look the same size. Thin fans and thick cap quarters may need to go into or come out of the pan at different stages.
Clean Before the Heat
Cleaning the mushrooms deals with debris, hidden surfaces and outside droplets before the skillet is hot. That step cannot stop mushrooms from releasing their own water during cooking. It does keep you from adding an extra load of rinse water.
Pre-sliced mushrooms save knife work when their cut suits the meal. They give you less room to choose when the dish calls for larger quarters or an intact cap. You can cut a thin bought slice smaller, but you cannot rebuild it into the solid piece the recipe needed.
The package's preparation claims still count. Sliced describes a shape, and on its own it does not mean washed or ready to cook without further handling.
Use the Flat Pan Area, Not a Fixed Weight
Spread loosely, the pieces each get a face against the skillet. No single weight fits every pan, because the flat base, the mushroom size and the cut all change how much contact a batch can get. Broad slices use that base differently from narrow quarters or overlapping fans.
Your spatula also needs room to lift and turn the pieces without dragging a whole heap along. That working space is one more reason to stop loading before the pan looks full to the rim.
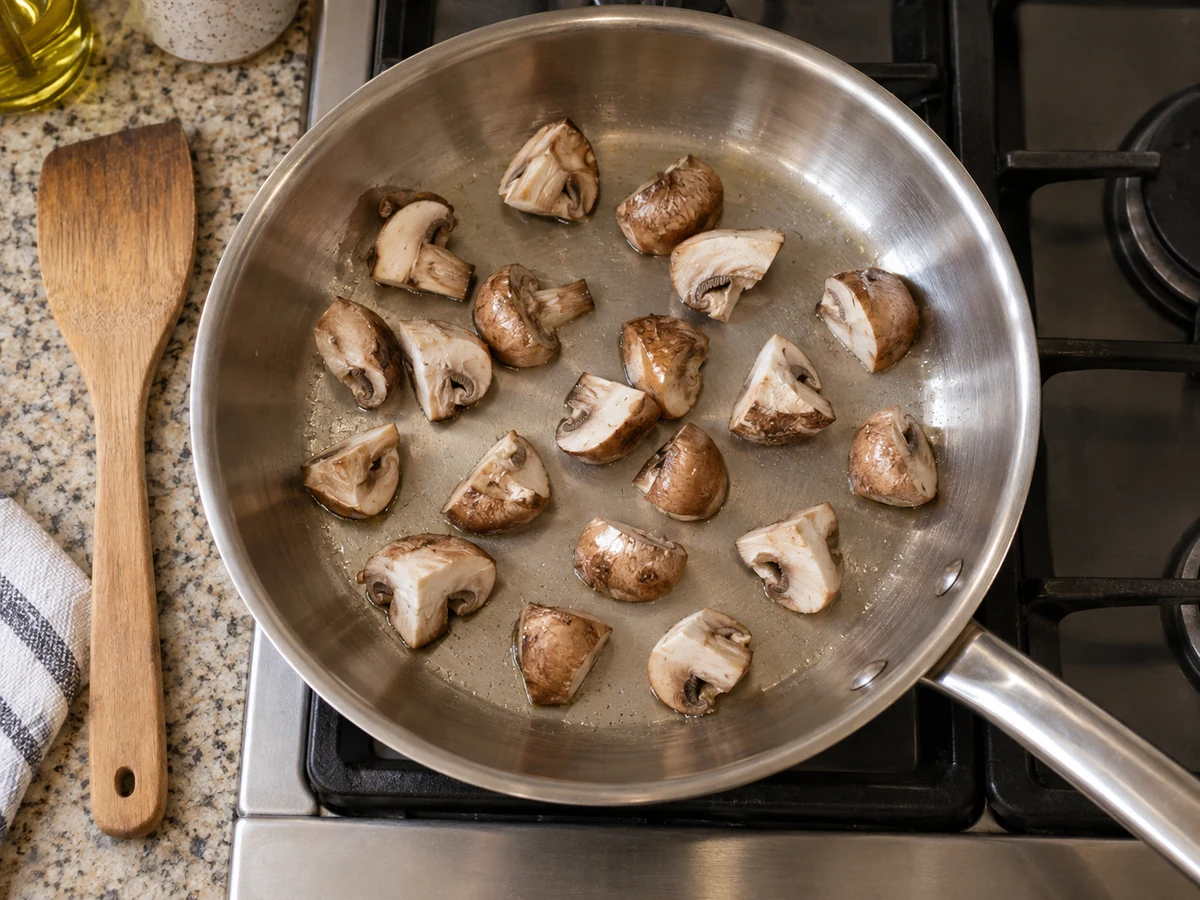
For the traditional oil-first method, a light film of fat coats the cooking surface without forming a deep pool. Choosing a pan and heat setting that suit that method makes the first batch easier to watch. Blasting a dry pan as hot as it will go does not suit every skillet material or coating, and the maker's heat limits still apply. If the oil starts smoking or pieces blacken fast, turn the heat down, since the highest burner setting is no requirement.
The second batch starts in a changed pan. Leftover fat and brown material are already hot, so another full preheat can push that batch toward scorching. Look at the surface again for the new load, and skip a mechanical repeat of the first burner routine.
From Pooled Liquid to Browned Faces
The conventional uncovered sauté moves through changing conditions, so a move that works at one stage can work against you at the next. Stirring wet pieces spreads the liquid and lets it evaporate, while dry faces need enough steady contact to take on color. The state of the pan tells you more than the idea that every fresh batch finishes at the same minute.
The Dry Start and the Wet Middle
Raw mushrooms can soak up fat at first, then release liquid as they cook. That explains why the skillet may look less glossy before water gathers around the same pieces. Adding more oil every time the first gloss disappears can leave more fat than the finished dish needs.
One piece sliding over a dry-looking patch and a whole batch sitting in water are different things to see. The first may need a turn or a small adjustment, while the second needs a chance for the free liquid to evaporate.
Putting on a lid takes that chance away. With the pan uncovered, moisture leaves the pan and does not collect above the food. Constant tossing in a broad pool cannot create a dry surface that stays against the skillet.
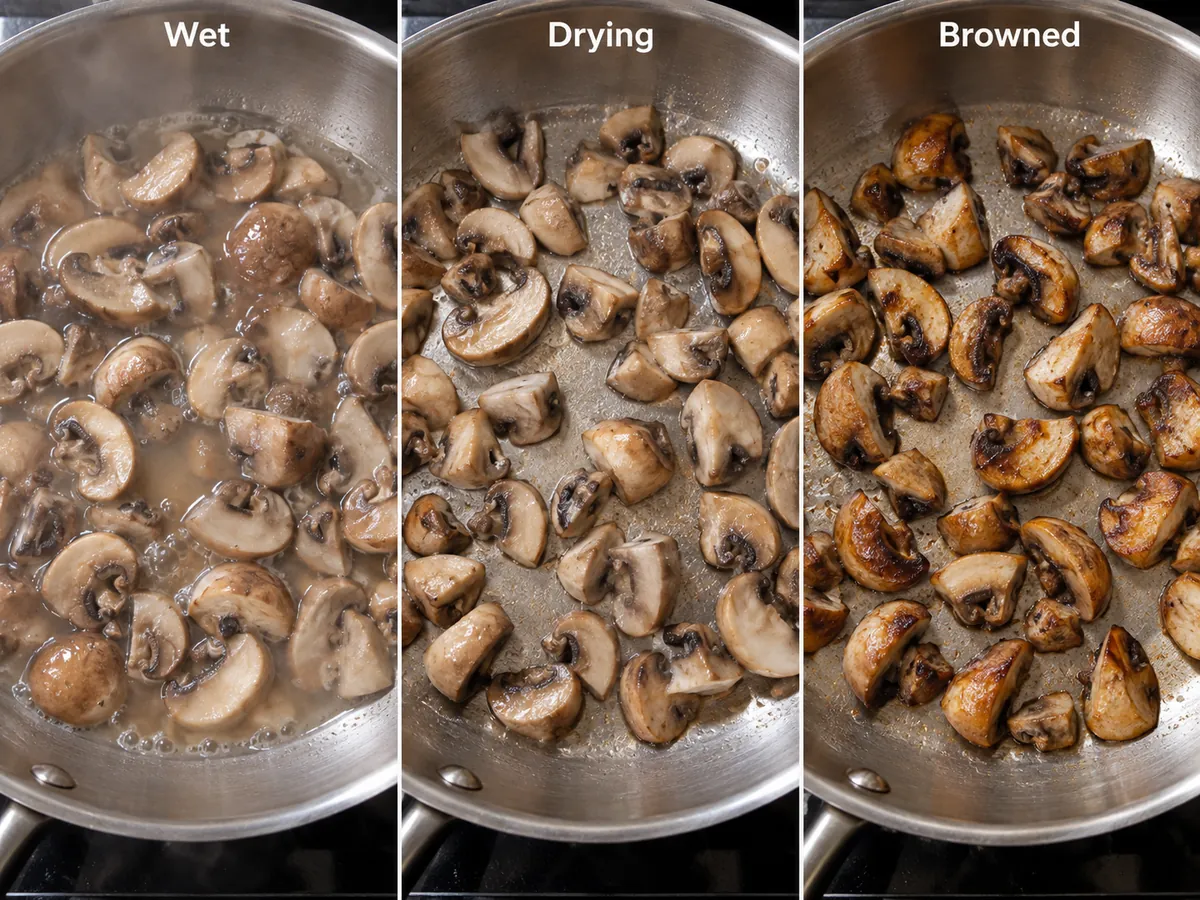
As the liquid shrinks, less water remains to soften the effect of the heat at the surface. So the same burner setting can change the color faster late in the batch than it did during the wet middle. That shift calls for closer watching, even if the setting worked fine a few minutes earlier.
Judging Color and Tenderness Separately
Cremini caps are already brown before they go into the pan. Their overall darkness can hide the line between raw cap color and newly browned tissue. Cut faces give you a clearer view of the color that formed against the skillet, and turning a typical piece lets you check that face without stirring the whole batch.
Color alone is not the whole endpoint. Thick pieces can brown on one face while staying firmer in the center than your dish needs, and thin edges can lose tenderness if they wait for larger pieces. You want both the right color and the right bite. Neither check tells you the identity or edibility of an unfamiliar mushroom.
Different Starting Forms Need Different Instructions
Frozen mushrooms come with processing and texture changes before the skillet work begins. Some frozen bags release a lot of liquid or hold food already prepared for a specific cooking order. Their package directions come before this fresh-mushroom method.
Drier fresh cuts and softened processed pieces may never reach the same texture, even if both pick up some surface color. Extra fat cannot reverse that starting difference.
The Steam-First Method
Cooking in a single uncrowded layer is a useful traditional method, and it is only one way to reach browned mushrooms. Starting wet on purpose can soften the pieces first, as long as the method then uncovers the pan and drives off the liquid before finishing. That second stage is what separates it from leaving a wet skillet covered the whole time.
One Published Example
Leah Colins' Serious Eats recipe uses 2 pounds, about 905 grams, of mixed cultivated mushrooms in a 12-inch skillet. Its main stages are a covered stage that draws out liquid, followed by uncovered browning, with the butter divided across the process. This is one attributed example of another method. It does not claim that this amount makes a loose single layer in every 12-inch pan.
The recipe gives 8 to 10 minutes for the covered stage and about 15 minutes after uncovering. Those times belong to that large batch and that order of steps, and they do not carry over to every cut, burner or conventional sauté.
| Part of the published example | Quantity or condition | Why the detail matters |
|---|---|---|
| Mushroom load | 2 pounds, about 905 grams, in a 12-inch skillet | A large covered batch demonstrates steam-first handling, not universal dry-start capacity. |
| Main fat | 4 tablespoons butter, about 50 grams, divided | The fat is split between stages rather than repeatedly topped up whenever raw pieces look dry. |
| Early seasoning | 3/4 teaspoon kosher salt, with half that volume for table salt in the source recipe | Salt type and timing belong to the stated recipe rather than a universal seasoning spoonful. |
| Covered release | Medium-high after the recipe's initial preparation, about 8 to 10 minutes | The lid supports the intended wet stage; this is not the browning endpoint. |
| Uncovered finish | About 15 minutes to deep golden color and tenderness | Evaporation and exposed contact still have to occur before the final result. |
Treat the earlier oil-first sequence and this butter-based example as two complete methods. If you combine the example's heavy load with the idea of instant single-layer browning, you lose the condition that made the larger batch work. Likewise, the fat in the example is no rule for a smaller plain sauté.
What the Covered Stage Changes
Serious Eats explains that steaming first pushes water out and softens the mushrooms before they brown. That change also cuts down how much fat the raw structure keeps soaking up at the start. Softening, water release and the dry finish that follows work as one linked sequence.
Adding salt early in that method gives no proof that salt always ruins browning. The recipe still reaches its browned result once the lid comes off and the free water cooks away.
Uncovered batches and covered release stages aim at different things in the moment. So if you follow one method, keep its whole sequence, and avoid taking the lid step from one source and the contact assumptions from another. The final color depends on reaching the right last state in the pan, and you do not need to avoid water at all costs.
Wet Batches Can Still Brown
Unexpected liquid can look like the planned wet stage, but the two situations are not the same. The load, cut and heat may differ, and you still need enough room and time to boil off the liquid without burning the driest pieces. Smaller or thinner batches may move through the stages faster than the published example.
So the clock stays a planning aid, and it cannot declare food finished whatever its condition. The named cultivated varieties in the source also do not prove that the same treatment suits every mushroom sold or found.
Why are my sautéed mushrooms pale or soggy?
Several faults show up as pale mushrooms, and each one needs a different fix. Water around the batch, pieces stacked above the base and a dry patch starting to scorch are separate problems. Adding oil or turning up the burner without telling them apart can make the final result harder to control.
| What you observe | What is happening | Useful correction |
|---|---|---|
| Broad pool around pale pieces | Released liquid is still being removed | Keep the pan uncovered, allow evaporation and reduce a heavy load if the dry edges are racing ahead. |
| Pieces stacked above the base | Much of the food lacks useful contact | Divide the batch and spread the remaining pieces against the cooking surface. |
| One dry side darkens rapidly | Heat exposure is concentrated locally | Turn affected pieces, reduce heat and move the pan if the burner heats unevenly. |
| A piece clings before a turn | The face needs careful contact and lifting | Ease a spatula beneath it instead of pulling the piece apart to force the same timing as its neighbors. |
| Greasy coating after water is gone | More fat was added than the finish needs | Lift pieces out while leaving excess fat behind rather than adding another round of oil. |
| Black residue and a burnt smell | Part of the pan contents has scorched | Stop heating that residue and separate unaffected food. Keep black burnt material out of the finishing sauce. |
Pooled Liquid Needs a Way Out
More heat alone can dry one side while a wet pile sits elsewhere. Spreading or splitting the food changes the contact and the evaporation, which turning up the burner cannot do. Smaller loads also make it easier to watch the pieces that have already reached the dry stage.
Pouring off liquid on purpose can speed up the next stage, but some mushroom flavor leaves with it. You may find a use for that reserved liquid in a sauce later. Putting it straight back into this pan, though, brings back the very condition you were trying to end.
Dry toppings and sauced dishes weigh that tradeoff differently. Keeping the liquid in a separate dish holds onto the option, so the same skillet does not have to stay wet and brown its faces at once. Burnt or otherwise unusable liquid is not worth keeping just to avoid waste.
Clinging, Uneven Color and Burning
Your spatula gives you more control than pulling a mushroom up hard enough to tear it. You can check one typical face before turning every piece on the same schedule.
The pan may also heat unevenly. Moving or turning it changes which part sits over the strongest heat, while moving the food changes which pieces get that heat. Both are more precise than adding oil to every part of the skillet.
Note
Adjust heat when pieces scorch
Rapid blackening needs reduced heat exposure or movement. Additional oil does not reverse burned tissue, and delicate garlic added to the same hot patch creates another ingredient to scorch.
Brown residue can be useful later, while black scorched material plays a different role in the dish. Sort the two before you deglaze. Scraping everything loose at once carries the fault into the sauce, even when most of the mushroom pieces are still usable.
Finishing for a Topping, a Side or a Sauce
Your cooking goal changes once the mushrooms have browned and turned tender enough. Ingredients that would burn during the long water-removal stage can now get a short, controlled turn in the heat. The finish also sets how dry the browned pieces stay, or how much recovered pan juice coats them.
Butter, Garlic and Herbs at the End
Serious Eats and a Mushroom Council recipe both add garlic near the end, after the main mushroom cooking. Minced garlic is much smaller than the mushroom pieces, so it does not need the whole browning stage in the same heat. The Serious Eats example gives it about 30 seconds, and its smell and fast color change still need watching in a different pan.
When you add butter late, it coats the cooked pieces, and the raw mushrooms never get the chance to soak it up and need more. Methods that use butter from the start are different complete recipes, so adding it late is an option and no ban on earlier butter.
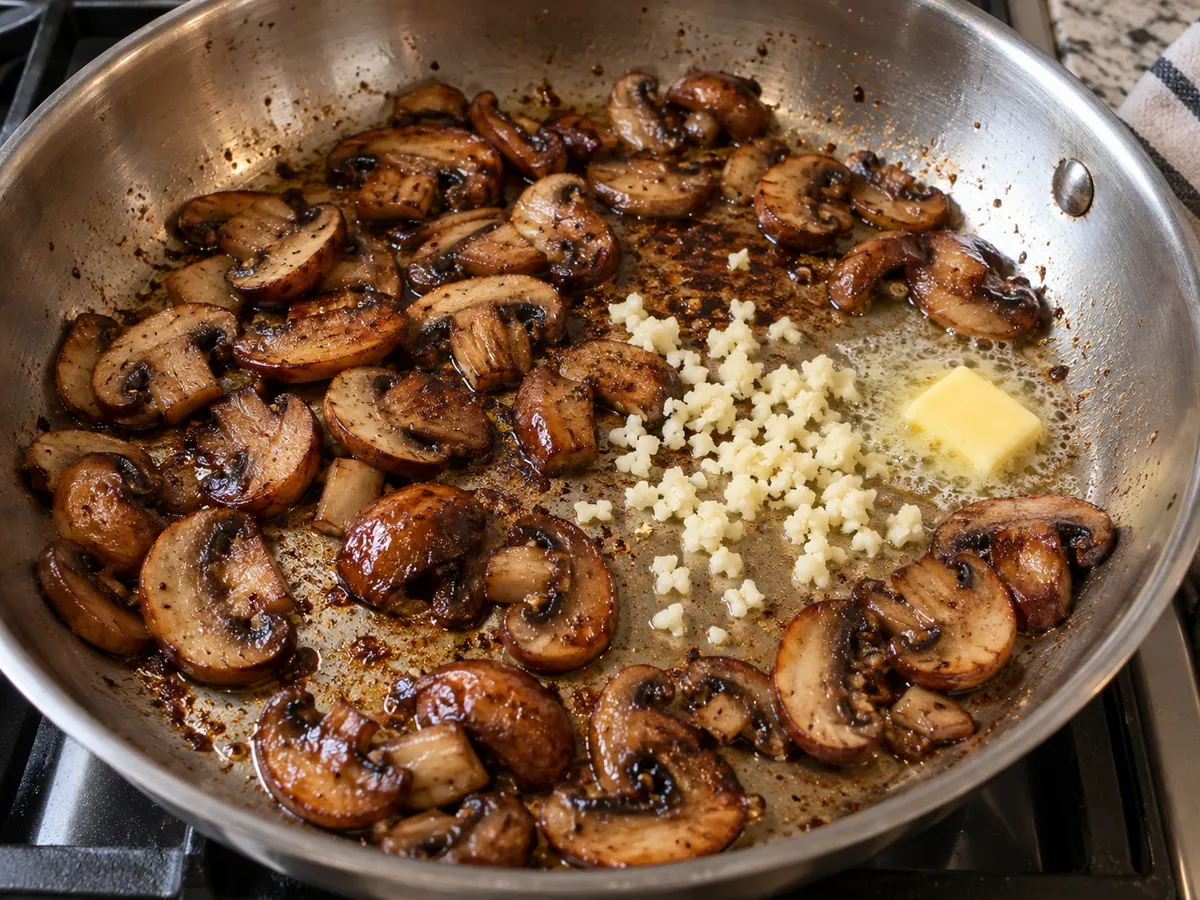
Fresh herbs added off the heat skip every moisture-removal stage. You can stir them through the finished food while the pan is still warm. Together, all of these ingredients set the final salt level.
Early Salt and Final Seasoning
The steam-first example salts during the release stage and still ends with browned mushrooms. That is enough to rule out a blanket claim that early salt always stops color. Final seasoning has another job, which is judging the food you will actually serve.
Cheese, a salty sauce or stock added afterward changes that result. So a plain mushroom side and the same mushrooms going into a seasoned sauce may not need the same final pinch of salt.
When you follow a measured recipe, the type of salt counts too. The published example gives different volumes for kosher and table salt, so switching products while keeping the same spoonful can change the seasoning. You can make a measured early addition and a final adjustment without the two contradicting each other.
A Little Liquid Lifts the Brown Residue
Deglazing loosens useful browned material from the pan into a small splash of liquid. That can make the mushrooms glossy, but it also changes the dry surface the earlier cooking built. Treat it as a choice for the dish, never an automatic last step.
The Serious Eats recipe uses a little vinegar and water, then cooks the liquid nearly away. That shows one limited way to recover pan flavor, and no rule says every mushroom topping needs vinegar.
Dry topping
Finish without creating a fresh pool, then transfer the pieces to their receiving dish.Browned pieces without a pool of liquid suit food that should not turn wet beneath them.
Glossy side
Loosen usable brown residue with a small liquid addition and reduce the excess.The light coating carries pan flavor and stays thinner than a deep sauce.
Sauce ingredient
Complete browning before the receiving sauce adds its own liquid.Browning first lets you control surface color and sauce consistency as separate stages.
Matching the Transfer to the Meal
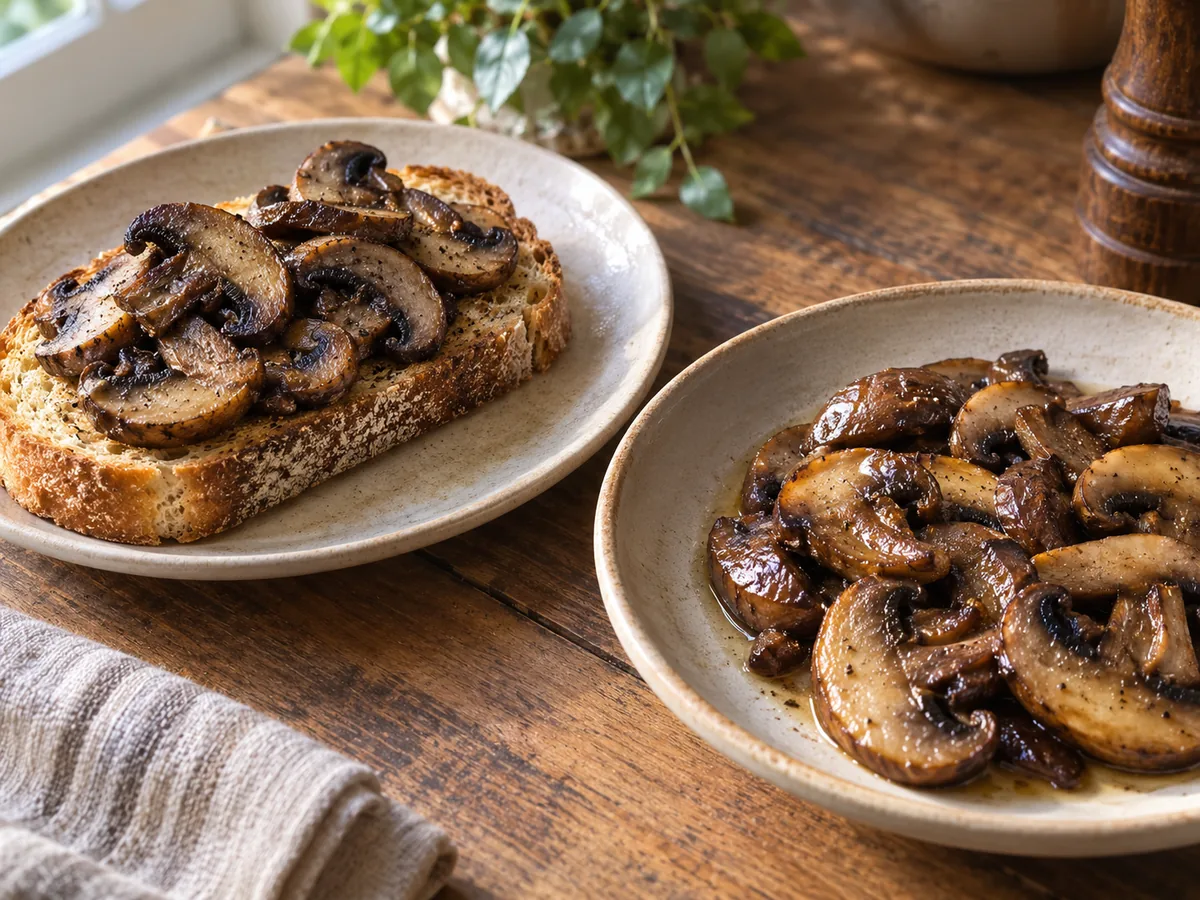
Mushrooms at breakfast can be a dry toast topping or an ingredient that goes into eggs. Keeping a pool of liquid off the toast protects the bread's texture, while the egg dish has its own cooking order after the mushrooms are ready.
Pizza mushrooms need one more moisture decision before the assembled pizza goes into the oven. Any liquid left around a finished sauté travels with the topping. Draining the spoon and letting extra moisture cook off is a different job from cooking small pieces on and on until they are dry all the way through.
With pasta, usable pan juices add flavor when the sauce has room for them. Count that liquid as part of the sauce, and add it before you settle the sauce's thickness.
Creamy mushroom risotto is a separate rice-and-stock process, even when it starts with browned mushroom pieces. The rice still gains from browning the mushrooms early, even though its later liquid means the combined dish ends without a dry crust. Mushroom soup puts the browned base to another use, pulling pan flavor into the broth while keeping its own proportions and steps. Your skillet work supplies one stage of that recipe and leaves the rest of the soup to its own method.
How long do sautéed mushrooms keep?
Browned surfaces change while the mushrooms wait. Covering a warm batch can trap moisture and soften a finish that was dry when it left the skillet. For serving right away, finishing the dish that receives the mushrooms near the end of the sauté cuts that waiting time. Texture is never a reason to leave perishable cooked food on the counter for long.
Cool and Refrigerate on Time
USDA's general leftover guidance works on time and temperature, and the look of the surface plays no part. Perishable leftovers need refrigeration within two hours, or within one hour when the surrounding temperature is above 90°F, about 32°C. Shallow containers let a large cooked batch cool faster than a deep pile.
This guidance covers cooked food in general, and it does not give each mushroom species its own shelf life. Glossy batches still need prompt storage, and a dry browned batch does not become safe to keep in the cupboard.
Storing fresh mushrooms is a different task for the unused raw portion. Keeping that food apart from the cooked batch stops you from treating their storage histories as the same.
Freezing mushrooms gives you another route when you want to keep cooked surplus longer. It has its own preparation and packaging steps, and freezing does not fix food that someone already held the wrong way. No attractive browned color can fill in that missing handling history.
Reheating Changes Texture Too
The leftover guidance calls for 165°F, about 74°C, when reheating. Steam or returning surface color can be useful cooking signs, but they do not replace measuring the reheating temperature. Chilled glossy coatings may need a gentle stir as they warm.
The pieces already lost water and changed texture the first time you cooked them. So reheating is no second run of raw mushrooms through the original sequence. Stretching it out just to rebuild every dry face can leave the smaller pieces with less substance.
Your last check pulls the stages together, with the right tenderness and finish for the meal, followed by sound cooling and reheating. Browning, seasoning and leftover handling each answer their own question as the same batch moves from skillet to table to fridge.


