Grow blue oyster mushrooms by keeping incubation and fruiting separate. Follow the supplier's strain range, wait for complete colonization, initiate in a prepared cool fruiting room, and use cap expansion rather than blue pigment alone to judge fresh air and harvest timing.
Blue oyster mushrooms grow reliably when colonization and fruiting are treated as separate stages. Start with the supplier's strain label, because the trade name covers cool-fruiting commercial oysters with ranges that are not interchangeable.
A ready block removes substrate treatment and inoculation from the first crop. Starting with verified spawn adds useful control, but it also makes clean transfer, moisture, packing, and full colonization your responsibility.
What should the culture label tell you?
- Trade name
- Blue oyster commonly refers to a blue-gray commercial strain in the Pleurotus ostreatus group, but suppliers may identify strains differently
- Incubation authority
- Use the labeled spawn-run range rather than copying a fruiting temperature
- Fruiting authority
- Use the supplier's initiation and fruiting range, then confirm it from pin and cap development
- Product example
- One commercial blue oyster block guide lists 55 to 75°F, 95 to 100% humidity for primordia, 85 to 95% for fruit bodies, and carbon dioxide below 1,000 ppm
- Growth habit
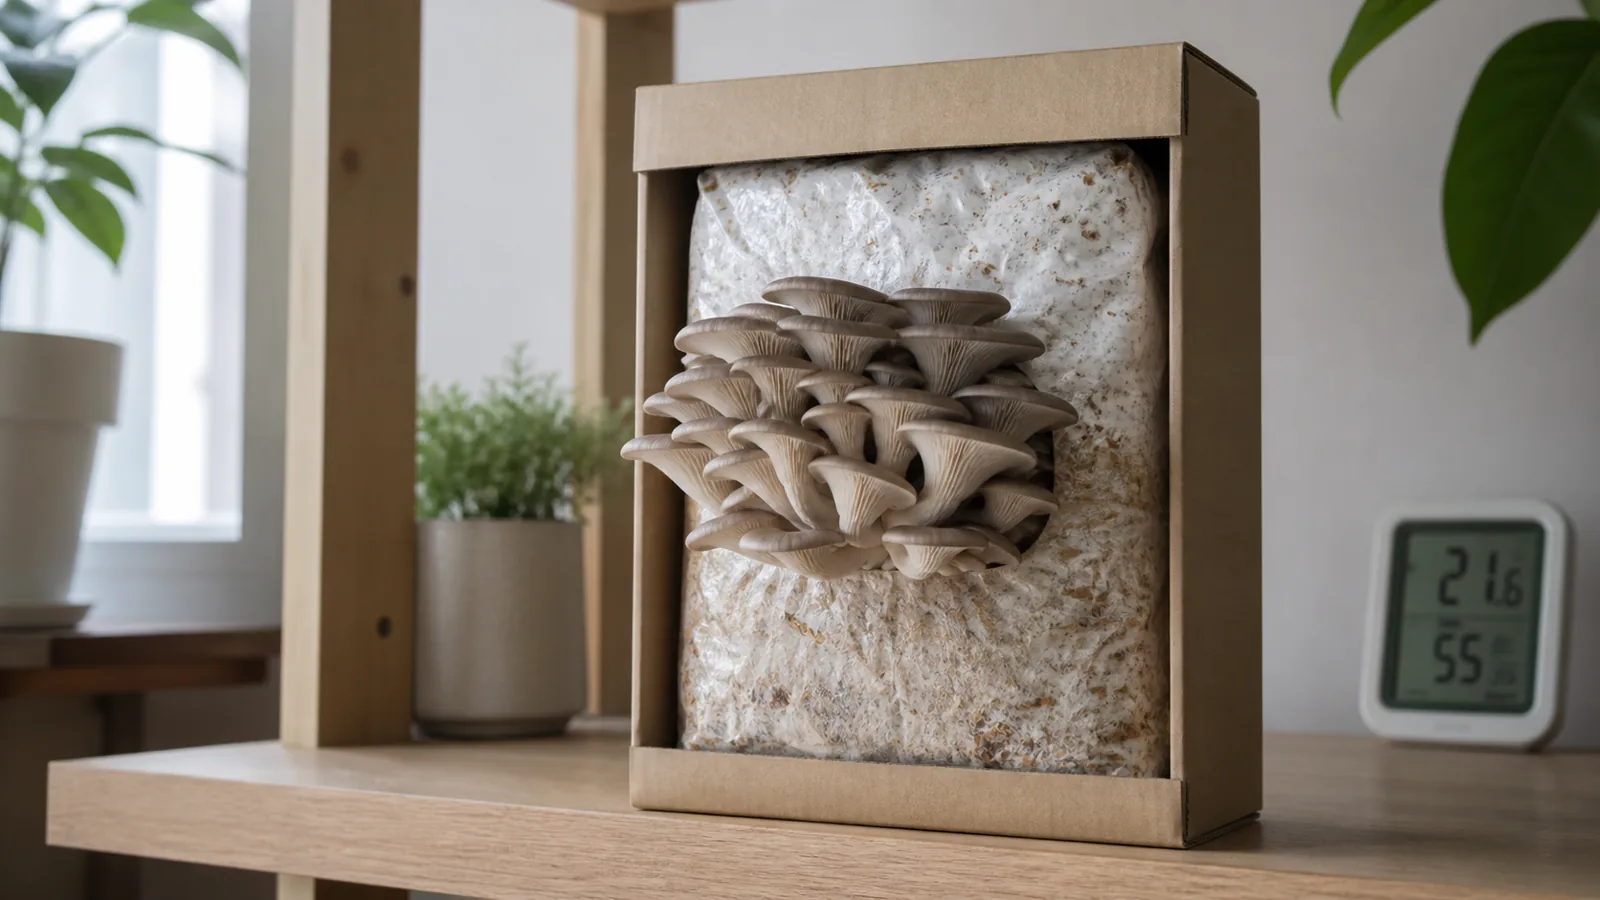
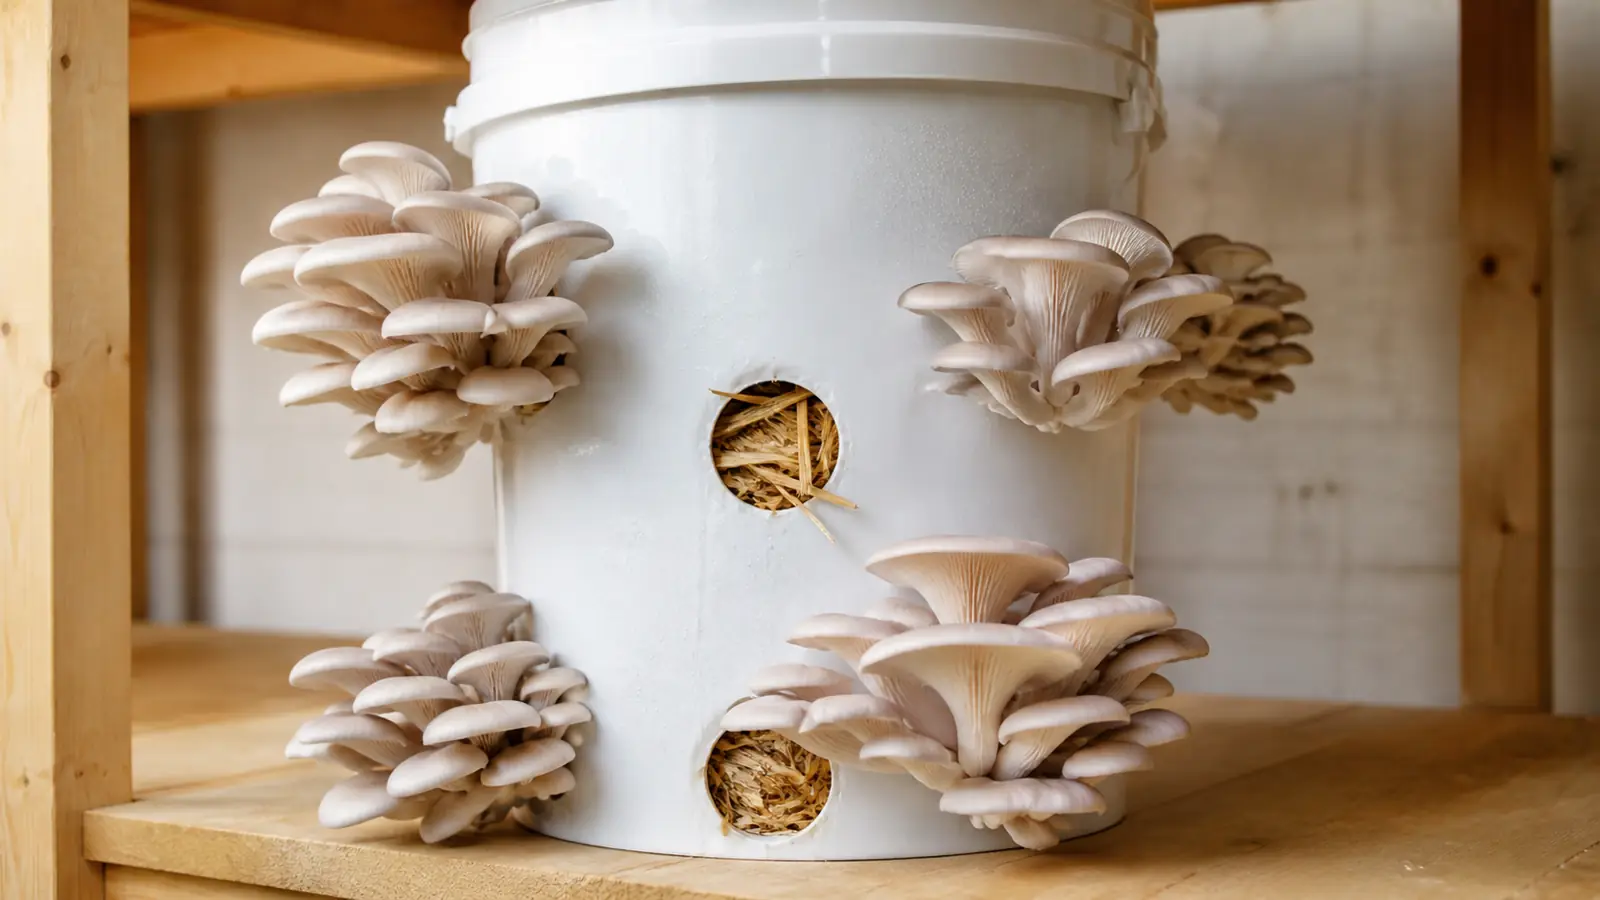
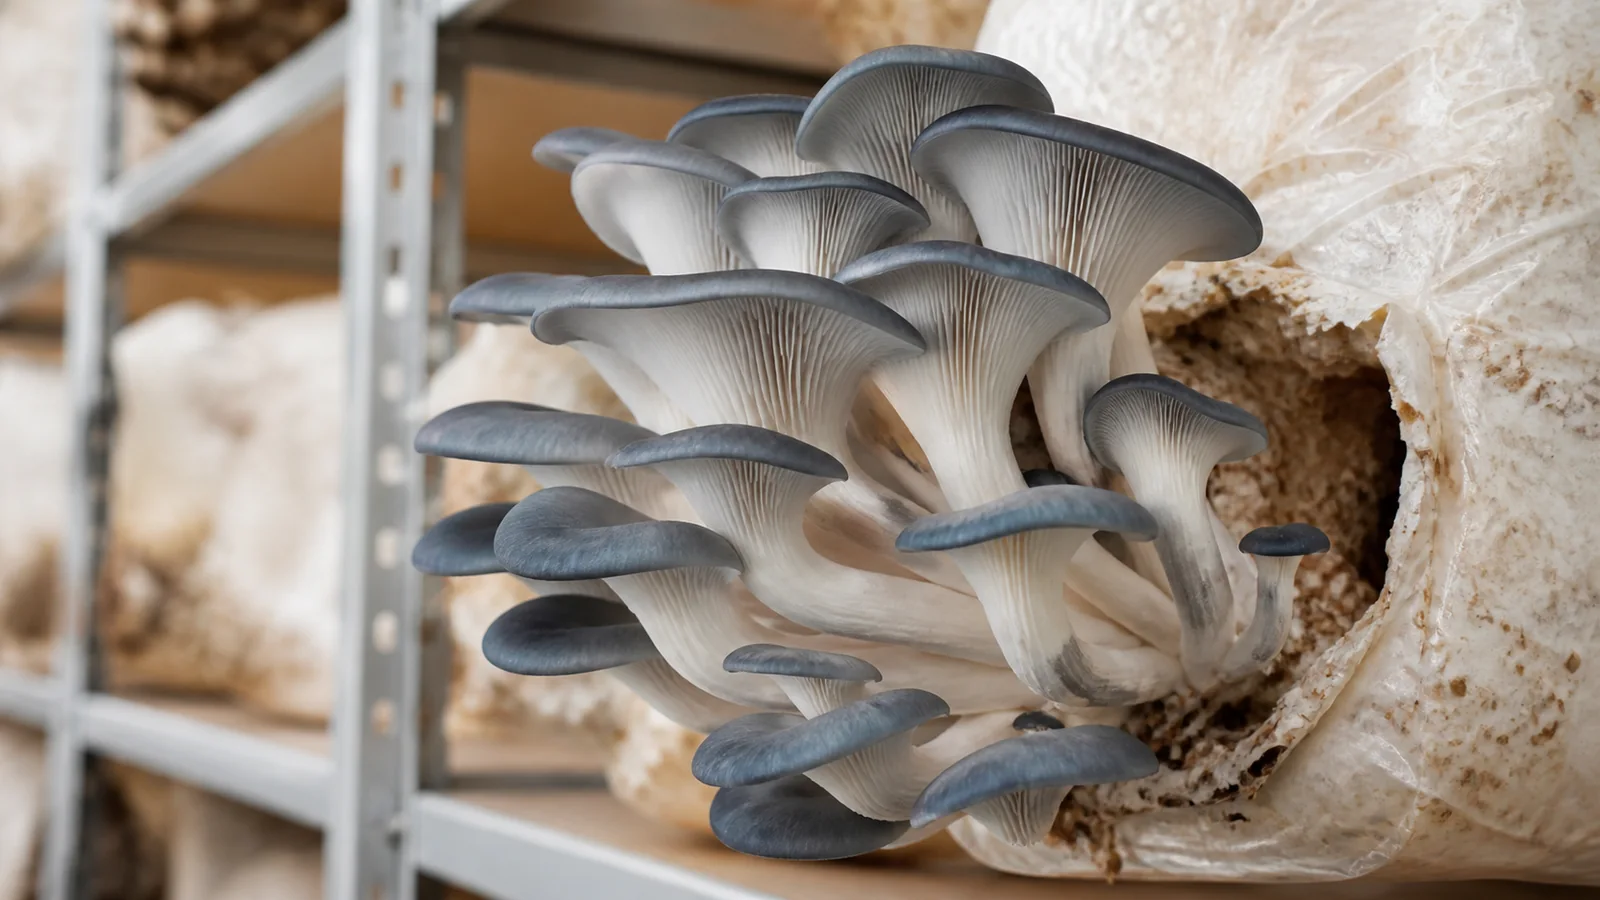
- Joined lateral clusters of overlapping fan-shaped caps on branching pale stems
- Color limit
- Young caps can be distinctly blue-gray and then become gray or brown-gray as they expand
The label should name the culture and give usable cultivation guidance. If a seller cannot identify the strain or provide stage ranges, you cannot know whether a cool basement or an ordinary indoor room fits that product.
Treat published numbers as examples tied to a product or experiment because the 55 to 75°F range above comes from one supplier's blue oyster block, while a different strain or bag design may carry a narrower range and another opening method.
Blue color is a trait, not a thermostat.
Temperature, light, age, strain, and camera exposure all affect appearance, so a dark product photograph cannot define your room setting or harvest time.
Measure where the block and clusters sit. A sensor near a ceiling vent or cold floor can describe a different environment from the fruiting opening.
The safest plan is simple. Write down the supplier's incubation range, initiation instructions, fruiting range, bag method, and expected timing before changing the room.
Growing MushroomsWhat Does a Mushroom Farm Actually Cost to Start?Which starting route suits your setup?
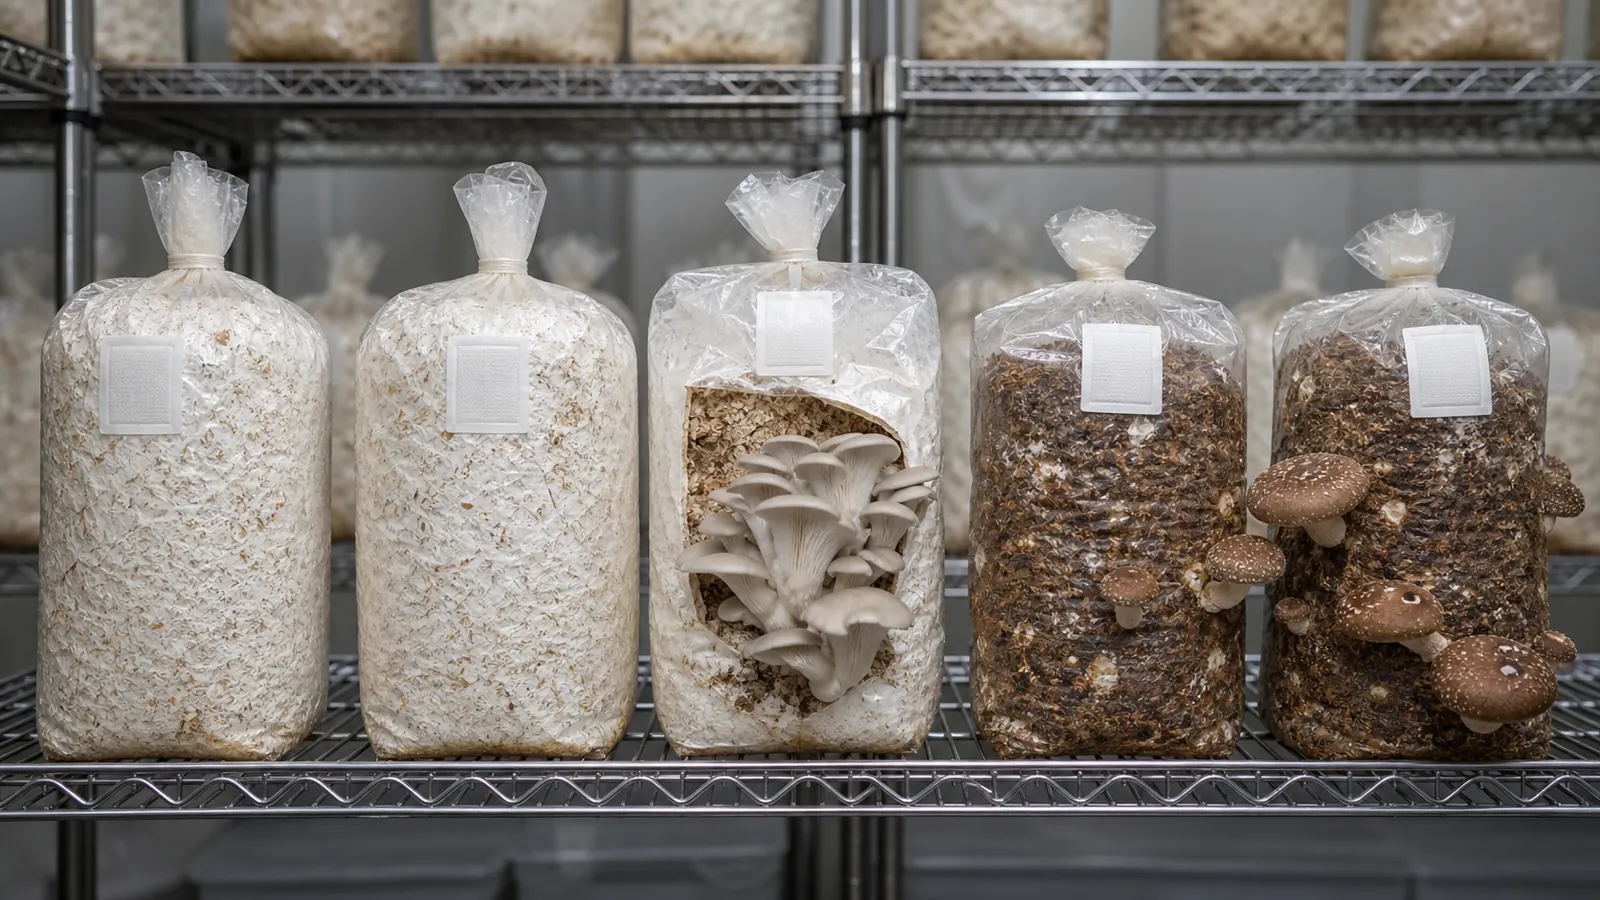
A ready-to-fruit block begins after colonization. You inspect the bag, move it into the prescribed fruiting conditions, make the intended opening, and learn how pins and caps respond.
A straw bag begins with substrate treatment and inoculation.
Supplemented hardwood begins with an even stricter process because nutrient additions increase contamination pressure and normally require pressure sterilization.
| Route | Work before fruiting | Best reason to choose it | Main diagnostic risk |
|---|---|---|---|
| Ready block | Inspect, position, open, and manage fruiting | Learn stage change and cluster form first | Blaming the block before checking room conditions |
| Pasteurized straw bag | Cut, heat, drain, cool, inoculate, pack, and incubate | Learn a repeatable low-nutrient substrate process | Excess water, dirty spawn, or incomplete cooling |
| Supplemented hardwood block | Mix, bag, pressure-sterilize, cool, inoculate, seal, and incubate | Use sterile equipment you already understand | Surviving contaminants or exposure during transfer |
Choose one route for the first crop. Three simultaneous methods create different treatment and sanitation problems, which makes a failure harder to trace.
Tip
Test the fruiting stage first | A ready block can prove whether the room supports the strain's cool initiation, diffuse light, humidity, and fresh air before you buy sterile equipment.
Do not use a finished or contaminated block as spawn for the next batch because verified vigorous spawn gives a new substrate a clear starting point, while an old block carries age, unknown contamination, and weak recovery.
What substrate do blue oysters need?
Clean cereal straw is a practical first substrate for many oyster strains. Research on Pleurotus ostreatus also shows why the exact material matters, since cotton seed, wheat straw, paper waste, and sawdust produced substantially different results in one comparison.
Another study found that straw age and preparation changed chemistry, microbial communities, enzyme activity, and biological efficiency. Those findings support careful material selection, but they do not create one universal home formula.
- Start with dry fresh-smelling straw that has no mold, manure, chemical treatment, or long weather exposure.
- Cut long stems so the material heats and packs more evenly.
- Apply the complete pasteurization process specified by your verified method, including the center of the mass.
- Drain on a clean rack or perforated container rather than on soil or an unwashed floor.
- Cool the center fully before opening spawn and record the dry substrate mass.
Squeeze a cooled handful after draining. A few drops indicate retained moisture, a stream indicates free water, and stiff straw that will not bind may dry rapidly at the fruiting cuts.

Pack enough to remove large empty channels, but do not crush the hollow stems into a dense wet plug.
Air space supports colonization and makes later gas exchange possible inside the block.
A published high-yield substrate is useful evidence only when your equipment can reproduce its treatment, so choose a simpler substrate if the vessel cannot heat the core or the workspace cannot protect a supplemented bag during transfer.
How long does a blue oyster grow take?
A ready block and a spawn-to-straw bag start their clocks at different stages. One commercial block guide lists one to two weeks of growth after fruiting begins, while a University of Florida home straw protocol observed full white colonization after about two to three weeks and fruiting around the third week.
Those examples produce a useful planning range, but they do not set a deadline. Substrate mass, spawn rate, strain, internal temperature, treatment quality, and the fruiting room can shorten or extend each stage.
Inspect the commercial spawn before cleaning the work surface. Reject a container with an unplanned color, sour liquid, damaged filter, broken lid, or growth that did not recover after shipping.
Prepare the cooled substrate, bag, closure, label, and tools before opening the spawn.
Stop fans, wash your hands, wear clean gloves, and disinfect the work surface and bag exterior so transfer remains brief.
Confirm a cool center
Check deep inside the substrate because retained heat can weaken spawn and create condensation after sealing
Break up healthy spawn
Separate colonized grains without crushing them into paste or touching them with an unclean tool
Mix throughout
Place inoculation points from top to bottom rather than concentrating spawn in one layer
Pack and seal
Remove large voids, protect the filter, and close the bag before leaving the clean workspace
Label the batch
Record strain, substrate, treatment, spawn amount, inoculation date, and incubation location
Incubate the closed bag out of direct sun within the supplier's spawn-run range. Several active bags placed tightly together may run warmer inside than the surrounding air.
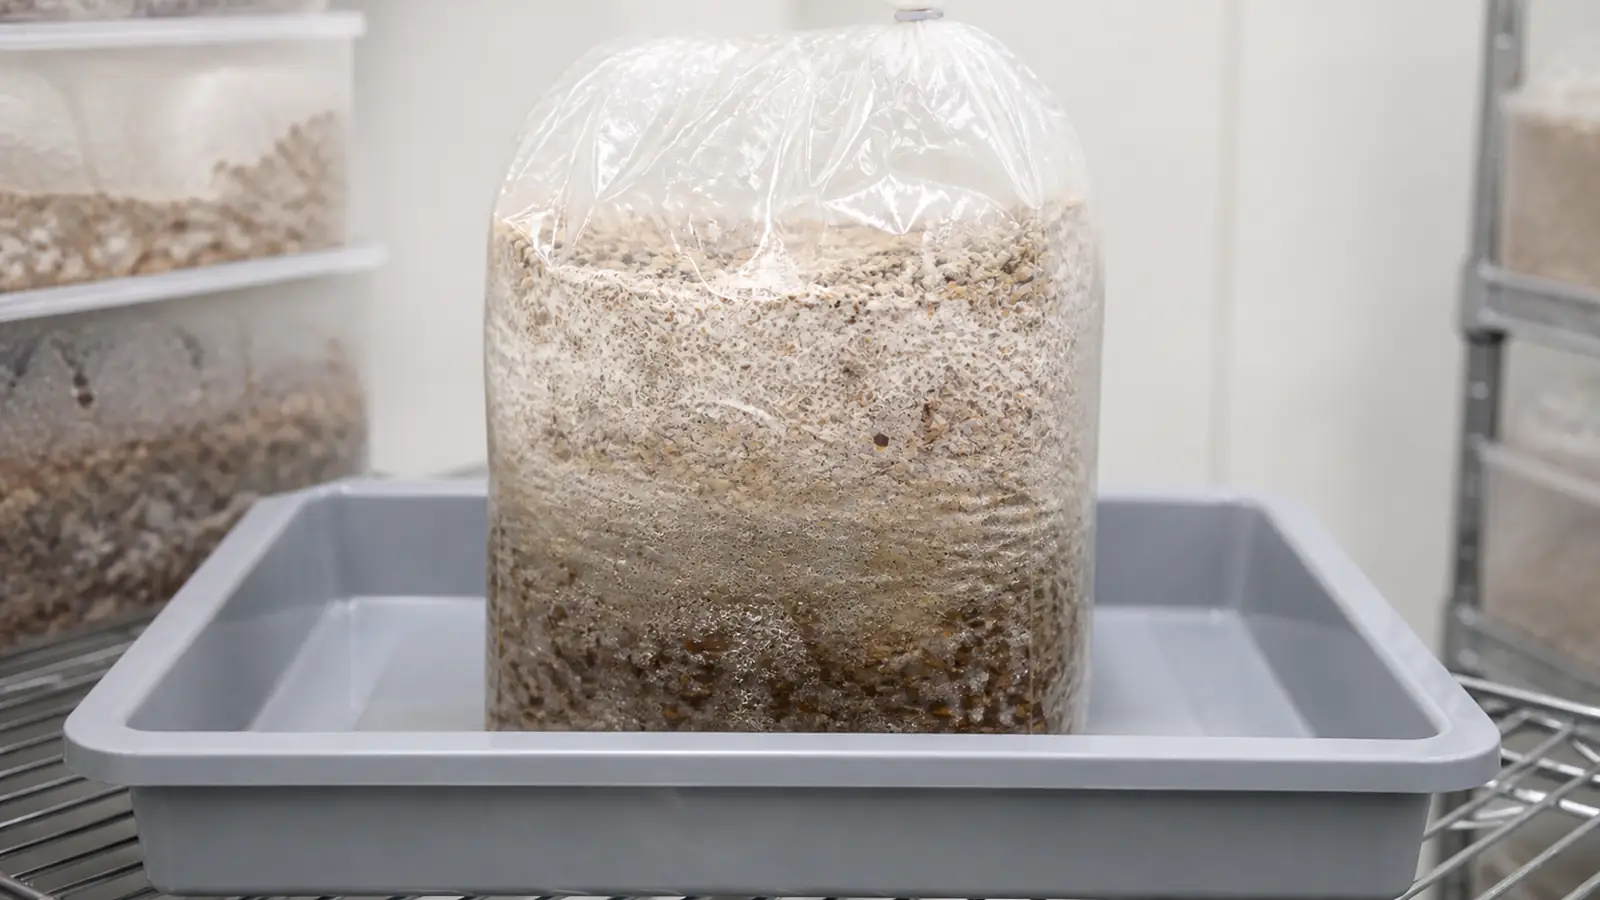
SCORE Continue incubating | White growth is joining the substrate, ordinary straw-colored pockets are shrinking, and no new boundary is expanding SCORE Ready to consolidate | White growth reaches the whole bag and the substrate holds together as one coherent mass SCORE Isolate now | A sharply bordered green, black, orange, or wet translucent patch enlarges between checks
Full exterior coverage is strong evidence, but a newly white surface may still need time to bind internally.
For a first spawn-to-straw batch, reserve several days beyond the advertised schedule instead of planning a meal around one date. A ready block can fruit sooner because the supplier already completed substrate treatment, inoculation, colonization, and quality checks before shipping.
Frequent squeezing and turning can fracture new connections and draw dirty air through a filter. Observe through the bag and move it only when the stage requires a change.
Growing MushroomsHow Do Mushroom Sawdust Blocks Work from Mix to Fruit?When should you change the room?
Fruiting initiation is a controlled stage change, not a blind cold shock.
Move the consolidated block to a room that meets the supplier's fruiting guidance, then establish diffuse light, humid air, and fresh-air exchange before opening the bag.
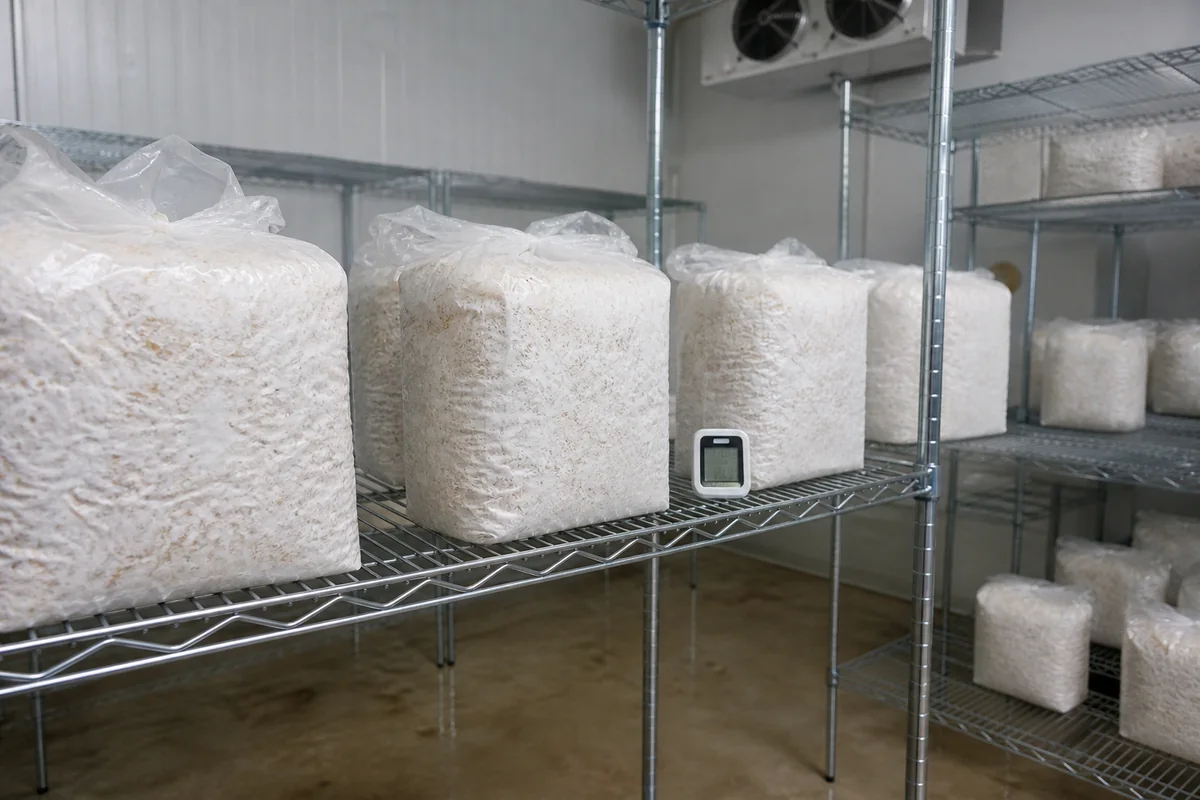
Measure at block height after the room stabilizes. A cold air outlet aimed at one bag can chill and dry its surface even when the average temperature looks correct.
Light gives developing fruits an orientation cue, while fresh air removes carbon dioxide. Humidity slows surface water loss, so each control affects a different part of initiation.
Light is functional rather than decorative because, in one commercial Pleurotus ostreatus strain, primordia did not form when initiation occurred in darkness and later dark-grown fruit bodies developed enlarged stems with little cap growth.
Open the bag only after those controls are working. For a commercial kit, follow its marked cut because the plastic and block were designed as one unit.
For a home straw bag, make a few small clean X-shaped side openings with room for complete clusters to expand. Removing a broad plastic panel exposes too much substrate and turns initiation into a drying problem.
What do blue pins actually tell you?
Healthy pins emerge as dense blue-gray knots that expand from one opening. Their color may be strongest when young, then soften toward gray or brown-gray as the caps widen.
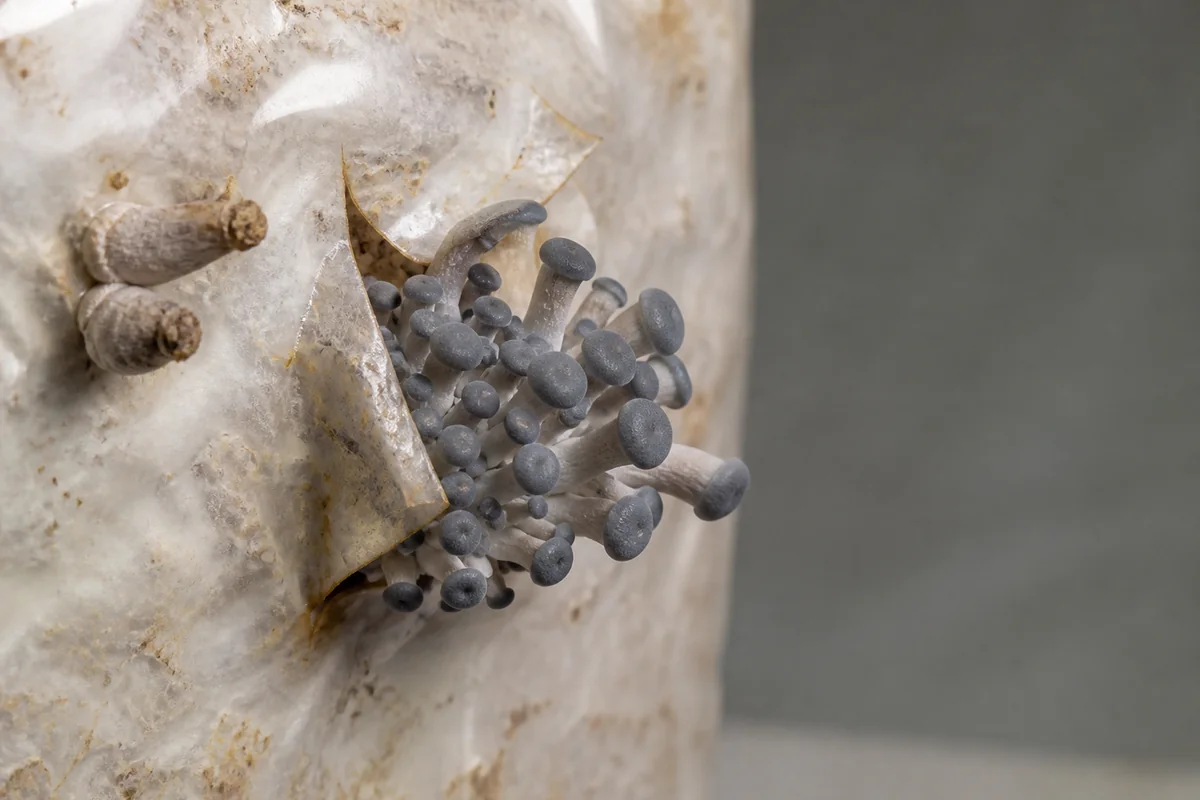
Color fading during expansion does not prove that the crop is failing.
Watch daily diameter, firmness, margin condition, and cap separation alongside color.
Mist the chamber or use controlled humidification rather than repeatedly soaking the cluster. Crowded pin bases trap direct spray, while a fan aimed at the opening can dry the opposite surface just as quickly.
Remove a dead abort only when it softens or blocks healthy growth. Picking through a young cluster to improve its shape creates wounds beside developing food.
Growing MushroomsHow Do You Build an Outdoor Mushroom Bed That Lasts?How much fresh air do blue oysters need?
Blue oyster clusters require substantial exchange during fruiting. Pleurotus ostreatus is notably sensitive to carbon dioxide, and controlled research found that high concentrations inhibited cap expansion and changed fruit-body form.
That evidence makes cap development a practical room test.
A carbon dioxide meter can confirm accumulation, but its position matters. Measure near the cluster during the active growth period, because a reading beside an exhaust outlet may miss the heavier pocket around crowded blocks.
Broad overlapping caps on proportionate stems show a different environment from long branching stems with tiny or trumpet-shaped caps.
| Cluster shape | Likely pressure | First useful action |
|---|---|---|
| Broad expanding caps with short branching stems | Exchange supports normal morphology | Keep conditions stable and record daily growth |
| Long thin stems with undersized caps | Carbon dioxide accumulates near the opening | Increase gentle exhaust and confirm replacement air reaches cluster height |
| Trumpet-shaped or incompletely opened caps | High carbon dioxide or another severe fruiting stress | Measure the room and restore exchange before changing moisture |
| Cracked margin on the fan-facing side | Air velocity removes surface moisture | Redirect the draft rather than sealing the entire room |
| Glossy soft tissue between caps | Direct water and stagnant pockets keep tissue wet | Stop spraying fruits, drain water, and improve gentle circulation |
Change one control and record the time.
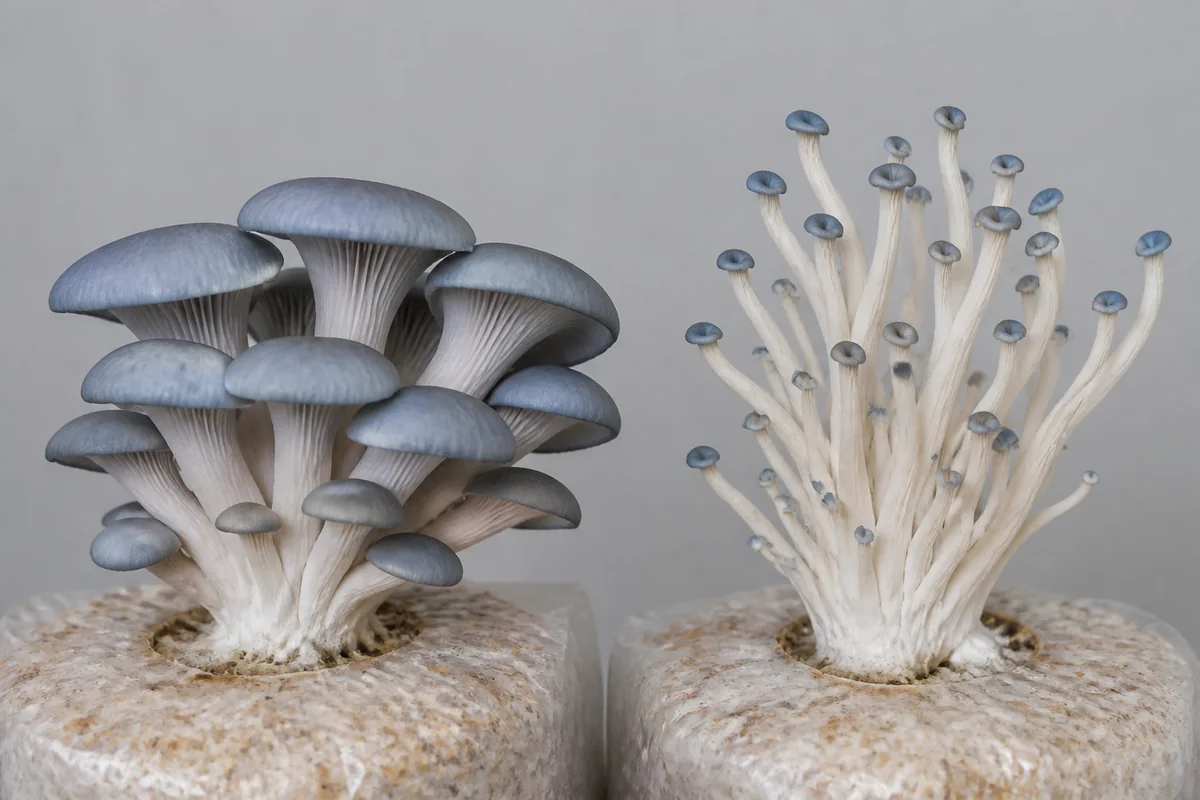
Increasing fan speed, humidity, temperature, light, and bag openings together may alter the crop, but it cannot tell you which condition caused the result.
Fresh air cannot replace humidity, and humidity cannot replace fresh air. A sealed wet tent allows carbon dioxide and standing droplets to rise together.
Exchange should remove stale air from the growing space rather than blow a hard stream across the caps. In a room with several blocks, route exhaust away from sleeping and living areas, harvest before mature caps shed heavily, and clean settled spores from washable surfaces.
Is that color normal or contamination?
Blue-gray belongs on young fruit bodies, while healthy colonizing mycelium is mainly white.
Do not treat a green, blue-green, black, orange, or wet spreading substrate colony as normal strain pigment.
Green powder, dark expanding borders, milky compressed straw, sour odor, and soft collapse are discard signs. Close or cover the opening, isolate the bag from other grows and occupied rooms, and avoid shaking spores into the air.
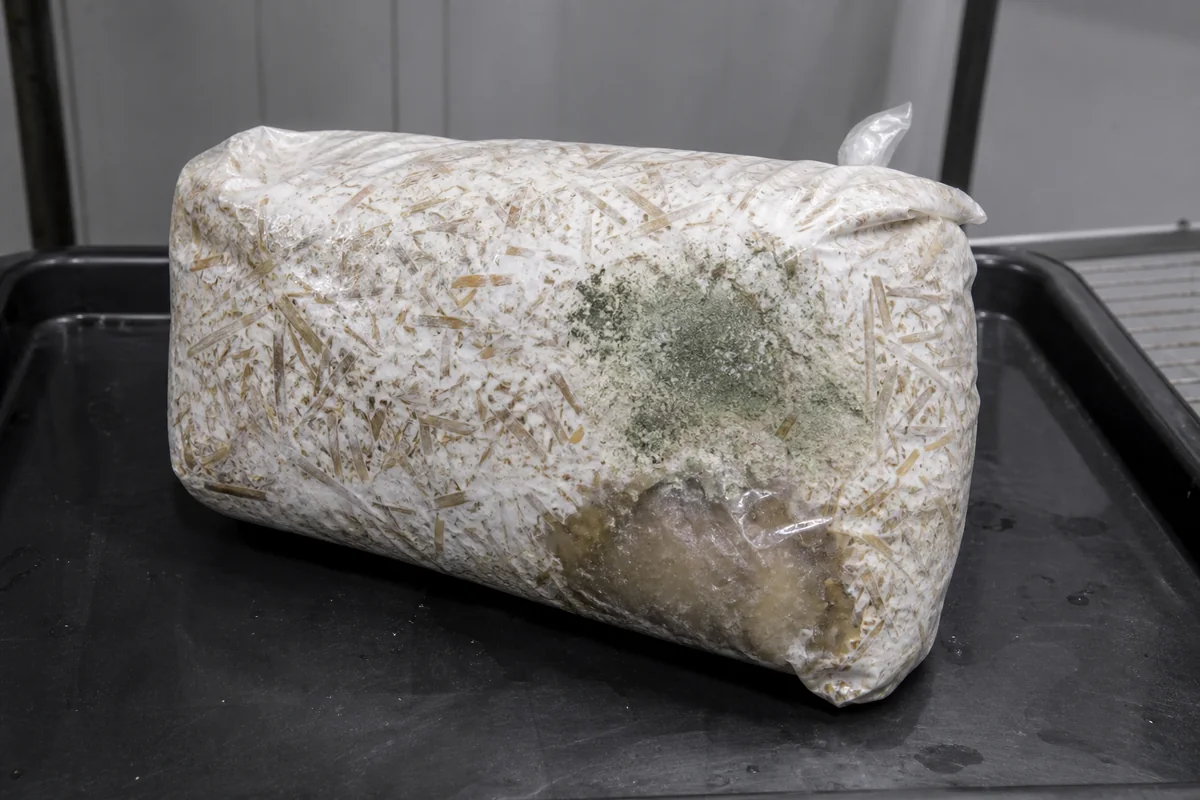
Clear or amber droplets can occur on stressed mycelium. Their meaning changes when the surrounding tissue softens, develops an odor, gains a new color, or expands a wet boundary.
Warning
Keep a sporulating block closed | Do not scrape off the visible colony, spray disinfectant into an occupied bag, or eat mushrooms growing through suspect substrate.
After removal, clean the shelf, tray, humidifier reservoir, and nearby washable surfaces, then use the growing contamination checklist to compare recurring colors and textures across later batches.
Trace the first defect to its likely stage. Failures shared by uninoculated controls point toward substrate treatment or bag integrity, while failures concentrated in one spawn lot or transfer session point elsewhere.
When should you harvest blue oysters?
Harvest when most caps have expanded, remain firm, and still hold a gently curved to nearly level margin. Waiting for every small cap to flatten can leave the oldest edges thin, brittle, and difficult to move intact.
The cluster may be less blue at this stage than it was as pins.
Cap expansion, firmness, margin position, and daily change are better harvest evidence than the darkest pigment.
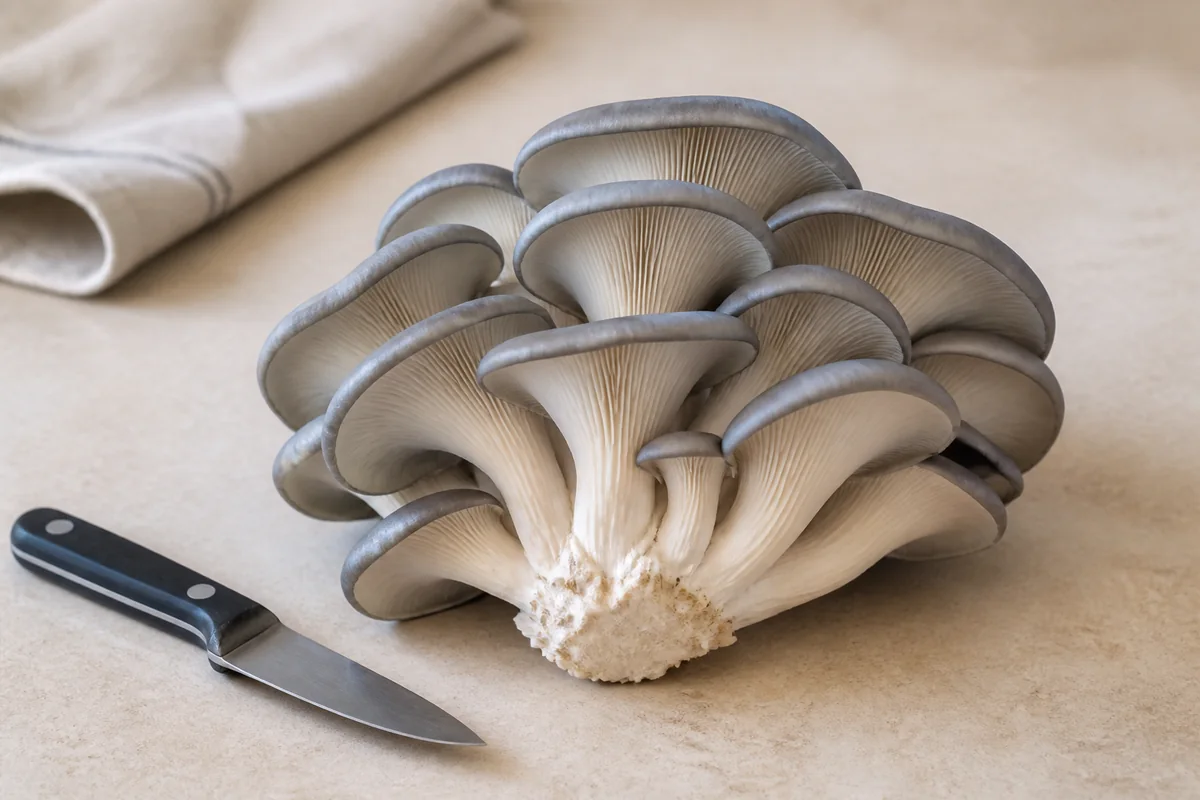
Support the cluster with one hand and cut the joined base cleanly with a sanitized knife. Trim loose straw without tearing a deep crater from the block.
Cool the harvest promptly in a breathable container and plan to cook or preserve it soon.
Brush off substrate before storage and rinse only immediately before cooking, since retained water speeds softening between overlapping caps.
Keep a clean block under fruiting conditions for another flush. Rehydrate only when it has become noticeably lighter and the chosen method calls for it.
Record the harvested mass and the days from initiation. Those two numbers let you compare the next flush with the first without pretending that another block, room, or strain must follow the same calendar.
SCORE Harvest proof | Broad firm caps retain a gently curved to nearly level margin even though their blue pigment has softened SCORE Reset proof | The trimmed block remains firm, clean-smelling, and free of expanding colored or wet areas SCORE Retirement proof | The block is soft, sour, contaminated, or no longer forms healthy pins after its supported flush cycle
Sources & References
- UF/IFAS D.I.Y. FunGuide: Grow Your Own Oyster Mushrooms at Home
- North Spore Commercial Mushroom Cultivation Guide
- Pleurotus ostreatus Growth and Yield on Different Substrates
- Influence of Growing Substrate Preparation on Pleurotus ostreatus
- Pleurotus ostreatus Under Different Carbon Dioxide Concentrations
- Effects of Light on Pleurotus ostreatus Fruit-body Development